A windvane autopilot is a mechanical steering device that holds a boat on a constant angle to the apparent wind. Wind pressure topples an air vane, a linkage twists a small underwater rudder, water flowing past that rudder generates a force many times larger than the wind force that started the chain, and that force turns the boat’s own rudder. No motor, no battery, no compass. Updated for October 2026.
That chain is the whole idea, and once you can picture it the rest is tuning. This guide walks through the parts, the control loop, the three steering modes, what happens when something fails, and how to test a build on the water before you trust it with a passage.
Table of Contents
- What Is a Windvane Autopilot?
- How a Windvane Autopilot Works
- What Parts Make Up the System?
- How a Windvane Autopilot Reads the Wind
- How a Windvane Autopilot Turns Wind Error into Rudder Movement
- Wind Mode, Heading Mode, and GPS Mode Compared
- What Happens When Wind, Power, or Sensors Fail?
- How Builders Test a Windvane Autopilot Safely
- Frequently Asked Questions
- Can a windvane autopilot steer without electronic navigation?
- What is the difference between wind mode and heading mode?
- Does a windvane autopilot need GPS?
- How does a windvane differ from a mechanical self-steering system?
- What sensors are needed for a small sailing robot?
- How much steering correction is safe for a small boat?
- Conclusion
What Is a Windvane Autopilot?
A windvane autopilot, often called a wind vane self steering system or simply a windvane, holds a boat on one fixed angle to the apparent wind and corrects any deviation from it by itself. It is a wind vane self steering system in the most literal sense: the wind is both the power source and the reference signal.
That reference is the important part. The device does not know north, and it has no idea what course you wanted. It only knows what angle the wind is making with the boat, and it works to keep that angle constant.
An electronic autopilot works differently. It reads a compass, a gyroscope or GPS, compares that with a heading or waypoint you programmed, and drives a linear or rotary actuator until the two agree. It can hold a heading through a wind shift. A windvane cannot; it follows the wind around.
Two consequences follow from that, and they explain most of the satisfaction and most of the frustration people report. A windvane needs no power and cannot be disabled by a flat battery or a flooded electronics box. It also cannot sail a straight line to a waypoint, only a straight line relative to the wind.
How a Windvane Autopilot Works
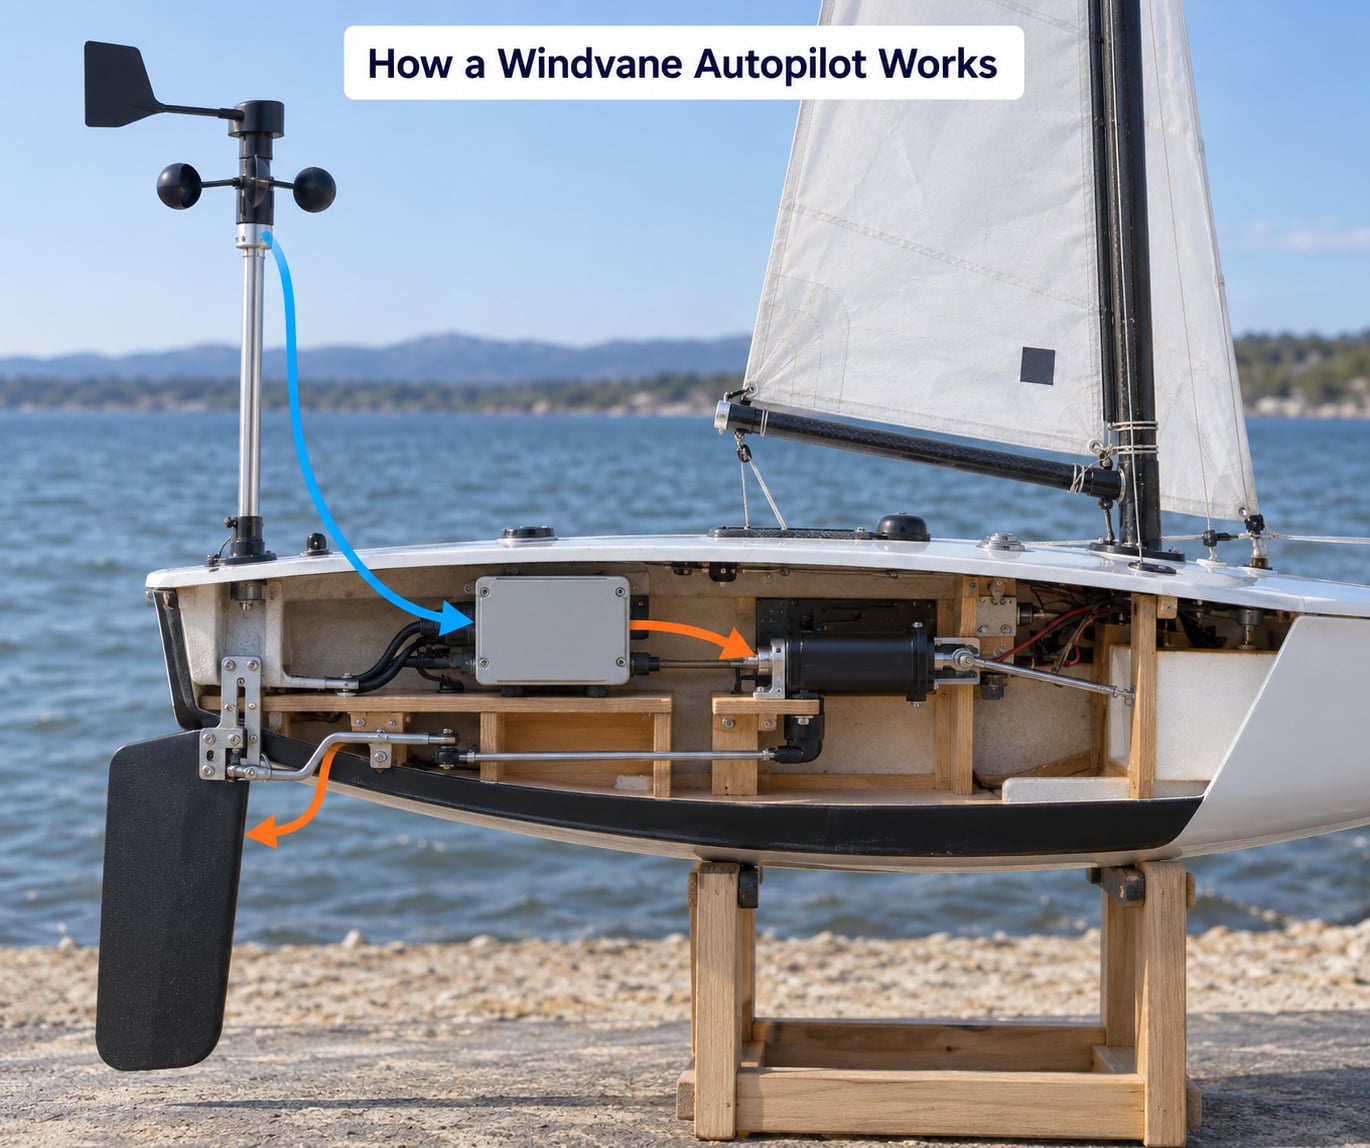
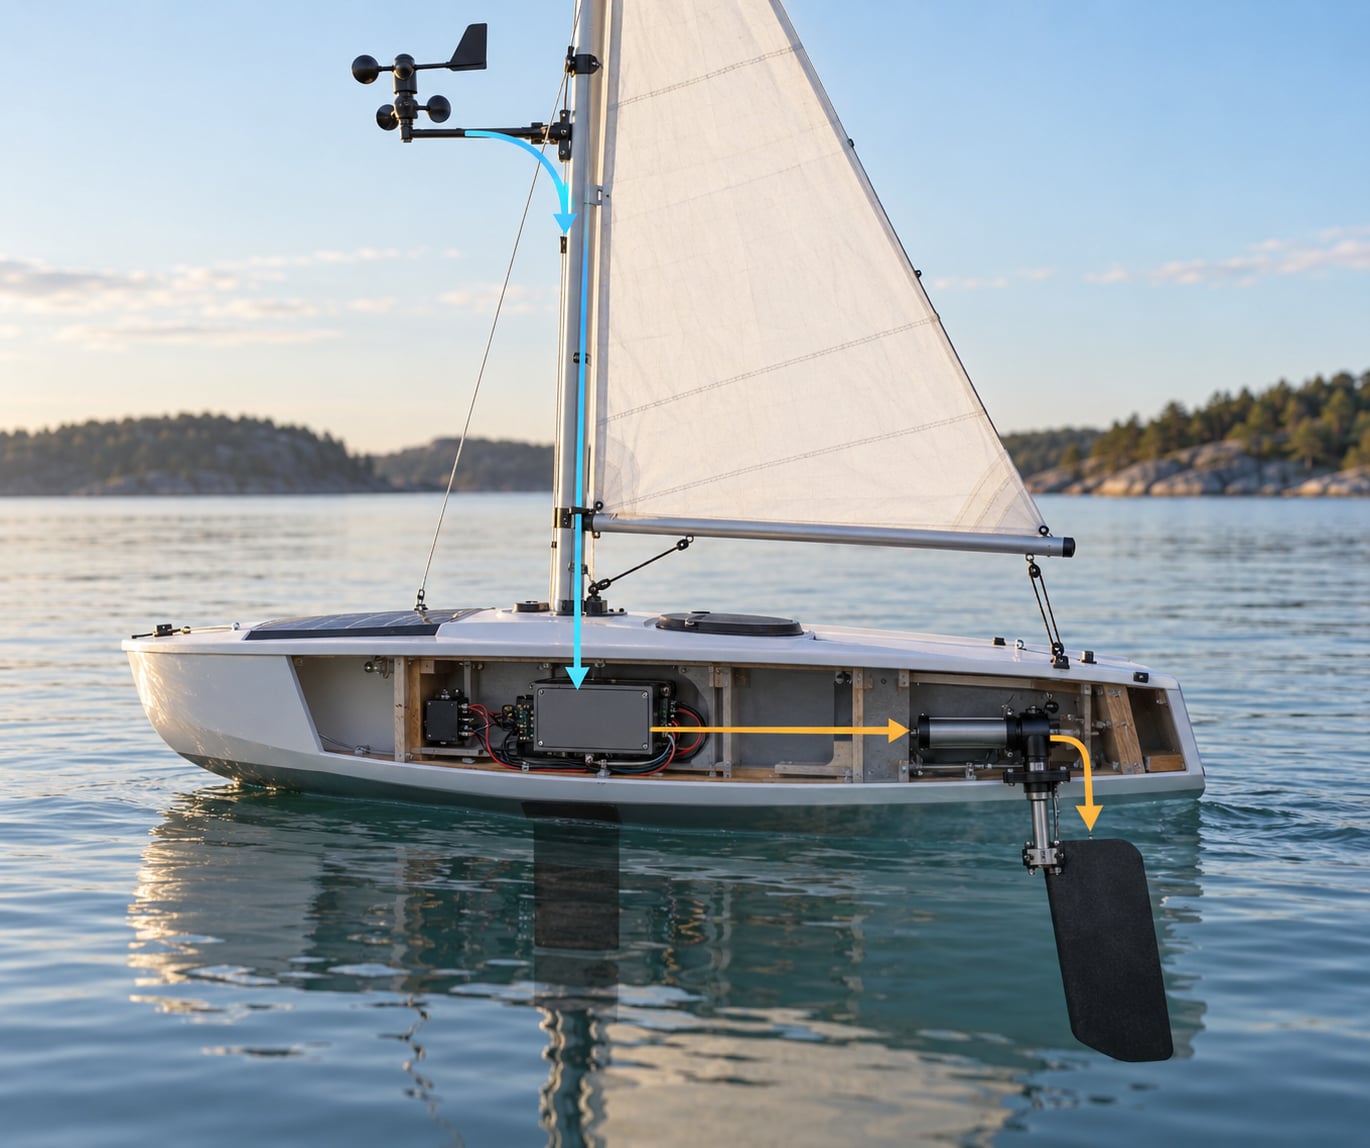
The system runs the same loop any steering controller runs: measure, compare, correct. On a windvane the measurement comes from the air, and the actuator is a rope and a rudder blade. Seven steps describe the cycle, and it repeats every few seconds for as long as you sail.
- The air vane weathercocks into the apparent wind, standing upstream with its flat side aligned to the airflow.
- The boat veers a few degrees off its line, and the vane falls over sideways because the airflow now strikes one of its flat sides.
- The vane shaft rotates inside its bearing, and a linkage at the bottom of the shaft converts that rotation into a pull on the control lines.
- The control lines pass through the steering quadrant and pull the boat’s rudder, or a servo-pendulum arm, to one side.
- Water moving past the now-angled rudder blade pushes on it, and that hydrodynamic force swings the boat’s stern around.
- The boat swings back toward its original angle to the apparent wind, the vane returns upright, and the control lines slacken.
- Rudder returns to neutral and the loop waits for the next deviation, which is normally only seconds away.
The step people find hardest to believe is step five, so it is worth dwelling on. A sailboat’s rudder is not pushed by a motor. It is pushed by water, and the water has far more momentum per square metre than the air does. A full-sized rig generates thousands of newtons of aerodynamic force in a decent breeze, while a fabric or alloy air vane a few hundred square centimetres in size generates a few tens of newtons in the same breeze.
Those air forces fight each other and largely cancel, which is why the vane only transmits the small difference. What moves the boat is not the vane at all. It is the small underwater blade being angled in a moving stream, then a mechanical gear chain from that blade to the main rudder. The air starts the process; the water does the lifting. So the answer to why such a small force steers a heavy boat is that the small force is only ever a trigger.
What Parts Make Up the System?
Every implementation is different, but the same five jobs need doing somewhere in the system, whether that is a brass tube on a 40-foot ketch or a lashed-up control board on a small sailing robot.
The wind reference input
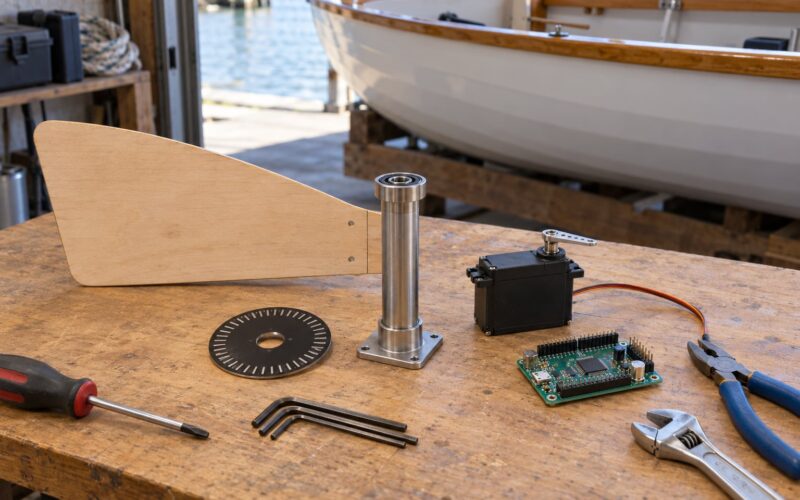
On a classic windvane this is a feathered blade or a flat panel on a vertical shaft, free to pivot in a bearing and held upright by the airflow. Small craft often use a masthead wind sensor instead: a spinning propeller or ultrasonic anemometer that reports wind speed and direction over a serial link. Some robots read direction from a differential pressure port and speed from an anemometer, then derive angle themselves.
The heading or position input
This is optional in a pure windvane and near-mandatory in an electronic one. Sources range from a simple magnetic compass on a gyro-stabilised heading sensor to a GNSS receiver giving true heading and speed over ground. Adding position lets the controller steer to a waypoint instead of to a compass number.
The controller
On a mechanical windvane the controller is the vane, the counterweight and the linkage geometry, all of which together form a physical analogue of a control loop. On an electronic system it is a microcontroller running a control law, usually in a box near the battery with a waterproof feedthrough to the helm.
The actuator
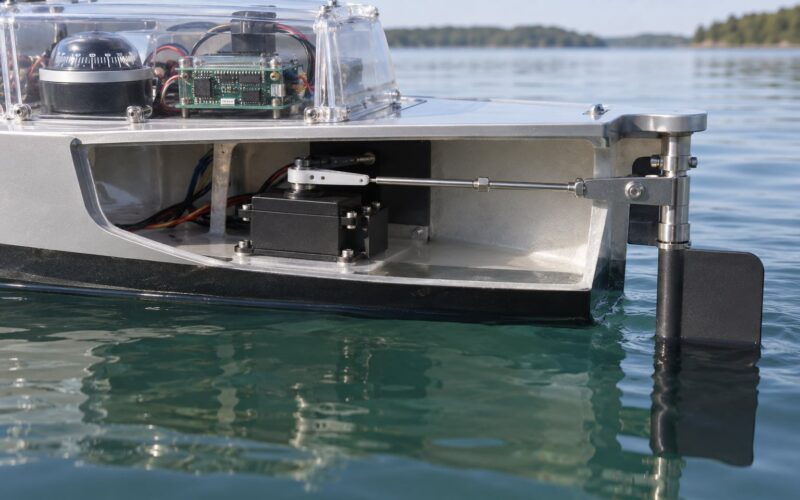
This is what actually moves the rudder: a linear drive pushing a tiller arm, a rotary drive turning a steering quadrant, a reversing motor on a sailboat’s steering gear, or, on a mechanical vane, nothing more than tension in a line. Actuator selection matters more than people expect, because it sets the correction speed, the stall behaviour and the power budget.
Power, limits and telemetry
Electronic systems need a supply, a motor current limit and a thermal margin, plus a way to see what the controller is doing. A rudder-angle sensor, a compass readout, a GNSS fix and a telemetry link that carries heading, error and correction over a radio link are typical. Mechanical systems need none of this, which is exactly their appeal on an offshore boat.
How a Windvane Autopilot Reads the Wind
The term that unlocks the whole subject is apparent wind: the combined vector of true wind and the boat’s own motion through the air. Sail upwind, apparent wind is far forward of the nose and stronger than the true wind. Dead downwind under a spinnaker, the boat’s motion subtracts from the airflow and apparent wind ends up nearly astern, sometimes almost nothing at all.
Because the device steers to apparent wind and apparent wind is created by boat motion, the two are coupled. Slow the boat down and the apparent wind angle moves forward. That is the practical reason a windvane needs flow over the transom, and the reason people report it going stiff or useless below roughly 2 knots of boat speed.
Wind direction is the other input, usually read at the masthead and corrected for the boat’s heading if the sensor is not aligned with the centreline. A masthead unit gives a clean digital direction. A weathervane at deck level gives a mechanical angle but sits in disturbed air. Wind speed matters less than most people expect, though several systems use the apparent speed as a sanity check, rejecting readings that are physically impossible for the boat’s known motion.
Inertial data and GNSS heading can fill the gaps where magnetic sensors get confused. A magnetometer near a steel hull, a motor or a lithium battery pack will report a heading that drifts with whatever current is flowing. Gyros and rate sensors do not care about magnetism at all, which is why they appear on anything that must steer reliably near steel or high current.
How a Windvane Autopilot Turns Wind Error into Rudder Movement
Once you have a measured wind angle and a desired wind angle, the error is simple arithmetic: measured minus desired. What the controller does with that number is where the engineering lives, whether it happens in code or in a piece of shaped aluminium.
A proportional term drives correction in proportion to the size of the error. That gets you most of the way, and on its own it is enough for a mechanical vane whose control lines only transmit tension. It also guarantees a steady-state offset, because a small persistent error produces only a small persistent correction.
Integral action closes that offset by accumulating past error until the rudder command equals what the situation actually needs. It also introduces lag, and a badly tuned integral term is the classic cause of slow hunting: the controller corrects, overshoots, accumulates more error in the opposite direction, corrects harder, and sets up an oscillation.
Derivative action watches how fast the error is changing and damps the response before the overshoot happens. On a boat that pitches and rolls, derivative sees a lot of noise, so it is usually filtered. Most simple controllers skip it entirely and rely on rate limiting and deadbands instead.
A deadband is the error below which the controller does nothing at all. On a small sailing robot a deadband of a couple of degrees stops the rudder buzzing on every wave. Sailboats with a heavier helm need a wider band and lower gain, or the boat simply sails a slalom course.
Correction limits cap how far the rudder is allowed to move in one command, and rate limits cap how fast it may travel there. Both exist for safety rather than performance, and both are worth setting conservatively on a first test run.
Wind Mode, Heading Mode, and GPS Mode Compared
| Mode | Reference input | Strength | Limitation | Typical use |
|---|---|---|---|---|
| Wind mode | Apparent wind angle from vane or anemometer | No compass needed, works if all other electronics fail, tolerant of magnetic interference | Holds a wind angle, not a course; course drifts as the wind shifts | Mechanical windvanes, autonomous sailing robots in variable wind |
| Heading mode | Magnetic or gyro-stabilised compass | Holds a true course through shifts and current | Needs a clean compass environment; disturbed airflow at the sensor can upset it | Coastal and delivery passages, short-handed cruising |
| GPS mode | GNSS position and course over ground | Steers to waypoints, corrects drift from current and leeway | Fix dependent, needs sky view and a satellite signal; sways badly at low speed | Route following on ocean passages and survey work |
The modes are complementary rather than exclusive, and a good system lets you switch between them. Wind mode for a downwind passage where you want the boat to follow the breeze, heading mode when you want to hold a course through a shift, GPS mode when you want a track made good rather than a heading steered.
What Happens When Wind, Power, or Sensors Fail?
A windvane autopilot is defined as much by its failure behaviour as by its normal operation, because that behaviour is what lets you sleep. The design rule is that every failure must end in a safe, recoverable state with a human able to take over instantly.
Stale sensor data is the most common fault and the easiest to miss. A serial link that drops does not usually raise an error; it just stops updating, and a controller with no watchdog will happily steer on the last heading it saw. Any build should treat input older than a second or two as a fault and disengage.
Actuator saturation happens when the demand exceeds what the drive can deliver, whether from a stalled motor, a seized tiller or a rudder hitting its hard stop. The controller should detect the difference between a commanded position and a sensed position and back off rather than pushing harder.
Low voltage causes its own family of problems. Motors draw much more current when stalled, a weak battery sags under load, and brownouts produce erratic readings that look like sensor faults. Current limits and a battery voltage cutoff are cheap insurance on any robotic installation.
Excessive heel changes the hydrodynamics entirely. A heeled hull develops a large lateral force, the rudder loses effective authority, and a gain setting that was calm on deck can start hunting in a gust. Limiting correction by heel angle, or simply backing off the gain in rough water, keeps the loop stable.
Compass interference on a steel boat or near a charging bank shows up as a heading that drifts while the boat looks straight. GNSS course over ground is the usual cross-check, though it is least reliable at very low speed.
Runaway steering is the outcome every safety case is written around. The protections are a hard limit on rudder range, a timeout that disengages rather than guesses, a physical disengage lever or clutch reachable from the helm, and manual steering that keeps working with no power at all.
How Builders Test a Windvane Autopilot Safely
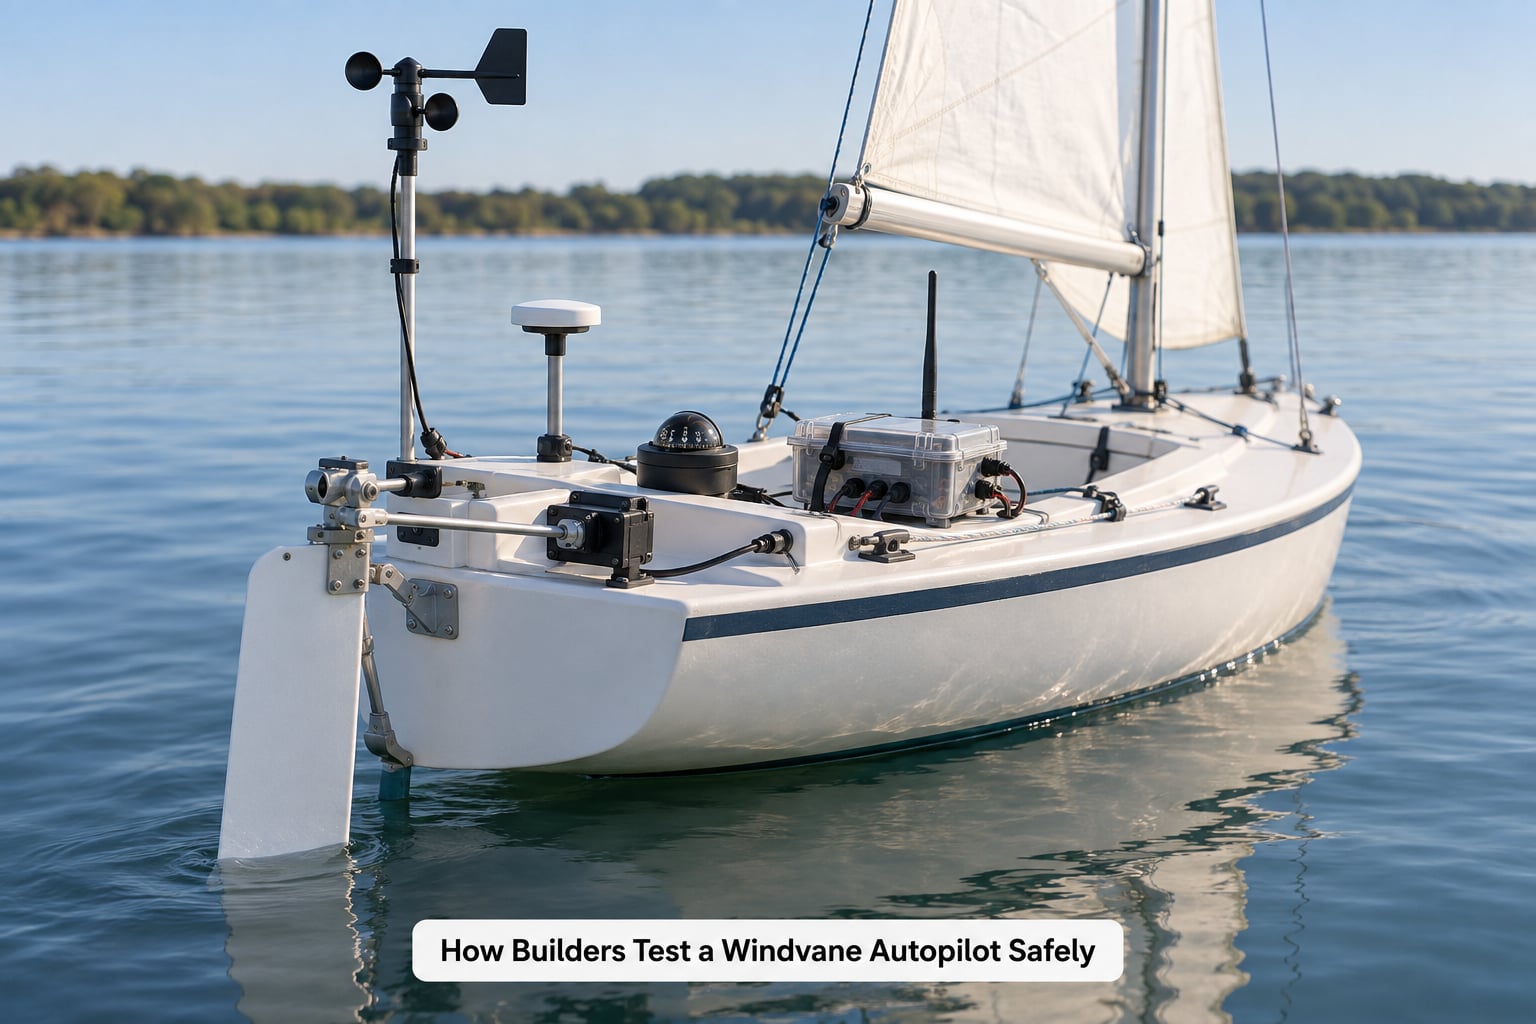
Testing is where a sailing robot earns its keep, and the stages exist so that a fault shows up in the cheapest conditions possible. Work through them in order.
- Bench test. Command the rudder through full travel with the boat on blocks. Confirm the actuator drives the correct direction, hits a known mechanical limit, and stops when the watchdog kills power.
- Sensor bench test. Rotate the compass slowly through 360 degrees and check for dips. Swing the wind sensor through a known range and confirm reported direction matches the physical vane.
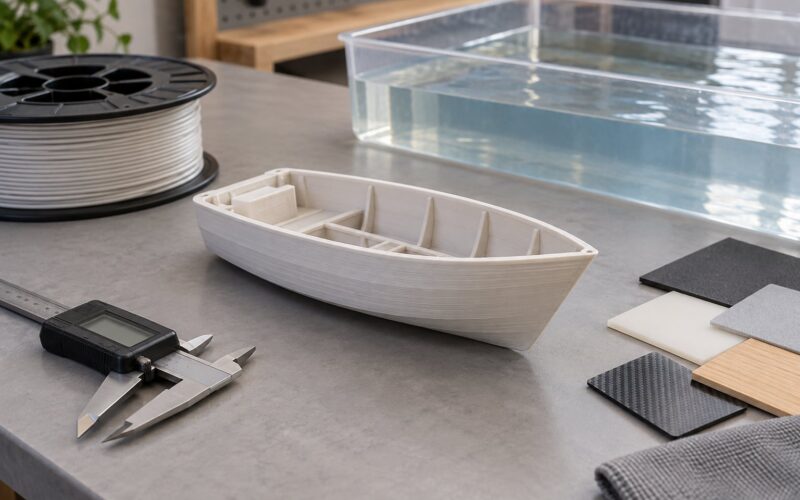
- Tank test. In still water, verify the full feedback loop: push the boat off line and watch whether the controller corrects toward or away from the error. Reversed response here is the classic wiring fault, and it is far cheaper to find with the boat in a tank.
- Dock test. With the boat alongside, set a low gain, engage, and make small manual disturbances. Watch the rudder for overshoot and ringing.
- Controlled water. In light air on a sheltered stretch, verify how a windvane autopilot works end to end: gain up until the boat settles, then confirm the loop damps its own oscillation rather than sustaining it.
- Conditions ramp. Increase wind and sea state in stages, watching for hunting, actuator saturation and recovery behaviour. Test the disengage from the helm under load, not just at rest.
Two habits save a lot of grief. Log heading, error and rudder command at a slow sample rate so you can see the oscillation rather than guess at it, and rehearse the manual takeover before you need it.
Frequently Asked Questions
Can a windvane autopilot steer without electronic navigation?
Yes, if it is a mechanical windvane. The air vane, its counterweight and the control lines form the whole control loop, with no compass, battery or electronics anywhere in the chain. That is why a windvane still works after a total electrical failure. An electronic system in wind mode can also run without GNSS, but it still needs its wind sensor and a power supply.
What is the difference between wind mode and heading mode?
Wind mode holds a fixed angle to the apparent wind, so the boat’s course changes whenever the wind shifts. Heading mode holds a fixed compass course and ignores wind changes entirely. Wind mode needs no compass and tolerates a steel hull; heading mode gives predictable track but needs a clean compass environment and somewhere sensible to mount the sensor.
Does a windvane autopilot need GPS?
A mechanical windvane needs no GPS at all, which is the point of it. An electronic autopilot in wind mode also works without a position fix, using only a wind sensor and a compass. GPS is what adds waypoint steering, cross-checks on heading when magnetic interference makes the compass wander, and lets the controller correct for current and leeway.
How does a windvane differ from a mechanical self-steering system?
Both can be entirely mechanical, but they are not the same idea. A windvane steers to the wind, so the boat follows the breeze. A mechanical self-steering system uses a weathervane and control lines connected to the tiller or wheel, so it also steers to the wind. The real differences are architectural: some windvanes drive the boat’s own rudder through a servo-pendulum, others use a separate auxiliary rudder underwater.
What sensors are needed for a small sailing robot?
A masthead anemometer for wind speed and direction is the usual starting point, since it is cheap and digital. A gyroscope-stabilised compass or magnetometer is needed for heading mode, and GNSS adds waypoint steering and a cross-check on heading. A rudder-angle sensor is worth adding because it makes actuator saturation detectable, and an IMU helps if the robot needs to know its attitude in a seaway.
How much steering correction is safe for a small boat?
Start conservative. Set a narrow rudder range, a low gain and a deadband of a couple of degrees, then raise them only once the loop damps its own motion. Small boats respond quickly, so a gain that feels right on a 40-foot ketch will put a 3-metre robot into a fast slalom. Keep a disengage within reach of the helm and test it under load.
Conclusion
Understanding how a windvane autopilot works comes down to one idea: the air starts the movement and the water finishes it. If you remember nothing else, check the input freshness and the rudder response first, because those two explain most of the strange behaviour people see.