You can teach kids about ocean robotics with a cork, a plastic spoon and a bathtub, then move up to real electronics when they are ready. The skill underneath every ocean robot is the same cycle: sense what is happening, decide what to do, act. Start there and the rest is just materials.
Underwater robotics means building and controlling machines that work below the water surface. Most school projects are remotely operated vehicles, an ROV tied to the surface by a tether and steered from the deck. A child can make one that floats, senses and reacts in an afternoon.
Here is the whole approach in six steps: pick one ocean question, build a body that floats, give it one way to notice its surroundings, write down what it should do, test it and change one thing at a time, then extend the project once the basic loop runs reliably.
- Start from a real ocean problem, like tracking floating debris or water temperature.
- Build the simplest floating body that will stay upright.
- Add one sensor and check that its reading matches reality.
- Program three or four simple behaviours, such as turn when blocked.
- Test in a tub, keep a log, and change one variable per run.
- Add wind, power or sampling experiments only after the loop works.
Most of the time the first build tips over, floats sideways, or ignores the obstacle it was supposed to avoid. That is not failure; it is the first useful data point, and it is where the learning actually happens.
Table of Contents
- What You Need
- Step-by-Step: How to Teach Kids About Ocean Robotics
- Common Mistakes
- Frequently Asked Questions
- What age is a good time to introduce ocean robotics to children?
- Do children need coding experience to start an ocean robotics project?
- How much does a beginner sailing robot or ocean drone cost?
- What is a simple environmental-sensing project for kids?
- How can parents or teachers make open-source robotics safer for children?
- Conclusion
What You Need
You need less than most people expect. The core list is craft material you probably already own, a container of water, and something to write with.
Core supplies for any age
- A floating body: cork sheets, foam board, clean plastic containers, or washed yogurt tubs.
- A sail or paddle: a craft stick, a drinking straw, a plastic spoon, or a bottle cap on a pencil.
- A test tank: a bathtub, a large clear storage bin, or a plastic dish tub on a towel.
- A control surface: a sheet of cardboard with hand-drawn arrows and a pencil to point at them.
- A test log: a notebook, a ruler, a timer, and a phone camera for photos.
- A sink cloth or towel, and a dry bag for anything electronic.
Optional robotics components
Add these once the floating version behaves predictably. Small DC motors with propellers, a basic microcontroller board, jumper wires, a battery pack, a string potentiometer or simple distance sensor, a small camera module, and heat-shrink tubing or silicone for sealing.
Expect the electronics to be the hardest part. Builders working on real ROVs say waterproofing is the number one blocker, because a circuit that shorts the moment the hull dips stops the whole project. Dry practice first, then short dips, then longer ones.
Three supply tiers, from free to a full kit
The free tier is scavenged: cardboard, bottle caps, drinking straws, and a leftover salad container. It teaches buoyancy, balance and cause and effect with nothing to buy.
The craft tier adds cork, a craft knife, a glue gun, small motors and a sensor or two from an electronics starter set. This is where most family and classroom projects sit, and it is enough to build something that responds to light, distance or a push.
The classroom-kit tier bundles frames, control boards, motors, wires and waterproof enclosures so a whole class can build at once. Worth it when you are running repeated sessions or preparing a team for a competition such as MATE or RoboSub.
Age-appropriate substitutes
Substitute freely by age. A three-year-old can push a cork boat across a bowl. A six-year-old can attach a paper sail and follow an arrow path. A ten-year-old can wire a distance sensor and read a block-coded program. A teenager can solder a sealed connector and tune ballast.
- Ages 3 to 5: a foil or cardboard boat pushed by hand, steered with verbal commands, no pool needed.
- Ages 6 to 8: a cork or foam raft with a paper sail or craft-stick paddle, guided by arrow cards on cardboard, still no pool.
- Ages 9 to 12: a foam and PVC frame with a small motor and a string or light sensor, run by if-then rules or block coding. A pool becomes optional.
- Ages 13 and up: a sealed frame with ballast, microcontroller, thrusters and camera, programmed in Blockly or text code. Pool time is genuinely useful at this stage.
Safety equipment and rules
Keep goggles, a non-slip mat and a dry towel within reach, and never let a child work over water alone. Batteries, control boards and soldering tools stay out of the tank and out of wet hands, and the tank is filled to a depth the child can reach safely.
Test in a bathtub, a storage bin or a shallow dish tub before you go near a pool. A pool needs an adult who is in the water, a clear drop zone, and the pool owner’s permission.
Step-by-Step: How to Teach Kids About Ocean Robotics
The sequence below runs from problem to extension in six moves. The order matters more than the materials: a robot that floats but has no question to answer teaches much less than a messy one that solves a real task.
Start With the Ocean Robotics Problem
Begin with one measurable ocean task, not with a robot. Good beginner problems include collecting floating plastic in a tray, mapping how far a current pushes a marker, comparing water temperature at the surface and lower down, or steering toward a target buoy without touching it.
Then name the three jobs every robot does. It senses, it decides, it acts. Write those three words on the wall where the build happens, because they frame every later choice: a bigger eye, a sharper rule, or a stronger push.
Adjust difficulty by age like this. Preschoolers need one variable and a visible result within a minute. Elementary kids can handle two rules and a written log. Middle schoolers can design their own sensor comparison. High schoolers can justify a ballast calculation or write the code that replaces the rule cards.
Success looks different too. For a five-year-old it is a boat that stays upright. For a twelve-year-old it is a robot that turns before it hits a block, every run, with a log showing why.
Build a Simple Floating Robot Body
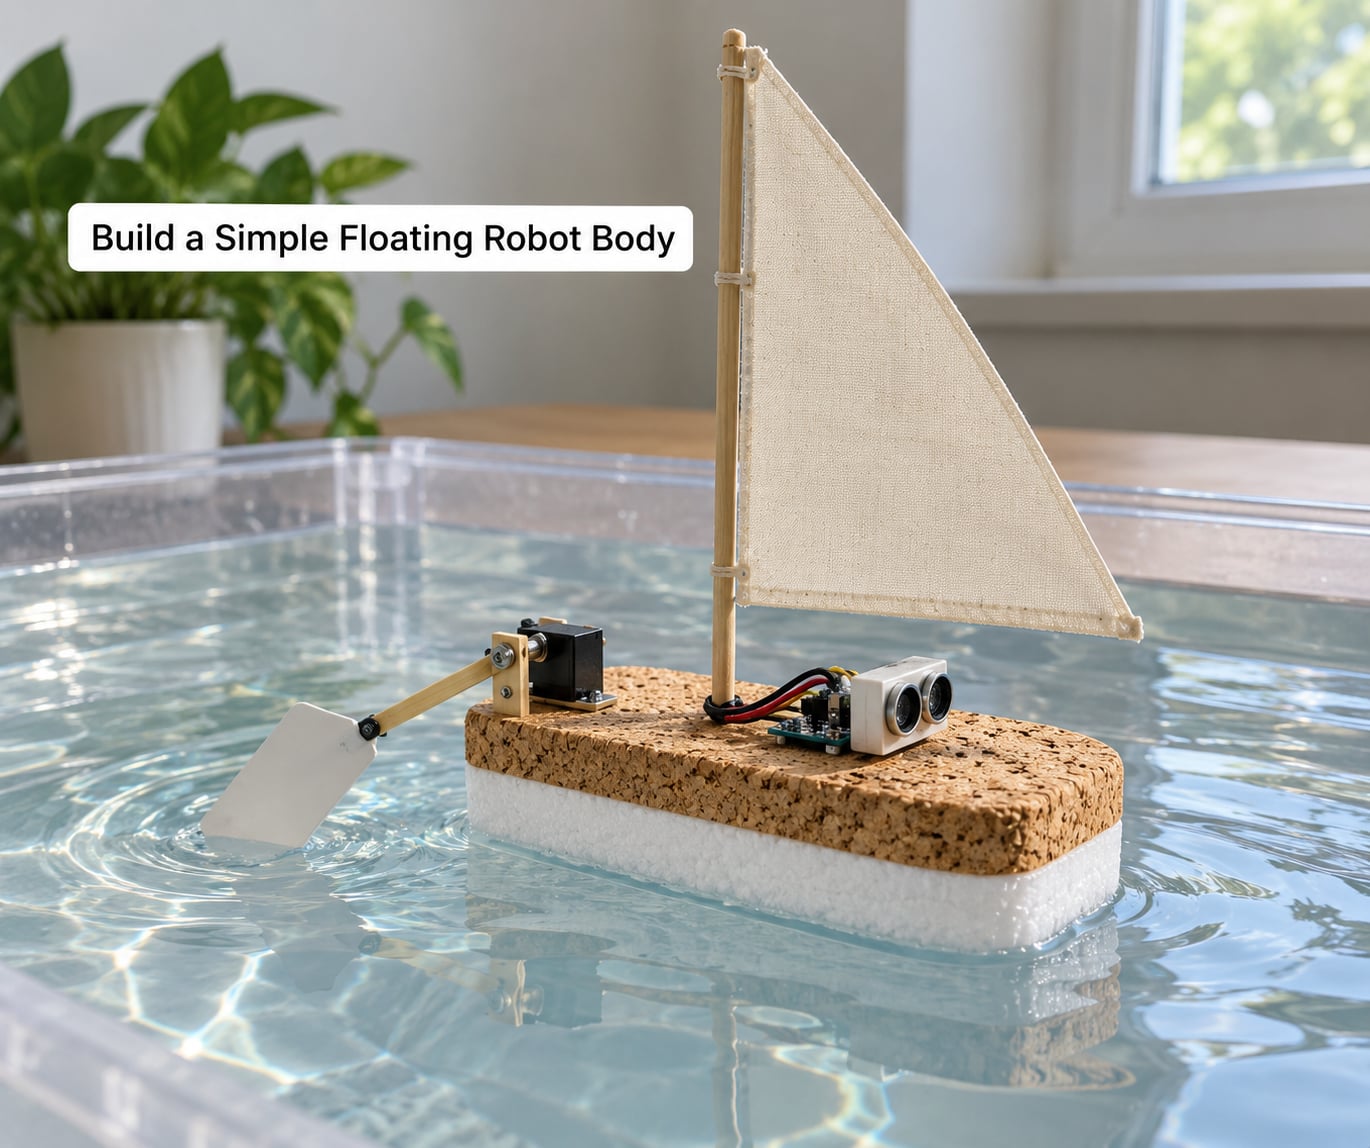
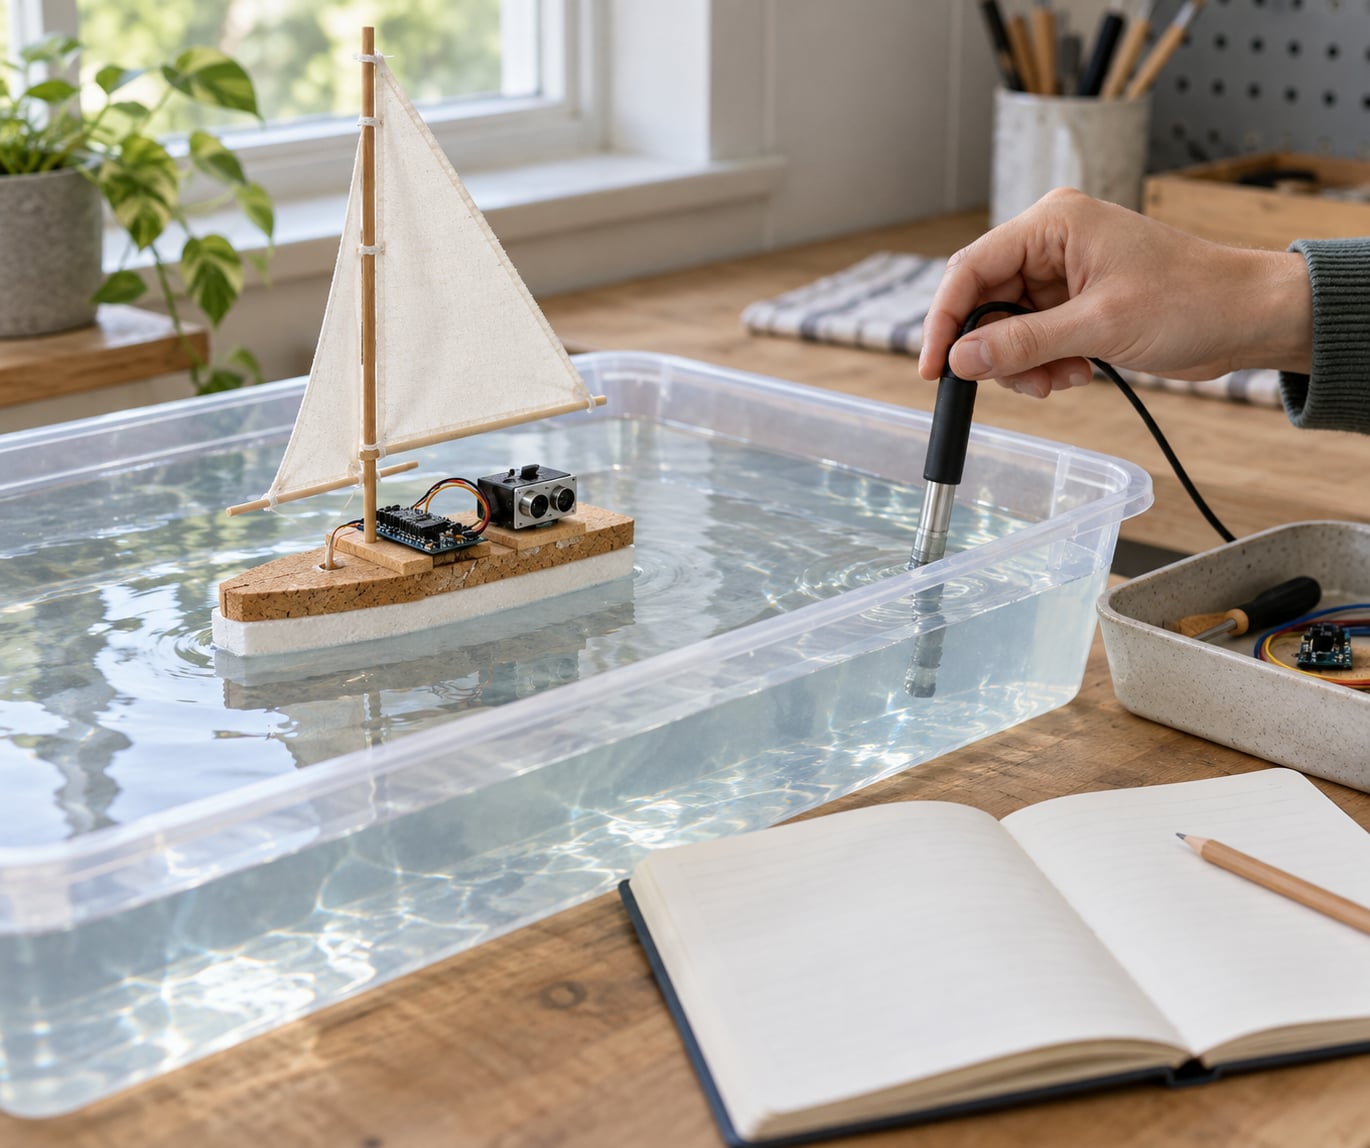
Build the body first and keep it as simple as possible. A cork disc with a slot cut for a craft stick makes a stable raft. A foam block with a bottle-cap mast is even simpler. Aim for a wide, flat shape with all the weight low and in the middle.
Balance beats cleverness here. Load the center rather than the edge, and add a layer of ballast such as a washer or a folded foil shape underneath. If the boat sits low and level, buoyancy is balanced. If it tilts, move weight toward the raised side and try again.
Seal exposed foam and cork with a coat of water-based sealant or fabric tape. Keep the electronics compartment above the waterline to start with, so the first float test is really a buoyancy test and not a leak test.
Supervision depends on the tools, not the age. Adults handle the craft knife, glue gun and any hot work. Children do the measuring, cutting to marked lines, decorating and balancing, which is where the thinking happens.
Add a Sensor or Observation System
Before buying a sensor, stand in a household version of it. A string with a paper clip and a washer detects contact when it touches an obstacle. A drinking straw taped to the deck bends a certain amount at a certain distance from a wall. A thermometer placed in the water reads temperature. A torchlight and a cardboard flag show light level.
Testing the sensor is the step children skip, and it is the step that teaches measurement. Set the robot at a marked distance, predict the reading, then check. If the straw bends more the closer it gets, the child has just discovered a sensor’s behaviour from scratch.
Record whether the reading matches the real condition. That one habit, comparing what a machine reports with what is actually there, is the most transferable thing in the whole activity.
Only after that should you add real electronics. A string potentiometer maps distance on a dial, a light sensor changes with brightness, a temperature probe changes with water temperature. Keep the sensor above water if you can, and dip it rather than submerging it until the waterproofing holds up.
Program Decisions and Basic Robot Behavior
Programming underwater robots can start with no computer at all. Draw arrows on cardboard for move, turn and stop, and have the child call each one in order. That is a program, and running it teaches sequence faster than any screen.
The next step is if-then rules, written on index cards. If the string touches something, then turn left. If the light sensor reads dark, then stop. Four good beginner behaviours: sail forward, turn when blocked, stop near a target, and report a sensor reading out loud.
Older kids move to block coding. ScratchJr suits younger children and works without a robot, Scratch handles logic puzzles, Tinkercad Circuits is a free simulator where you can test a wiring plan before anything gets wet, and Blockly or Arduino IDE takes over when the child is ready for real hardware.
Keep the program visible and short. One screen or one card of rules that the child can explain in their own words beats a clever build they inherited from a video.
Test, Observe, and Improve
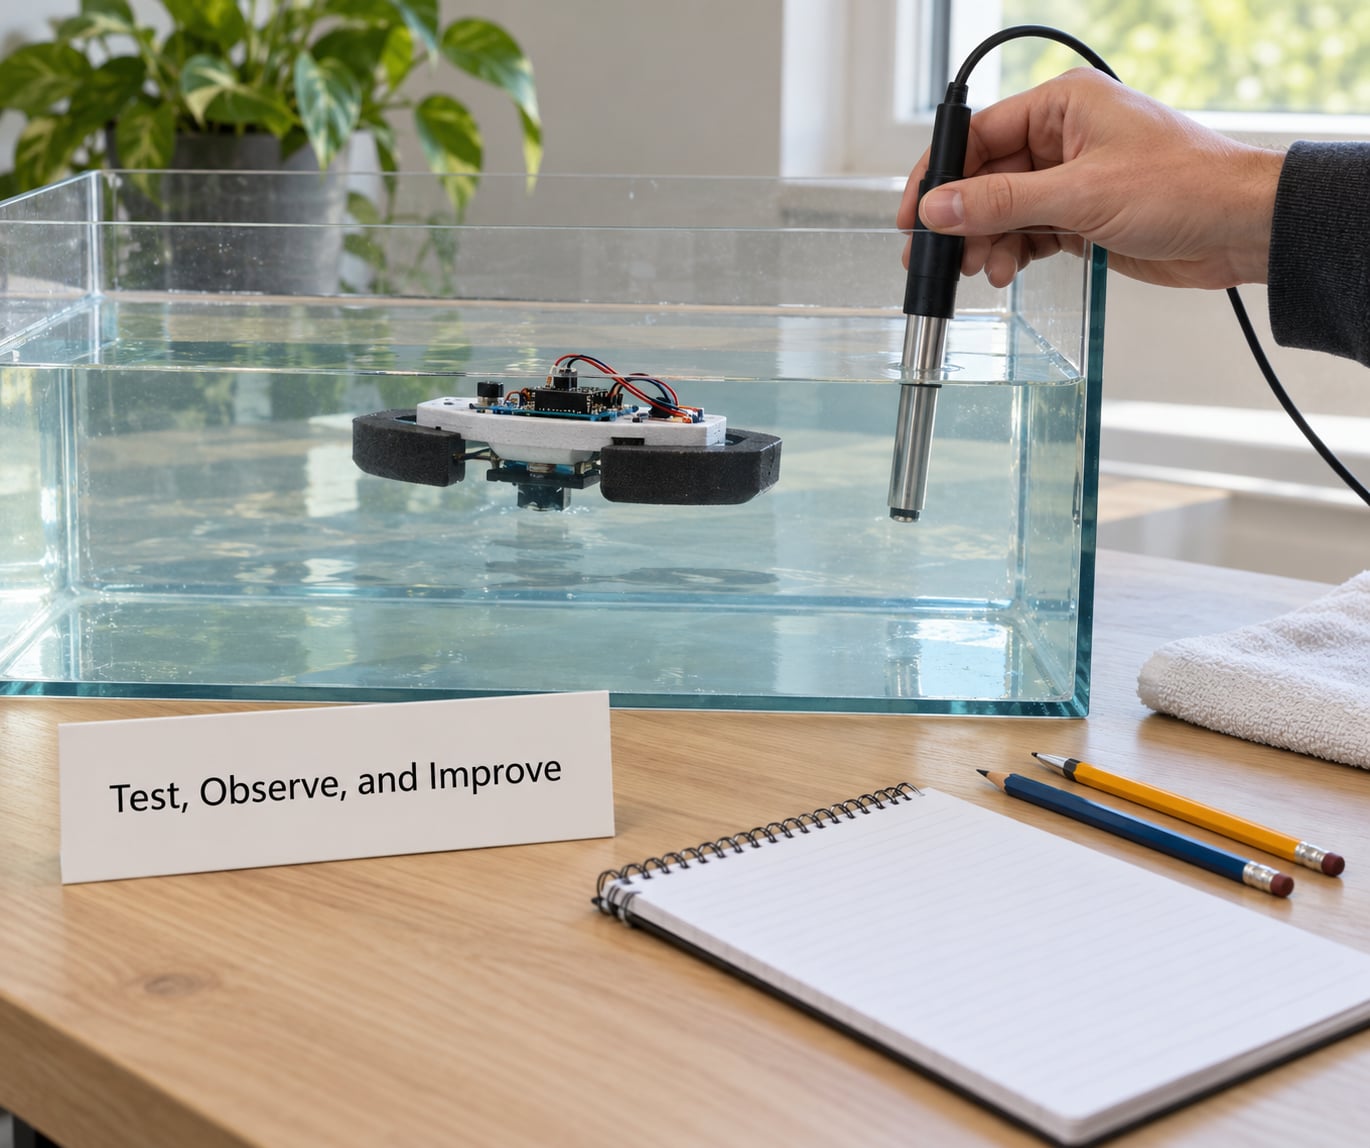
Set up a test area where everything to the robot’s right is its right, and put the log sheet on a dry surface next to the tank. A storage bin on a towel in a hallway works better than a pool for the first ten runs.
Run the same test three times and write down what happened each time. Most floating robots behave differently on run one and run three, and noticing that difference is a genuine result, not noise.
Change one variable at a time. If the robot misses the buoy, adjust the sail or the ballast or the turn angle, but never all three, or you will never know what helped. Log the change and the outcome in one line each.
Reading the result is the teaching moment. Ask what the robot did, what you expected, and which single thing to change next. When a fix works, the child owns a result. When it does not, they own a good question.
Take the Project Further
Once the basic loop runs, extend it in one direction at a time. Add a fan or a stronger sail to study wind and waves. Swap the battery pack for a small solar cell and measure how long the robot runs on a bright day. Add a scoop or a mesh bag and let it pick up floating debris in a controlled tray.
Remote control comes next for many teams, using a simple controller on a cable, and cooperative behaviour after that, where two robots hold a shared line or hand off a token. Both teach negotiation and timing, which is where most real ocean missions get their coordination.
Keep one rule: introduce advanced electronics only after the child can explain the build and the test from memory, without following the instructions. That explanation is the real assessment, and it is the point at which new hardware actually helps.
Common Mistakes
Most of these come from doing everything at once. Each one has a small fix.
Overcomplicating the first build
Symptom: four hours in, no floating body. Fix: cut the parts list to cork, a craft stick and a tub for the first session. Add the motor only after the boat survives three float tests.
Unstable or leaky bodies
Symptom: the robot lists to one side or takes on water. Fix: widen the base, drop the weight to the centre line, and reseal every joint. Buoyancy is tuned before propulsion, never after.
Skipping sensor calibration
Symptom: the robot reacts when nothing is there. Fix: check the reading at three known distances and write the values down. A sensor nobody calibrated is just an expensive guess.
Testing in unsafe water
Symptom: batteries and hands near deep water, or a child working alone. Fix: stay in a tub or bathtub, keep electronics dry during the session, and put an adult in the water at any real pool.
Changing several variables at once
Symptom: an improvement you cannot explain. Fix: one change per run, logged. If the results are confusing, go back to the last configuration that worked.
Believing claims without evidence
Symptom: a robot described as autonomous that actually needs a person pushing it. Fix: ask what senses the environment, what the robot decides on its own, and what the human still controls. Honest scope beats a clever label.
Letting the adult build it
Symptom: the child can operate it but cannot rebuild it. Fix: hand over the tools and the log, and let the first attempt be messy.
A few teaching habits that pay off: ask the child to predict before every test, keep a wall of labelled logs so progress is visible, celebrate the diagnosis more than the result, and connect the week’s build to a real mission run by NOAA, Woods Hole or MBARI so the work has somewhere to point.
Frequently Asked Questions
What age is a good time to introduce ocean robotics to children?
Start between ages three and five with floating boats pushed by hand, since success is visible within a minute. From six to eight, add a paper sail, an arrow path and a simple craft. Nine to twelve usually handles sensors and if-then rules. Thirteen and up can wire, seal and program a tethered robot. Match the challenge to the child, not the other way round.
Do children need coding experience to start an ocean robotics project?
No. Most of the learning happens with cards, arrows and spoken commands before any software appears. Once the child can run a written sequence reliably, block coding transfers almost directly, because the logic is identical. Screen-free programming builds the same habit and works on a boat with no electronics at all.
How much does a beginner sailing robot or ocean drone cost?
It depends entirely on which tier you build. A scavenged cardboard boat costs nothing beyond craft scraps you already own. A cork or foam boat with a small motor and one sensor stays low, using craft supplies and a starter electronics set. A classroom kit bundles frames, control boards and sealed enclosures so many students can build at once.
What is a simple environmental-sensing project for kids?
Use a floating thermometer in a clear container to compare surface and lower water temperature, and log the readings each day for a week. A paper sail or a bottle-cap paddle can map how far a current pushes a paper marker. Older students can add a light or distance sensor and check its readings against a ruler.
How can parents or teachers make open-source robotics safer for children?
Test in a tub before a pool, keep batteries and boards dry, and handle knives, glue guns and soldering tools as adult-only steps. Stay within arm’s reach of any child at water, and get permission before testing in a shared pool. Choose kits with sealed connectors, and build a clear rule that nothing powered goes in the water unsupervised.
Conclusion
Teaching ocean robotics works best when you shrink it until it fits in one afternoon. One real ocean question, one floating body, one sensor, three rules and a written log cover the same thinking a research ROV runs on.
Start with this: choose one problem you actually care about, such as where floating plastic collects, then build the simplest model that can test it. A cork raft and a paper sail in a storage bin is enough for the first session, and the first robot that fails is exactly what you want.