To find a short in boat wiring, you isolate the fault from the battery outward: confirm the battery and main connections, find which circuit the fuse or breaker belongs to, then split that circuit in half and test each half until only the faulty section remains. Most faults are chafed insulation, a corroded terminal, or water bridging two conductors somewhere in a bilge, transom or engine space.
This guide works for 12-volt DC systems on outboards, inboards and small cruisers. Budget an evening for the first pass, and longer if the fault is intermittent. If the boat has shore power or an AC panel involved, stop at the DC system and bring in a qualified marine electrician.
Table of Contents
What You Need
You need a wiring diagram, the right fuses, and a way to measure resistance before you touch anything. The diagram is the difference between a two-hour fix and an afternoon of guessing.
- The boat’s wiring diagram and owner’s manual. Older boats often have a schematic folded in the glovebox or taped inside the helm console. If there is none, a model-year diagram from the builder is a good starting point.
- Circuit labels. A breaker panel with labels is worth far more than one without. If yours is unlabelled, label it yourself as you trace circuits — it pays for itself the next time something blows.
- Replacement fuses in the correct ratings. Read the amperage printed on the fuse itself, not on the box it came in.
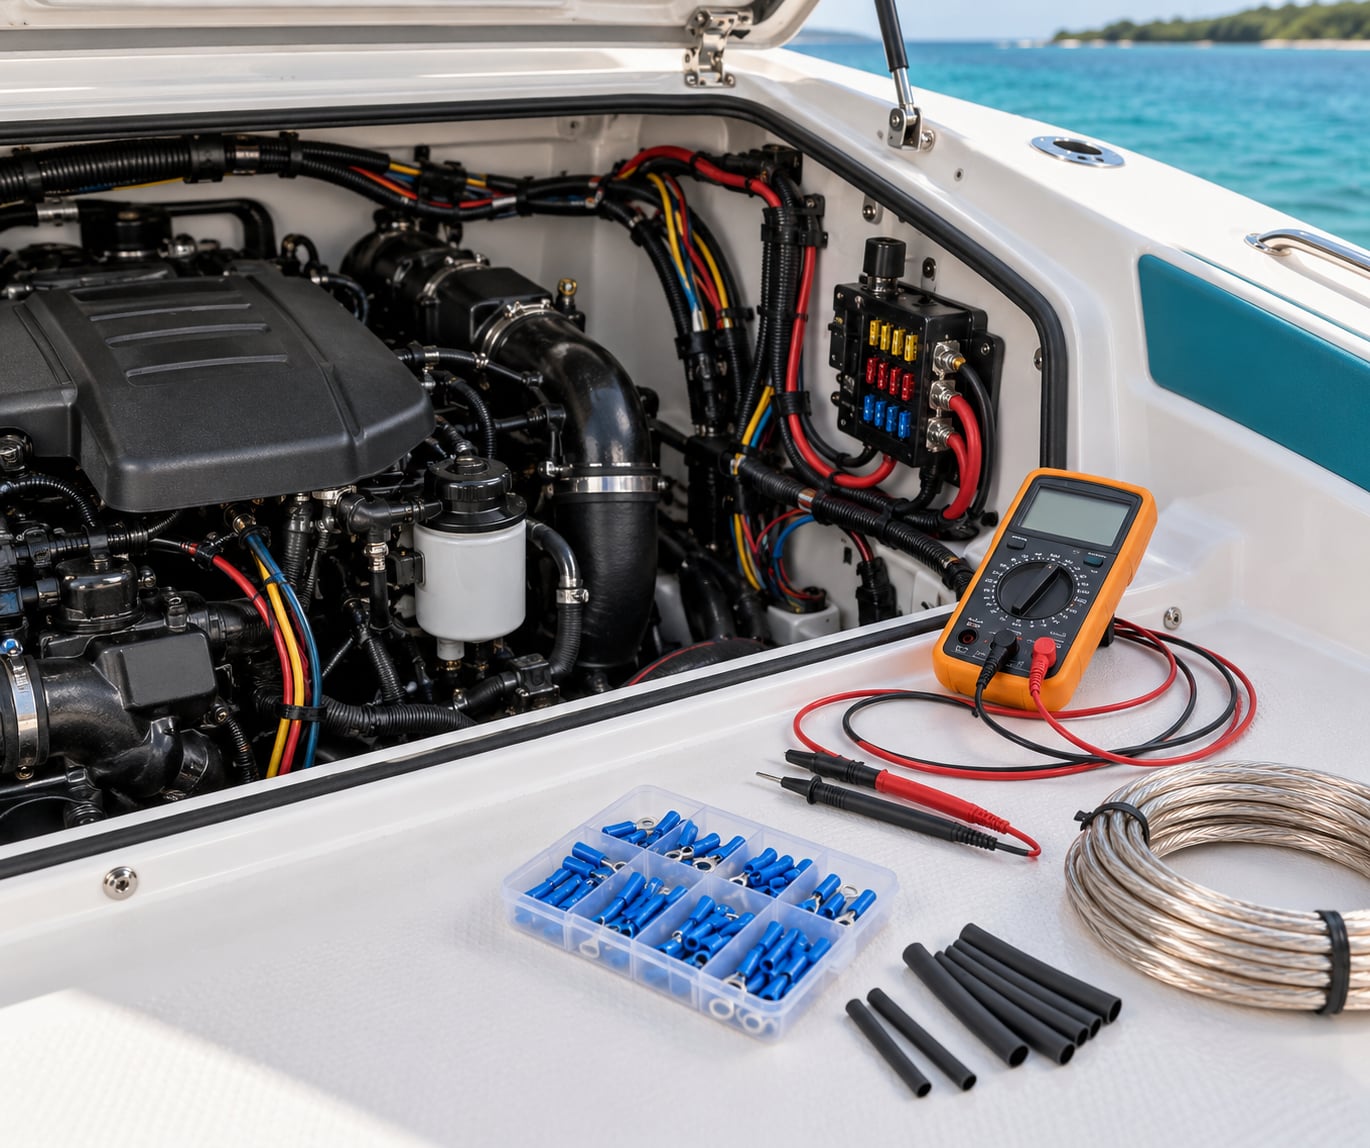
- A digital multimeter. Auto-ranging is worth the small extra cost. It needs a continuity setting and a resistance (ohms) setting at minimum.
- A test light and a fused jumper lead. The jumper lets you energize one circuit at a time without touching the battery terminals.
- Wire strippers, marine-grade crimp connectors, heat-shrink tubing and dielectric grease. These are consumables you want on hand before you open anything.
- Safety glasses and non-conductive gloves. Batteries can deliver enough current to melt a tool and start a fire in a hurry.
A fully charged battery matters more than people expect. A weak battery produces misleading voltage readings that send you chasing a fault that isn’t there, and some electronics misbehave below their minimum input voltage.
Before disconnecting anything, photograph the breaker panel with every switch in its actual position, and photograph the battery cables before you loosen them. That photo saves an hour of tracing later, especially on a boat with no diagram at all.
Step-by-Step: How to Find a Short in Boat Wiring
The method below is divide and conquer. At each stage you halve the amount of wiring left to examine: start with everything, end with a single connector or a six-inch length of cable. Skipping stages is what turns a fifteen-minute diagnosis into an afternoon.
Before you start, it helps to be precise about what you are chasing. A short circuit, a ground fault and an open circuit feel similar to an owner but behave completely differently, and confusing the three is the most common reason a repair turns into a repair of the wrong thing.
| Fault | What it is | Typical symptom | How you confirm it |
|---|---|---|---|
| Short circuit | Positive conductor touches the negative rail or the hull/ground path, almost with no resistance in between | Fuse blows instantly, wire or terminal too hot to touch, breaker trips at once | Resistance or continuity to ground near 0 ohms with the circuit de-energized |
| Ground fault | Leakage from a positive conductor to a bonded surface such as the hull, an engine block or a wet compartment | Fuse blows after a delay, electronics switch off on their own, slight smell of hot plastic | Low but non-zero resistance to ground, or a small current reading that rises with load |
| Open circuit | A break anywhere in the path, so current simply stops | Dead load, no fuse blown, panel still healthy | Continuity test reads open across the section; voltage present on one side of the break and not the other |
| High-resistance connection | Corrosion or loose terminal that heats up under load instead of carrying it cleanly | Dim lights when the engine starts, warm terminals, voltage sags under load | Voltage drop test across the connection, then across the wire run |
1. Disconnect power and confirm the fault
Start by removing energy from the circuit, not the whole boat, unless you need the whole boat. Turn off the relevant switches, unplug shore power, and open the battery switch for that bank. If you are working near the starter, disconnect the battery negative cable and remember which battery it was on.
Then reproduce the symptom safely: this means watching which fuse blows or which breaker trips with the system energized, then de-energizing again before opening anything. Do not repeat the fault more than needed. A fuse that pops instantly is telling you something; a third blow is just adding heat.
Write down what you saw. “House fuse blows when the anchor light switch is on” narrows the search enormously compared with “the lights don’t work.” Note the time of day, whether the engine was running, and whether the boat had been in rain or saltwater.
A blown fuse, a tripped breaker, a terminal hot enough to discolor, a burnt-plastic smell, or a device switching itself on without being asked all point to a wiring fault. So does a battery that is flat overnight with nothing left switched on.
2. Inspect the wiring and look for damage
Visual inspection finds more boat shorts than any meter. Follow the circuit physically from the panel to the load, tracing every inch of it, and look at the conductor wherever it passes a sharp edge, a bracket, a moving part or a fastener.
Look for these in order:
- Chafing. Insulation worn through where a cable rubs against a sharp edge, a bulkhead, a cleat or a hose. The shiny copper underneath is the tell.
- Cracked or hardened insulation. Marine wire that has been in a hot engine bay for years turns brittle and splits at bends.
- Loose terminals. A screw terminal that spins, or a crimp that pulls out of the wire when tugged gently.
- Corrosion. White, green or powdery deposits on battery posts, breaker studs, terminal blocks and grounding points.
- Water intrusion. Standing water in a bilge or under a helm box bridges terminals more easily than most people expect.
- Pinched or drilled conductors. Screw tips that pierced insulation during a previous repair, and hoses clamped onto a cable run.
One confirmation worth naming: a wire that is discolored, stiff, or smells burnt at a point along its run is a fault location, not a coincidence. So is a terminal with a bright ring around the screw head where the wire was clamped under a loose fastener.
A thermal imaging camera makes this pass faster on a live boat. With the circuit energized and the suspect load running, a hot connector or a pinched section shows up as a bright spot against cool surroundings. It is genuinely useful when the fault only appears under load.
3. Check fuses, breakers, and circuit protection
Identify the correct fuse or breaker from the circuit label and the wiring diagram, then confirm its rating and holder are sound. A blown fuse is a symptom, not a diagnosis — but a fuse that is the wrong rating, or a holder with corroded contacts, can be the actual cause of the failure.
With the circuit de-energized and the load disconnected, check the protection device itself. A good fuse shows continuity across its body and opens instantly when you bridge it briefly with a properly rated fused jumper. A breaker that will not reset, or that trips with nothing connected downstream, has failed internally.
Never fit a larger fuse or bypass a breaker to “see if it holds.” The device is rated for the wire, not for the load. Oversizing protection lets a chafed cable reach the temperature that damages the boat, and in a confined space that is how a diagnostic job becomes a refit.
Also worth ruling out early: an undersized fuse on a heavy-starting motor. If the amperage in the panel is lower than what the load needs, the fuse blows on start every time and you will chase a short that does not exist.
4. Separate loads and test branches
Once you know the circuit, split it. Disconnect the loads one at a time, starting with the easiest to reach and the least likely to be at fault, and test the branch each time. Removing half the loads and seeing the symptom disappear tells you the fault is in the half you removed, not the half you left.
On a shared feed — a terminal block feeding several circuits, for example — disconnect all downstream branches and test the feed alone first. A feed that reads clean is good news: the short is in the branches you just removed, and you have already halved the search.
What isolates the problem is a branch that reads continuity or near-zero resistance to ground once everything downstream of it is disconnected. What means the short lies elsewhere is a branch that tests clean with its load off; keep splitting the remaining wiring at connectors and mid-runs until one piece reads bad.
5. Use a multimeter to confirm the short in boat wiring
Knowing how to find a short in boat wiring with a multimeter comes down to three settings: continuity, resistance, and DC volts. Continuity and resistance tell you whether a path exists. DC volts tell you where power stops.
Set the meter to continuity or lowest resistance. Place one probe on the positive conductor of the suspect section and the other on the engine block, the battery negative, or the bonding point — whichever ground the circuit uses. Disconnect components where you can, because a reading taken through a solid-state device can be misleading.
- Continuity beep or near 0 ohms: a direct short. The fault is in what you are bridging.
- A few ohms to a few hundred: a resistive leak or a ground fault, not a dead short. Note the number; it should be much higher when the load is disconnected.
- OL or open: no short on this side. Keep going.
Here is the dial reference most people get wrong:
| Meter dial | Use it for | Power state | What a healthy reading looks like |
|---|---|---|---|
| Continuity (speaker icon) | Finding a path where there should be none, and confirming a fuse or switch | Off | Beep only across the device you intend to test |
| Resistance (Ω) | Comparing a section against a known-good one | Off | Low single digits on a sound connection, OL on a clean wire run |
| DC volts (V⎓) | Confirming battery state and finding which side of a break is live | On | About 12.6 resting, 13.8 to 14.4 while charging |
| DC amps (A, in series) | Measuring parasitic draw on a dark boat | On, meter in the circuit | A few milliamps after everything sleeps |
| Amps via clamp | Measuring current draw without breaking the circuit | On, clamp around one conductor | Load current on a working circuit, near zero on a shorted one once protection opens |
To narrow a run in two, test the midpoint. Take the conductor apart at a connector in the middle of the suspect run and bridge each half separately. Say the feed runs from the panel down the console to a bilge pump. Panel to connector reads 0 ohms, connector to pump reads open. The fault is upstream, and you have three feet of cable to inspect instead of twelve.
When the fault only shows up hot, use DC volts as a pair. With the system energized, place one probe on the supply side of a connection and the other on the load side. A healthy connection shows almost no difference. A corroded one shows a measurable gap while current flows — that gap is the voltage drop, and it is the reason the wire heats.
Two things to keep straight: never take a resistance or continuity reading on a live circuit, and never trust a continuity reading taken through a component. Disconnect the device, then test the wire either side of it.
6. Repair or replace the faulty section
Replace the damaged conductor with the same gauge and the same type you removed — tinned copper, marine grade, in the same color convention as the rest of the boat. Running the conductor through conduit, a loom sleeve or a cable tie mount is what stops the chafe recurring.
Cut back to sound wire on both sides of the damage, strip cleanly, and terminate with a marine-grade crimp connector sized to the conductor. Heat-shrink with adhesive-lined tubing over the joint. Do not wrap bare tape around a splice, and do not twist two wires together and hope. If you solder instead, use a marine solder and iron, flow the solder into the strands, and insulate fully.
Fit strain relief so the connector takes the pull, not the conductor. Then fix the cause: move the cable off the sharp edge, seal the wet compartment, replace the corroded terminal block, tighten the ground that was loose.
On grounds specifically, a single daisy-chained ground between two batteries is a common and easily missed fault. Each battery needs its own ground back to the main ground point, and ABYC guidance puts the resistance of that bonding connection at 1 ohm or less.
Never bypass short-circuit protection as a repair. If a fused jumper is used as a diagnostic tool, it stays in the test circuit and comes out when the test is over.
7. Restore power and verify the repair
Reconnect in the reverse order you disconnected. Refit the correct fuse or reset the breaker, confirm every terminal is tight and the connector is fully seated, then energize in stages: main power first, then the panel, then the individual circuit.
Watch the current draw on the repaired branch, listen for abnormal motor noise, and check for heat or an odor after a few minutes of running. Then operate every load on the circuit in turn. Fuses that hold through a full switch-on cycle, terminals that stay cool to the back of your fingers, and a battery that stops losing charge overnight all confirm the short is gone.
Hand the job to a qualified marine electrician if the fault is in the AC or shore power side, if the short reappears after repair, if it involves the starting circuit on an inboard, if you find melted insulation and heat-damaged terminals, or if any part of the diagnosis takes you into fuel or engine spaces. Sooner is better than later on a boat that has to start in rough water.
Common Mistakes
Nearly every repeated visit to this problem comes down to one of a handful of habits. Each has a straightforward fix.
Replacing the fuse and calling it done. The fuse is the alarm, not the fault. Every replacement hides the evidence and adds heat. Fix: leave it out, and work through steps 2 to 5 before fitting anything.
Bypassing protection with a heavier fuse. It “fixes” nothing and it removes the last line of defense between a chafed wire and a hull. Fix: correct the short, or reduce the load, or run properly sized wire.
Measuring resistance on a live circuit. The meter reading will be wrong at best and the meter can be damaged at worst. Fix: power off, verify with DC volts, then switch dials.
Trusting a continuity reading taken through a device. Solid-state electronics and some motors will show a path that has nothing to do with a short. Fix: disconnect the component and test the conductor on each side of it.
Repairing the first chafed spot you find. Cable that has rubbed once usually rubs again, often a few inches away. Fix: open the whole run, inspect every point of contact, and secure the cable along its path.
Using the wrong wire or terminal type. Undersized conductor, non-marine crimp, or a twist-and-tape joint. Fix: same gauge as original, tinned copper, adhesive-lined heat shrink, mechanical strain relief.
Leaving a poor ground behind. A new wire on a bad ground is still a bad circuit. Fix: clean the ground point to bright metal, tighten it, coat it with dielectric grease, and confirm the drop across it under load.
Assuming every blown fuse is a short. An undersized fuse, an undersized breaker, a motor drawing too much on start, or water in a connector can all do it. Fix: match the protection to the load before hunting for a fault.
Two habits keep the next fault short. Label every circuit as you trace it, and keep a log of what you measured, what you replaced, and where. That log is the difference between a ten-minute diagnosis on the next boat trip and starting from zero again.
Frequently Asked Questions
Why does the fuse keep blowing after I replace it?
Because the fault is still there. A fuse is a sacrificial device sized to protect the wire, not the load, so every replacement removes the evidence and adds heat to a cable that may already be damaged. Fit a fuse of the correct rating only after you have found the chafe, the shorted device or the water intrusion that caused it. If a brand-new fuse blows the instant you energize the circuit, skip ahead to isolating the branch with a multimeter.
Can a multimeter find a short in boat wiring?
Yes, once the circuit is de-energized and you have narrowed it down. Set the meter to continuity or resistance, place one probe on the suspect conductor and the other on the engine block, battery negative or bonding point, then split the run at a connector and test each half. A reading near zero ohms points to the shorted section. For faults that only appear under load, use DC volts to measure the drop across each connection while the circuit is running.
Does a short circuit always blow a fuse?
No. A dead short with almost no resistance will blow the fuse immediately, which is the easy case. A ground fault or a high-resistance leak draws more current than intended but may take longer to open the fuse, or trip a breaker, or only fail when the load draws more. That is why a boat can show dim lights, electronics switching themselves off, or an unexplained overnight battery drain with no blown fuse anywhere in the system.
How do I tell whether the short is in the wiring or a device?
Disconnect the device and retest the branch. With the load removed, measure from the positive conductor to ground. If the reading stays low with the device disconnected, the fault is in the wiring or the connector. If it jumps to open the moment you unplug the device, the device itself is the problem. Testing each half of a split run the same way narrows it further, and gives you a clear answer before you buy a part.
Is a boat wiring short safe to diagnose myself?
Most 12-volt DC faults are within reach of an owner with a multimeter, provided the circuit is de-energized before you open anything. Work only on DC systems, never on shore power or the AC panel. Stop and call a qualified marine electrician if the fault is in the starting circuit, involves melted insulation or heat-damaged terminals, keeps coming back after a repair, or if the work takes you near fuel or engine spaces.
What causes a short near a boat battery?
Usually corrosion or physical damage. Battery posts and cable clamps build up conductive deposits, terminals work loose from vibration, and cables get chafed where they pass through a bulkhead or over a sharp edge. Flooded and high-humidity compartments accelerate all three. Clean posts to bright metal, tighten clamps, coat connections with dielectric grease, and inspect the cable run where it crosses anything sharp.
If you do only one thing before touching the wiring, photograph the breaker panel and the battery connections. Everything after that goes faster because you can put it back exactly as you found it.
Then start at the fuse, follow the circuit physically, and split it in half until one small piece of wiring reads bad. That is the whole method, and it works on a 16-foot skiff with one circuit just as well as it does on a cruising boat with forty.