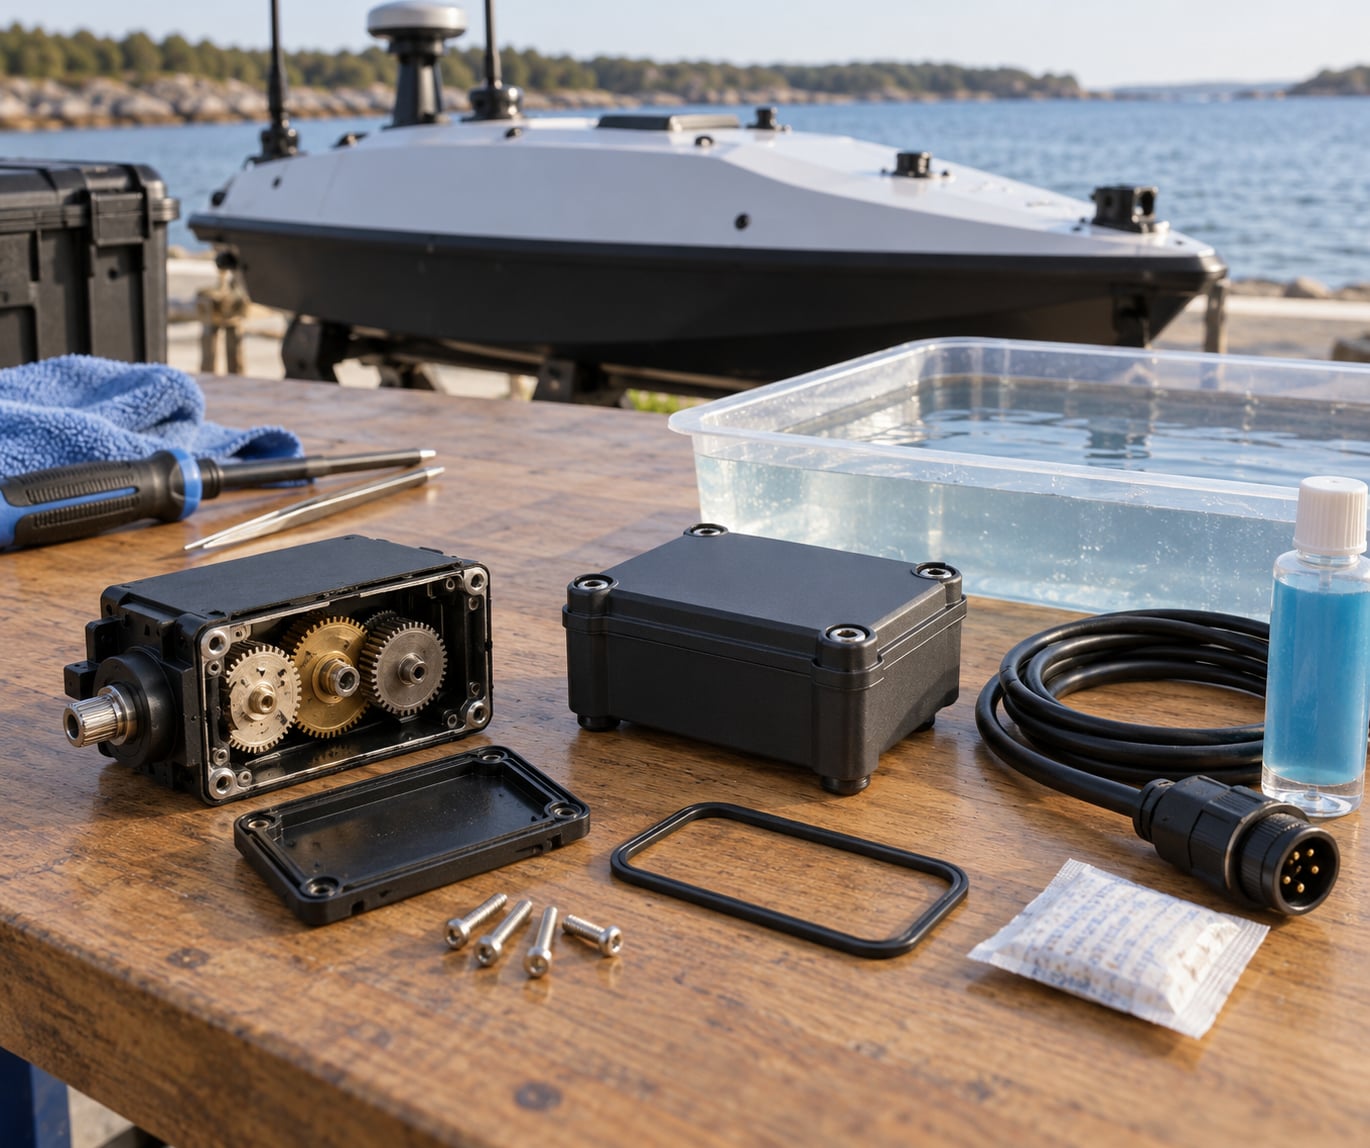
To protect servos from salt water, seal every ingress path — the case split line, the base plate screws, the wire entry and the output spline — so conductive brine never reaches the circuit board, motor brushes or feedback pot. Then rinse the assembly with fresh water the moment it comes out of the sea. That combination does most of the work; anything beyond it depends on how often the servo actually gets wet.
Salt water is the harder case. It is an electrolyte, so it carries current far better than rain or river water, and it turns a damp circuit board into a short within minutes. Salt also drives galvanic corrosion between dissimilar metals inside the case, and it leaves crystal residue behind that keeps eating at copper and steel long after everything looks bone dry.
Almost every servo on the market is water resistant, not waterproof. The factory seal is usually a thin plastic case with a small split line and a wire that just passes through a hole, sometimes with a cheap neoprene O-ring that perishes from UV and salt air. That seal is fine for a dusty workbench and hopeless for a splash zone.
Table of Contents
What You Need
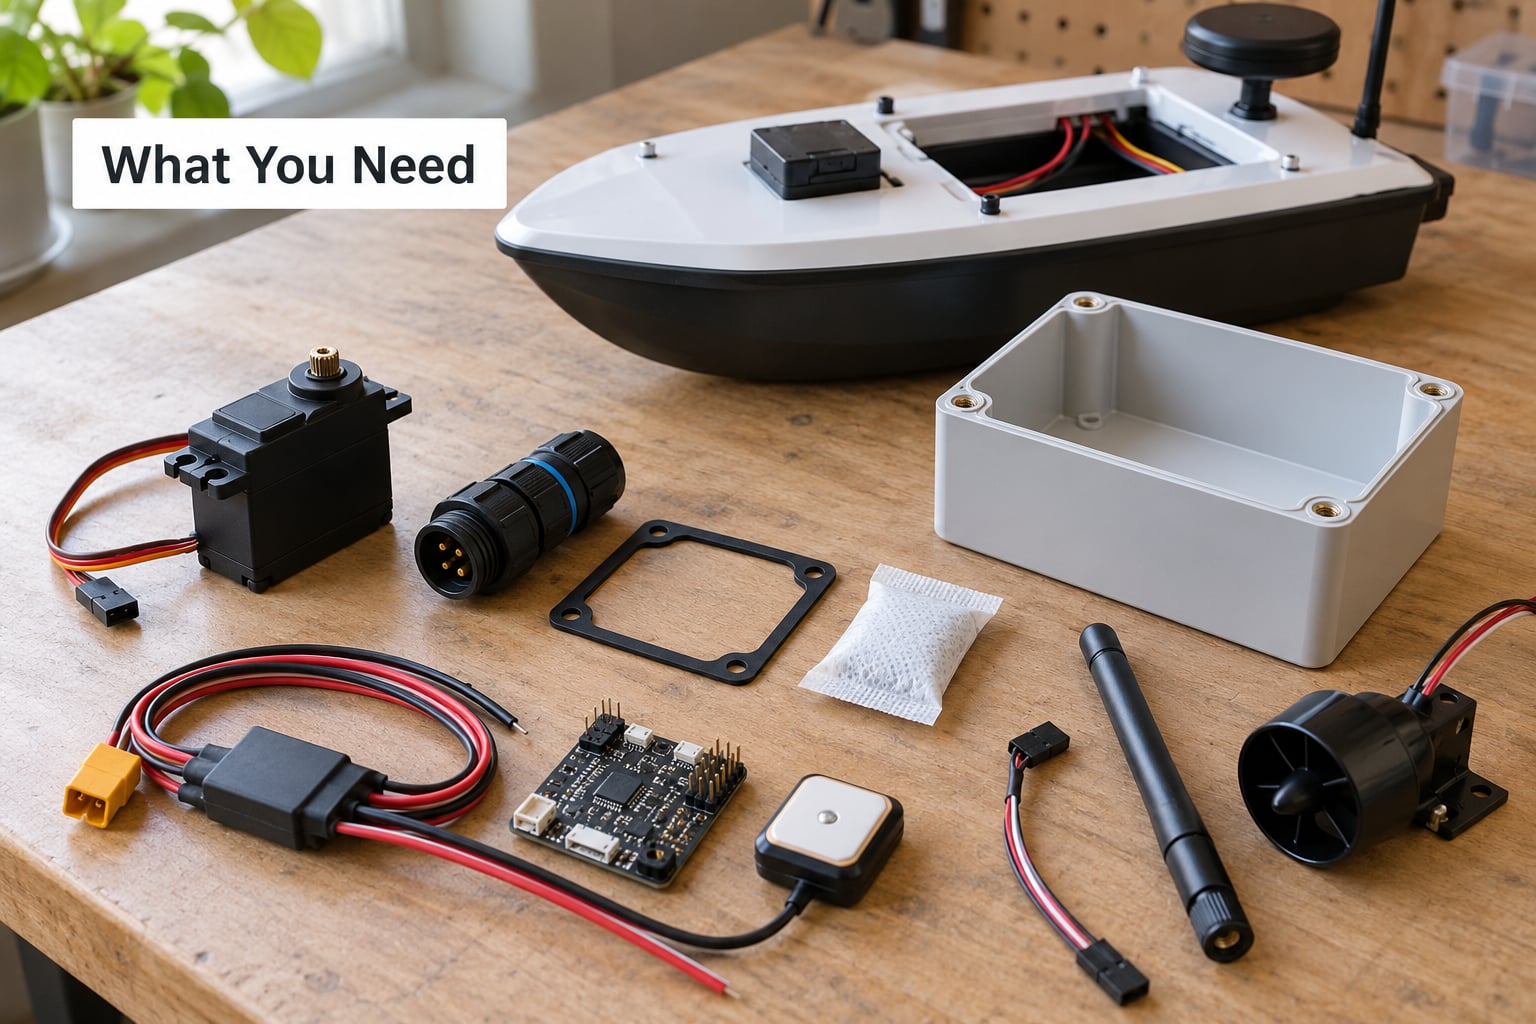
You do not need much, but you do need all of it. The list below covers everything from splash-zone mounts to housings that get dunked on purpose.
- A servo that suits the job. Check torque, operating temperature, feedback type and connector style against the manufacturer’s datasheet before you seal anything.
- Neutral-cure silicone or RTV gasket sealer. Acetoxy-cure silicone releases acetic acid while it cures, and that acid attacks plated contacts. Neutral cure is the safe choice around a PCB.
- Conformal coating. Urethane or silicone-based board coating, plus a small brush or foam applicator.
- Dielectric grease for the motor brushes, the commutator and the top side of the board.
- Corrosion inhibitor such as CorrosionX for connectors and exposed metal.
- Liquid electrical tape or adhesive-lined heat-shrink for wire strain relief and joint coverage.
- Marine-grade connectors if the servo stays unplugged between sessions. IP-rated circular connectors are worth it on any tether or buoy.
- A waterproof enclosure — a dry box, a PVC pipe end cap housing, or a pressure-compensated oil-filled canister if the unit runs submerged.
- Gaskets, cable glands and desiccant packs. Desiccant does real work inside a sealed box that breathes.
- Fresh and distilled water for rinsing.
- Basic hand tools: a precision screwdriver set that fits tiny case screws, tweezers, a soft brush, 91% isopropyl alcohol, a heat gun or hair dryer, and a multimeter.
Wear eye protection when you open a case. Hobby servo screws are small, stripped easily and end up in the bilge water.
How To Protect Servos From Salt Water: Step-by-Step
Seven methods cover almost every marine project, ordered from least to most involved. Work down the list only as far as your exposure demands: a splash-zone mount needs steps 1 to 4 and the rinse, while a continuously submerged actuator needs the enclosure and pressure handling in step 5.
| Method | Difficulty | Expected service life | Re-serviceable | Continuous immersion |
|---|---|---|---|---|
| Fresh water rinse protocol after every session | Easy | Season after season | Yes | No, it prevents damage |
| Conformal coating on the PCB | Easy | One to two seasons | No | No |
| Dielectric grease on brushes and board | Easy | One to two seasons | Yes | No |
| Resealed case with silicone or RTV | Moderate | Several seasons | Yes, by cutting the bead | No |
| Exterior coating (Plasti Dip, liquid tape, epoxy shell) | Moderate | One season, often less | Rarely | No |
| Sealed dry enclosure with desiccant | Moderate | Several seasons | Yes | No |
| Pressure-compensated oil-filled housing | Hard | Long, if built correctly | Poor | Yes |
1. Choose a Marine-Suitable Servo
Pick the servo and the sealing strategy together, because the servo decides how you seal it. Datasheets rarely state an IP rating, and where one appears, IP67 means dust tight plus temporary immersion under lab conditions — not “keep this running at depth”. Assume splash resistance unless the manufacturer states otherwise in writing.
For submerged work, look at the motor type first. Brushed servos have a commutator and brushes that arc in a conductive fluid, which accelerates wear and can bridge tracks. Digital servos give you better holding torque and typically better sealing than cheap analog units, but a bigger case means bigger joints to seal. Match torque and speed to the load with a healthy margin, because a stalled servo under water draws current and heats fast.
If the mechanism barely moves — a trim tab, a camera tilt, a slow release — keep it above the waterline if you can. Moving the servo into a sealed tube, as one ROV builder did instead of trying to seal the servo itself, sidesteps the whole problem.
2. Disconnect Power and Inspect the Servo
Unplug the battery and disconnect the controller before anything else. Inspect the case, the horn, the output spline, the wires and the connector, and replace anything already damaged — sealing a pitted housing just traps the corrosion you already have.
Look for a split line with a visible gap, a wire entry with no strain relief, and connector pins with a greenish or white bloom. Squeeze the case gently; a servo with a swollen or separated top shell has already been in water. Bristled or green metal on the shaft means corrosion, and the bearing is usually finished at that point.
3. Remove Salt and Moisture Before Sealing
Never seal a damp servo. Rinse it with clean low-pressure fresh water while the salt is still loose, let it dry completely — 24 hours is not excessive — then remove any corrosion with a soft brush or 0000 steel wool on bare metal parts only.
For contacts and the board, a fiberglass pen or 91% isopropyl alcohol is safer than anything abrasive. Salt crystals dissolved into the potting compound keep working on the board underneath, which is exactly how a “sealed” servo dies a month later. Dryness first, seals second.
4. Seal the Servo and Connectors
Four places take the protection, and each needs its own material. The table below is the reference I keep coming back to.
| Seal location | Material | Technique |
|---|---|---|
| Case split line | Neutral-cure silicone or RTV gasket sealer | Open the case roughly 3 mm (1/8 inch) to strip the old seal, lay a single continuous bead, clamp, and let it cure fully |
| Base plate screws | Thin gasket bead plus thread-locking compound | Snug the screws, no more. Thin plastic cases strip and crack if you overtighten |
| Wire entry | Adhesive-lined heat-shrink plus a blob of neutral-cure silicone | Leave a drip loop; this is the failure point most reported on coated servos |
| Output spline | Dielectric grease or a proper shaft boot | Keep the horn area free of coating so the mechanism still moves |
Conformal coating goes on the board, dielectric grease on the brushes, the commutator and the top side of the components. Cover the motor can and the case exterior if you want a sacrificial skin, but remember that coatings trap heat and a potted servo runs warmer than a bare one. Never coat or fill the spline, horn or output boss, and never fill the case to the point where the gearbox cannot move.
Epoxy potting is the extreme version. It works and it is final: you will cut the case open to service it, and the motor inside will run hotter for its whole life. Use it on a spare servo you have already accepted might die, not on your last working one. Modification voids the manufacturer warranty, which is worth remembering before you open a brand new unit.
5. Install the Servo in a Drainable or Vented Enclosure
The enclosure is the real waterproofing; the servo sealing is defence in depth. Mount it above the waterline where the design allows, and if it must sit low, put it in a sealed dry box that stays above the worst wave.
Any box that is not truly hermetic will breathe. As it warms and cools, moist air gets drawn in and condenses on the coldest surface inside, which is often the servo itself. A desiccant pack in the corner handles that, as does a slow pressure-equalising vent covered with a hydrophobic membrane. Drain holes that face downward keep standing water out without letting the box breathe like a chimney.
For a shaft that genuinely has to pass through a wall, a PVC pipe end cap with a drilled hole and a glued-on shaft seal is the classic no-lathe approach used on ROV builds. For continuous immersion, the real answer is a pressure-compensated housing filled with mineral oil and closed with a flexible bladder, so external depth pressure never exceeds the oil pressure and cannot force water into a trapped air pocket. Get the bladder right and it holds; skip it and depth does the work for you.
6. Test It in Controlled Conditions
Test before the boat goes in the water, not during. Power the servo from a bench supply with a current limit or a fuse, sweep it slowly through its range, and confirm smooth movement, correct neutral and a stable current draw.
Write the running current down. That number is your baseline, and a servo pulling noticeably more after a salt session is telling you something before it stops moving. Check connector security by hand, then do a controlled dunk: a tub of water or a spray bottle test tells you far more than a first lake run. Log what you see, and fix any weep at the wire entry while the servo is still on the bench.
7. Rinse and Maintain After Marine Use
This is the step every forum thread names and no guide bothers to write down. Power down and disconnect first, then rinse the assembly with clean low-pressure fresh water while the salt is still in solution, flushing each connector and any drain hole. Do not use a pressure washer; you can force water past seals that were fine an hour ago.
Let it dry fully in a warm, ventilated place, ideally with desiccant in the enclosure, and give it at least a day before you close everything up. Then inspect the shaft, the case, the wires and the connector contacts. Remove any corrosion you find, replace the desiccant, and note anything unusual about the torque or the current draw.
Storage is where a lot of salt damage actually happens. A servo that was rinsed and dried goes into storage fine; one that was just towel-dried and bagged will find white crystals and green contacts when you open the boat in the spring. Multiple builders across the RC forums name the fresh water rinse as non-negotiable, and the reasoning is simple: salt keeps working as long as any moisture is left with it.
Common Mistakes
Heat-shrink as the whole protection. Heat-shrink on a wire is mechanical strain relief, not a water seal, and the hole it leaves in the case is still open. Add a silicone blob at the entry and route a drip loop.
Potting the output shaft. If the spline, horn boss or bearing is covered in epoxy or coated thick, the servo either will not move or grinds itself apart. Keep the output area clear and seal only the wire entry.
Sealing connectors while they are wet or with salt still on the pins. You seal the electrolyte inside the joint. Clean, dry, then close, and add a corrosion inhibitor on the exposed pins afterwards.
Using household grease. Ordinary grease holds water against metal and does nothing electrical. Dielectric grease is designed for it; a thin coat on the brushes and board is the correct use.
Ignoring condensation. A sealed box that is not hermetic pumps moist air in every time it cools. Desiccant and a slow equalising vent handle it, and an open case sitting in a sealed box does not.
Powering a servo during or right after salt exposure. Salt water conducts, so every second the servo is live in brine is another chance for a dead short. Power down first, rinse, dry, then test.
Superglue at the case joints. It absorbs moisture and lets go early, which is exactly where you needed a seal. Use neutral-cure silicone or RTV and let it cure properly.
Overtightening the case screws. Thin plastic cases strip their threads and crack. Snug is enough when a gasket bead is doing the sealing.
Treating a “waterproof” label as a guarantee. Builders on the RC forums report “waterproof” servos frying on first contact with water often enough that it is not surprising. Buy on torque and build quality, then seal it yourself.
Frequently Asked Questions
Can a standard servo survive salt water?
A standard servo survives salt water only briefly and only if you reseal it. Factory cases are water resistant rather than waterproof, and the split line, base screws, wire entry and spline all leak. Salt water then short-circuits the board, corrodes the brushes and leaves crystal residue that keeps working in storage. Seal the case with neutral-cure silicone, protect the board with conformal coating and dielectric grease, and rinse with fresh water after every session.
Is potting a servo in epoxy the best waterproofing method?
Potting is effective but rarely the best first choice. Epoxy gives excellent sealing, but it is non-serviceable, traps heat and shortens the life of the motor inside, and it must never cover the output spline or horn. Many builders get better results sealing the case joints and coating the board, then putting the whole servo in a sealed enclosure. Pot reserved for a spare unit you have already accepted might be written off.
How long can a servo stay underwater?
It depends entirely on the rating and the seal, not on the servo alone. A resealed hobby servo should handle brief dunking and splash zones, not hours at depth. Continuous operation underwater needs a pressure-compensated oil-filled housing with a flexible bladder so external pressure cannot force water into trapped air pockets. Assume a sealed case buys you minutes to hours of accidental immersion, and test the real assembly in a tub before trusting it.
Should I rinse a servo with fresh water after use?
Yes, and treat it as mandatory rather than optional. Disconnect power, rinse away visible salt with clean low-pressure fresh water, flush every connector and drain hole, then let the unit dry completely in a warm ventilated place before storage. Salt keeps corroding as long as any moisture remains with it, which is how apparently dry equipment comes out of winter storage with green contacts. Add desiccant in the enclosure and check the contacts again after drying.
What To Do First on Your Next Launch
Start with the fresh water rinse protocol, because it costs nothing and protects every other part you own. Then open one servo, run a neutral-cure silicone bead around the case split and a blob at the wire entry, and give it a full cure day before it goes near water.
Everything else — conformal coating, potting, pressure compensation — is a scale decision based on how often that servo actually gets wet. Build the rinse habit first, add sealing for the units that see real spray, and only reach for housings and oil fills when you are running below the surface.