Gelcoat is a pigmented polyester resin that forms the glossy skin on a fiberglass hull or part — colour and shine come from it, but the strength comes from the fiberglass laminate underneath, which makes it a cosmetic repair rather than a structural one. Learning how to apply gelcoat for beginners is mostly about preparation and a short working window: clean and abrade the surface, mix catalyst accurately, lay a thin even film, and get the air out before the resin starts to gel. A small chip or gouge takes an hour and a little practice; a full hull is a weekend job and often a shop task.
The one thing experienced builders repeat is that preparation decides the outcome more than technique does. A beautifully rolled repair on a waxed or un-sanded surface will peel off in a season. Everything below assumes you are outdoors or in a well-ventilated space with a respirator, since the resin’s styrene vapour and the MEKP catalyst are both genuinely unpleasant to work around.
Table of Contents
- What You Need
- Step-by-Step
- Step 1: Inspect the Area and Choose the Right Gelcoat
- Step 2: Prepare the Surface
- Step 3: Repair and Level Minor Imperfections
- Step 4: Measure and Mix the Gelcoat
- Step 5: Apply the First Layer
- Step 6: Roll Off and Remove Trapped Air
- Step 7: How to Apply Gelcoat for Beginners Without Defects
- Step 8: Cure, Wet-Sand, and Finish
- Common Mistakes
- Frequently Asked Questions
- How much gelcoat and hardener should a beginner mix for a small repair?
- How long does fiberglass gelcoat take to cure before sanding or polishing?
- Can I apply gelcoat over paint, fiberglass, or bare metal?
- How do I get a smooth, glossy finish without bubbles or wrinkles?
- Why does my gelcoat color look different after it cures?
- Can gelcoat be applied in cold or humid weather?
- Conclusion
What You Need
Gather everything before you open the can, because once catalyst goes in you are working against a clock.
- Gelcoat and matching hardener. Marine-grade polyester gelcoat with an MEKP (methyl ethyl ketone peroxide) catalyst at 1–2 percent by volume. Match the resin family: gelcoat cures properly only with its own catalyst, and mismatched hardener leaves a soft or brittle patch.
- Colour source. The hull’s manufacturer colour code if you have it, or a small hidden chip to take to a gelcoat supplier for a tint match. Judge colour in daylight, never under garage fluorescents.
- Filler for deep damage. Marine filler or putty for gouges deeper than the gelcoat’s roughly 0.02–0.03 inch thickness.
- Solvent. Acetone for cleaning and dewaxing, plus MEK or acetone if you intend to spray.
- Prep supplies. Marine soap, a firm sanding block, 80–120 grit paper for beveling, 180–220 grit for scuffing, painter’s tape and paper for masking, a plastic spreader, and microfiber cloths.
- Application tools. A high-quality synthetic brush, or a wool and foam roller combination, plus a stiff bristle brush for stippling out bubbles.
- Protection. Nitrile or butyl gloves, a respirator with organic vapour cartridges, safety glasses, and closed sleeves.
- Room to cure. A shaded, ventilated, dust-free spot where nothing will touch the repair for several hours.
Paste or liquid is the choice most beginners get wrong. Paste is thickened for vertical surfaces, small fills and controlled build-up; it will not sag or run. Liquid flows and self-levels, which suits a horizontal hull panel and a spray gun, but it runs if you lay it too thick. For your first repair on a small boat, paste is the forgiving option.
How much to mix for a small repair
Mix only what you can apply inside the pot life. A quarter cup of base with roughly 8 to 10 drops of catalyst covers a chip or short scratch. Many builders use the rule of about 24 drops of MEKP per 4 oz (about 118 ml) of gelcoat, around 1.5 percent by volume, and check the pot life in a throwaway cup before committing a full batch. Whatever you mix is what you must finish before it gels.
Brush, roller, or spray
| Method | Skill level | Finish out of the can | Best for |
|---|---|---|---|
| Brush | Low | Good, thin films | Small patches, touch-ups, tight curves |
| Roller | Medium | Best of the three | Chips, gouges, hull panels, most DIY work |
| Spray gun | High | Evenest, but still needs sanding | Large areas, boot stripes, moulding work |
Brushing is fine, and plenty of small repairs are done exactly that way. Rolling gives the most even film if you work a wool roller followed by a foam roller. Spray equipment is a different category: a household paint sprayer tends to lay down a thin, uneven film that still needs heavy sanding, and it needs thinning with MEK or acetone and a 1.8 mm tip or larger at low pressure. For a first job, roller or brush.
Step-by-Step
Step 1: Inspect the Area and Choose the Right Gelcoat
Look at the damage before you touch a tool, and decide honestly whether it is cosmetic.
| What you see | What it means | Action |
|---|---|---|
| Crazing or spider cracks in the surface only | Cosmetic | Grind out to a V-groove and refill |
| Chip or gouge into the colour layer | Cosmetic | Fill, scuff, coat |
| White or pink blotches, soft underneath | Water in the laminate (osmosis) | Shop job |
| Delamination, bulging, cracked core mat | Structural | Repair the laminate first, professionally |
Any sign of water intrusion or delamination needs a professional, not a coat of colour. Then confirm the substrate: bare fiberglass, existing gelcoat, or bare metal. Bare steel and aluminium should get a barrier coat or epoxy primer first, because polyester resin bonds poorly to metal and will creep. Buy marine gelcoat in the matching resin family, check the colour code, and buy more than you think you need — a second small batch beats a failed first one.
Step 2: Prepare the Surface
The goal is a clean, dry, scuffed surface with a sound feathered edge.
Wash with marine soap and water, then strip wax, oil and sealant using the two-rag method: dampen one microfiber cloth with acetone and wipe, then use a clean dry cloth behind it to pick up the residue. Change cloths often. Acetone does not harm cured gelcoat, but it dissolves uncured gelcoat, so keep it away from the repair itself. Let the surface dry fully, then sand.
Grind cracks and sharp edges back with 80–120 grit and cut a shallow V-groove along the line so filler has somewhere to sit. Feather the surrounding sound coating back with 180–220 grit until the boundary disappears under your fingertip. A hard lip is what makes a repair pop out later. Finish with 180–220 grit over the whole repair area, and wipe off dust with a tack cloth or a clean damp cloth.
You do not need to sand to bare fiberglass for a cosmetic repair. Grinding out the damage and bonding to sound existing gelcoat is enough, and stripping the whole panel does more harm than good, since the coating is only about 0.02–0.03 inch thick and aggressive sanding burns straight through to glass.
Step 3: Repair and Level Minor Imperfections
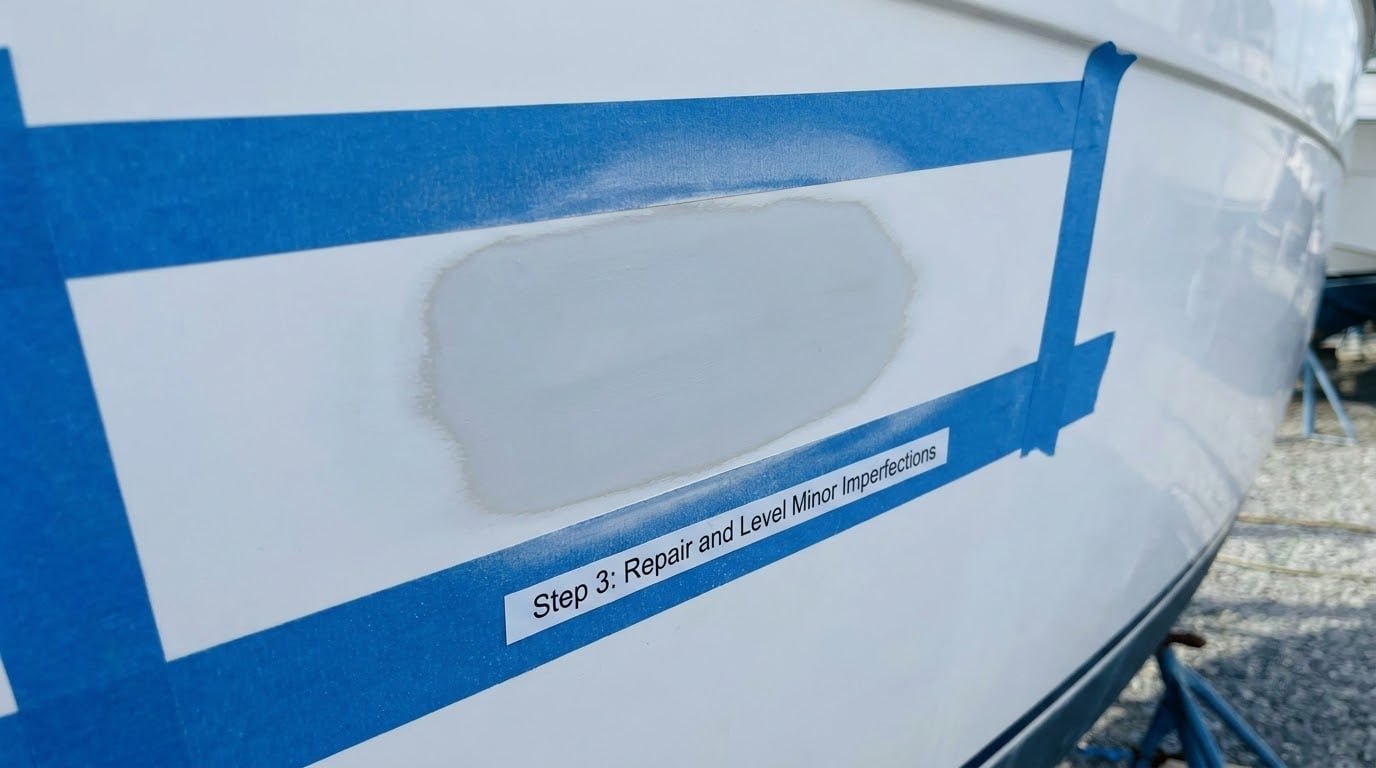
Use filler only where the damage is deeper than the gelcoat film. Thin it with acetone to a peanut-butter consistency, press it into the groove with a flexible plastic spreader, and let it go off per the label. Sand it back with 120–180 grit and a firm block, staying above the fiberglass surface. Never smear filler over a hairline crack — grind the crack out to a V first, or you end up with a strong-looking patch over a crack that still grows.
Mask off adjacent surfaces with painter’s tape, keep dust out with a light cover over the work area, and confirm nothing is within falling range of the repair. Success here means: filler flush with the surrounding surface, edges you cannot feel, colour-free dust only.
Step 4: Measure and Mix the Gelcoat
Pour your measured base into a clean cup, then add catalyst at 1–2 percent by volume and stir thoroughly for a full minute, scraping the sides and bottom. Under-mixed resin cures unevenly and stays soft in pockets. Never add extra catalyst to “speed things up” — an over-catalysed repair cures brittle and cracks later.
| Air temperature | Approximate pot life | Plan |
|---|---|---|
| Around 65 F (18 C) | 15–20 minutes | Comfortable for a first timer |
| Around 75 F (24 C) | 10–15 minutes | Work in one continuous pass |
| Around 85 F (29 C) | Under 10 minutes | Shade the area or postpone to a cooler part of the day |
Temperature moves pot life hard, so on a warm day mix half as much and work faster. Transfer the mixed material to your second container or brush — the residue left in the mixing cup stays live and can exotherm on the bench. Always mix in a clear container you can see into; it catches an unexpected foaming reaction before it becomes a problem.
Step 5: Apply the First Layer
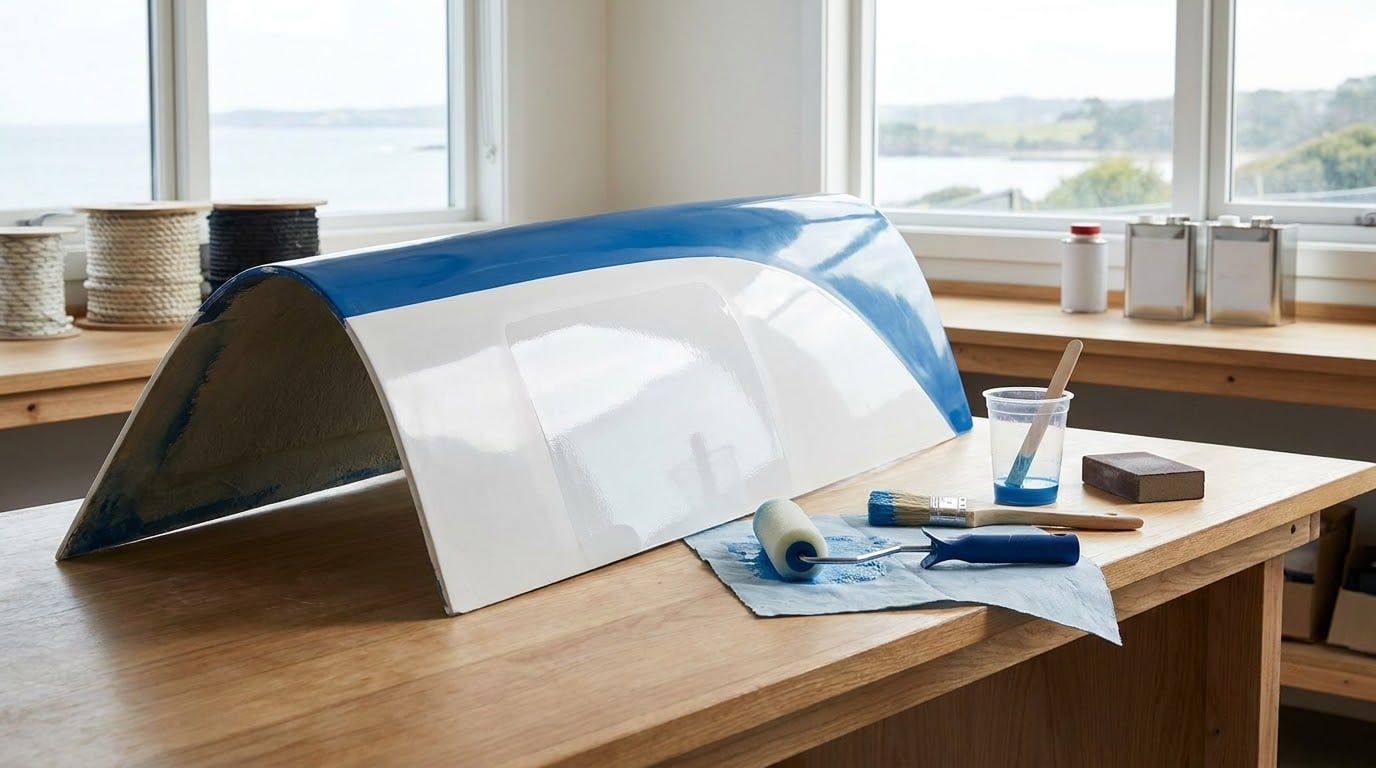
Load the brush or roller lightly. Drip, do not drag, and work from one edge across in even laps, keeping a wet edge ahead of you and overlapping each pass before the previous one starts to tack. Lay a film roughly 15–25 mils thick — thick enough to level, thin enough to cure through.
Signs of good coverage: uniform colour, no brush or roller streaks showing through, and no bare scuffed areas. Wet gelcoat always looks darker and shinier than the cured result, so judge coverage by evenness, not by tone. If you see a dull patch, add material rather than spreading harder, which pushes air in.
Step 6: Roll Off and Remove Trapped Air
Roll the wet film out with a wool roller, then cross-roll at right angles and finish with a foam roller to level it. Follow the contour, keep steady pressure, and stay inside the wet edge — by the time you finish one area, the far edge is setting and rolling a set edge drags wrinkles.
Then stipple: flick a stiff brush lightly across the surface to pop trapped bubbles. If you used a foam roller and it felt like it left almost nothing on the panel, that is usually because you rolled too dry or offloaded too early; a foam roller should be loaded, not dry. Success is a level, uniformly glossy film with no bubbles, runs, or ripple marks.
Step 7: How to Apply Gelcoat for Beginners Without Defects
The whole technique reduces to six things you can hold onto on your first attempt.
- Catalyst at 1–2 percent by volume. More is not faster and it costs you strength.
- Mix less than you want to use. Whatever you mix you must place before gelation.
- Control the film. Thin and even beats thick and fast.
- Work inside the wet edge. Roll off while it still flows.
- Get the air out. Roll, cross-roll, offload, stipple.
- Block oxygen during cure. Waxed gelcoat handles this itself; non-waxed needs PVA, plastic film or a cover.
If the material starts gelling in your pot, do not try to thin it with fresh resin and carry on. Use it on a scrap board or the bottom of a hidden panel if the film is still workable, and mix a fresh small batch.
Step 8: Cure, Wet-Sand, and Finish
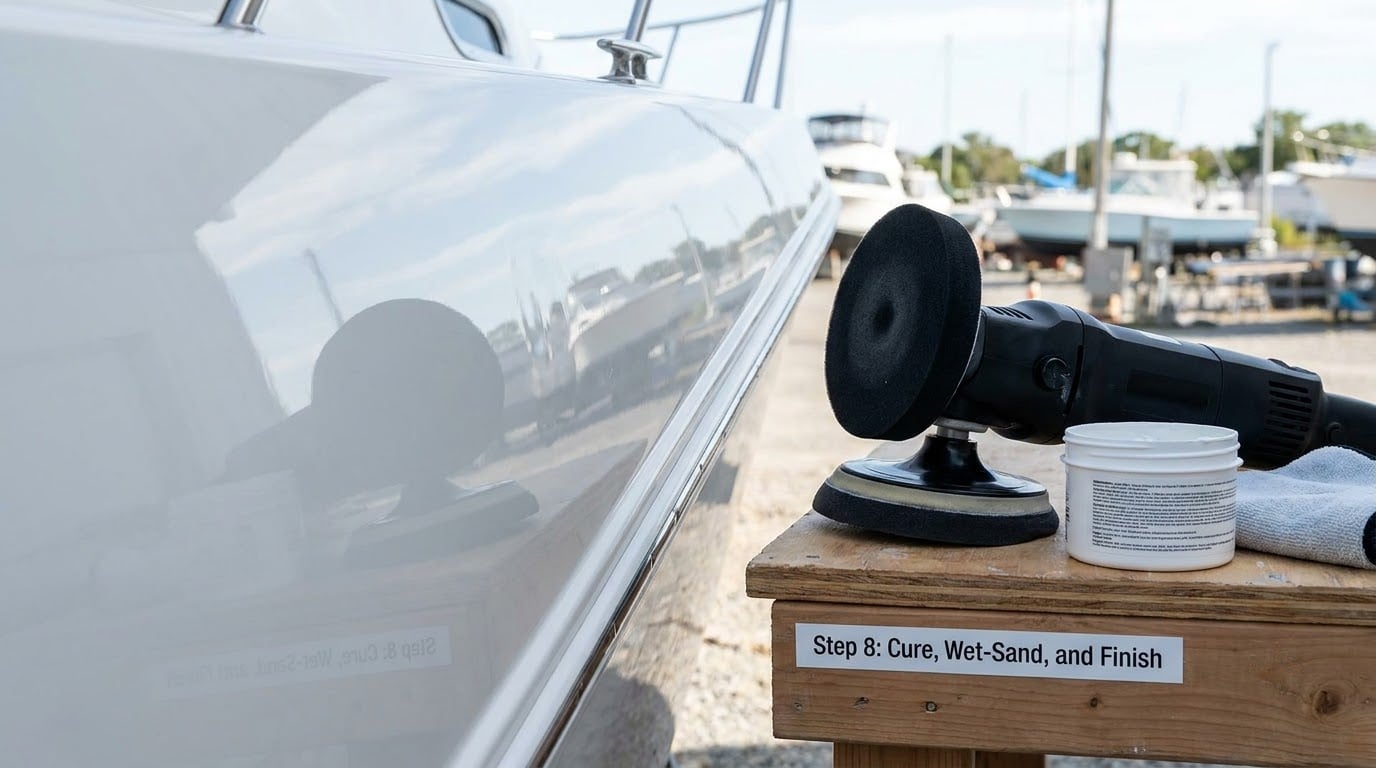
Leave the repair alone for 24 hours before you touch it, longer if it is cool or humid. Gelcoat that stays soft or tacky days later was air-inhibited — oxygen reached the surface and stopped the cure. Sand or scrape the tacky skin off and recoat, and next time use waxed gelcoat or cover the repair with PVA or plastic film while it sets.
Wet sand by hand with a firm block: 320 grit to level the repair, 600 grit to take out scratches, then 1000–1200 grit for gloss. Keep the surface wet, change grit often, and never drop back to a coarser paper to fix a mistake — move up instead. Follow with rubbing compound and a finishing polish, ideally on a buffer with a clean pad. Full cure keeps developing for weeks, so wait a few days before heavy buffing if you can.
The repaired area is now a coating rather than a laminate, so treat it gently: rinse with fresh water, wash with marine soap rather than harsh detergent, and keep it out of the sun for the first few weeks. Wax or polish it once or twice a season. The gelcoat itself will still need replacing in a decade or two; your job now is just to slow that down.
Common Mistakes
Almost every failed beginner repair shows up as one of these symptoms, and all of them are fixable without starting the job over.
Bubbles and pinholes
Air trapped in the film or solvent flashing off too fast. Stipple with a stiff brush while the coat is still wet, and roll more slowly. Next time warm the surface, work in shade, and avoid thick coats.
Wrinkles and orange peel
The film started to set before you finished rolling it. Work faster, mix smaller batches, and finish rolling at the wet edge. Wrinkles cannot be rolled out later — sand the wrinkle level and lay a second thin coat.
Poor adhesion or peeling later
Wax, polish, sealant or paint was still on the surface, or it was not scuffed. Strip with acetone, scuff with 180–220 grit, and recoat. A repair that peels within a season almost always traces back to prep that was rushed.
Runs and sags
Too much material laid too thick on a vertical surface. Brush or roll the excess out immediately, or sand the sag level and add a second thin coat.
Colour mismatch
Wet gelcoat reads darker and glossier than cured gelcoat, and matching under indoor light makes it worse. Compare in daylight against a hidden original surface, and use a tint kit in small test batches on a scrap of the same laminate.
Soft or tacky spots
Air inhibition, or a mix ratio that was off. Sand off the soft skin and recoat with waxed gelcoat or a covered surface. A whole repair that stays rubbery means under-catalysing or under-mixing — strip it back to sound material.
Gel that set in the pot
Too much mixed at once in warm conditions. Halve your batch size and check the temperature table before you start.
Burn-through into fiberglass
Sanding that went too deep. If you hit glass or mat, treat it as a repair: refill, sand level, recoat.
The line between cosmetic and structural is worth repeating. Wrinkles, bubbles, colour and gloss are cosmetic problems you can fix with a sander. Soft spots, blisters and delamination mean water or failure inside the laminate, and those belong to a shop. Practice mixing and rolling on an offcut of laminate first — an hour of that saves a visible repair on the transom.
Frequently Asked Questions
How much gelcoat and hardener should a beginner mix for a small repair?
Mix only what you can place inside the pot life. A quarter cup of base with roughly 8 to 10 drops of MEKP covers a chip or short scratch, and about 24 drops per 4 oz of gelcoat works out near the standard 1.5 percent by volume. Test a small batch in a throwaway cup first, and remember that warm air shortens your working time considerably.
How long does fiberglass gelcoat take to cure before sanding or polishing?
Wait at least 24 hours before touching a repair, and longer in cool or humid conditions. Sand wet with 320 grit, then 600, then 1000–1200, following with compound and polish. Heavy buffing is best left for several days after that, since gelcoat keeps hardening for weeks after it feels dry to the touch.
Can I apply gelcoat over paint, fiberglass, or bare metal?
Not reliably over paint or sealant — that layer has to come off, along with any wax or polish, before you scuff and coat. Over existing sound gelcoat or fiberglass laminate, grinding out the damage and feathering the edge is enough. Bare steel or aluminium needs a barrier coat or epoxy primer first, because polyester resin will not hold on metal on its own.
How do I get a smooth, glossy finish without bubbles or wrinkles?
Keep the film thin and even, work a wet edge ahead of yourself, and roll it off while it still flows. Roll with a wool roller, cross-roll at right angles, offload with a foam roller, then stipple with a stiff brush to pop bubbles. Wrinkles come from rolling a film that has started to set, so mix smaller batches on warm days.
Why does my gelcoat color look different after it cures?
Wet gelcoat always looks darker and glossier than the same material cured, so a good-looking coat can still sand back to the wrong tone. Compare your repair against an original hidden surface in daylight rather than under garage lights, and mix tints in small test batches on a scrap of the same laminate before committing to a visible panel.
Can gelcoat be applied in cold or humid weather?
You can, but both slow the cure. Cold air stretches your pot life and stretches the cure, while high humidity traps moisture against the surface and can leave the film hazy or soft. Aim for a comfortable working temperature with low humidity, work in shade, and leave the repair longer before sanding. Pouring water into a catalyst mix for any reason is a hazard.
Conclusion
Start on an offcut of the same laminate and practise measuring the catalyst, rolling a thin even film, and popping bubbles before you touch anything visible. On the day, treat the surface as the real work: strip the wax, scuff thoroughly, feather the edge, and check that the damage is cosmetic rather than structural. Mix one small batch at 1–2 percent catalyst, lay it inside the wet edge, roll and stipple while it still flows, then let it cure covered from oxygen for a full day. One controlled, bubble-free coat beats three rushed ones every time.