The best paint for a small boat depends on three things: what the hull is made of, what water it sits in, and whether it lives on a trailer or in the water. Match those and the choice narrows to a topside enamel for above the waterline, a primer that bonds to the substrate, and antifouling only if the boat actually sits in the water. A whole repaint on a 16 to 20 foot hull is one person’s weekend job, if you start with the right can and the wrong one ends in peeling within a season.
That last part is the reason this question comes up so often. Cheap paint on a boat is not a bargain, because coating failure is what lets water into the laminate or onto bare metal. Buying the right marine paint is cheaper than repairing what happens after the wrong one lets go.
What follows is the order I work in: what you need to know before you open a can, how to choose paint for a small boat by material and exposure, how to read the label instead of guessing, and how to apply it so it lasts. Where the rules are absolute — like copper antifouling on aluminum — I’ve said so plainly.
Table of Contents
- What You Need
- Step-by-Step: How to Choose Paint for a Small Boat
- Step 1: Assess the hull and its surroundings
- Step 2: Choose the coating system for each zone
- How to Choose Paint for a Small Boat by Hull Material
- Step 3: Check compatibility before you buy
- Match the Finish to the Boat and Water Exposure
- Step 4: Prepare the surface
- Step 5: Apply, then respect the cure time
- Step 6: Inspect before you call it done
- Common Mistakes During Application
- Common Mistakes
- Frequently Asked Questions
What You Need
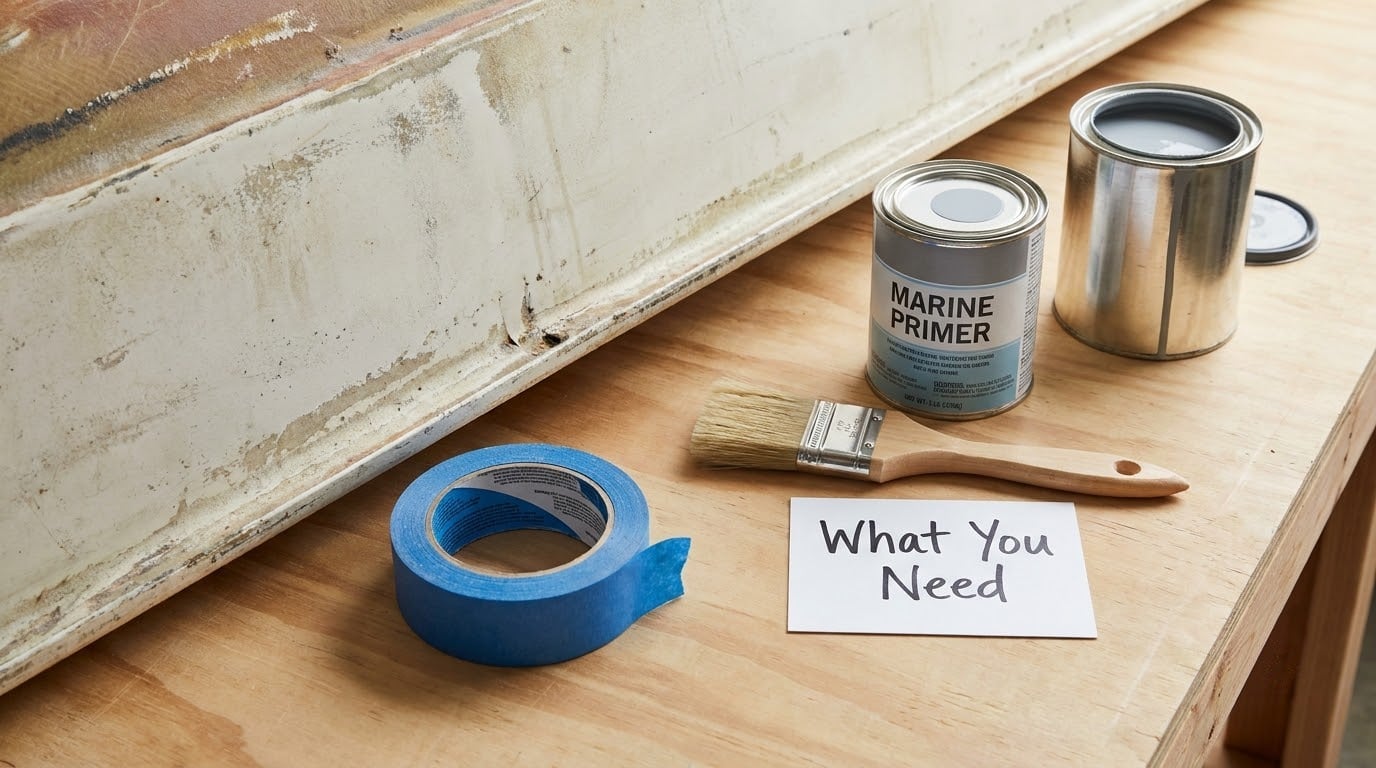
Before you shop, you need six pieces of information. Most of them come from the boat itself, and one comes from a label you should read before you buy anything.
The hull material. Fiberglass, aluminum, marine plywood, steel and plastic all need different primers, and mixing them up is the single most common expensive mistake. Find out what you actually have: knock on it, look at the edge of a wear pad, check the original build sheet, or ask the manufacturer with the hull number.
The state of the existing coating. Sound paint you can scuff and reprime, versus chalky gelcoat, versus bare metal, versus wood that has swollen under the seams — four very different starting points. If you don’t know what the current coating is, treat it as unknown and plan a tie coat.
The exposure level. Fresh lake water, brackish river water, and saltwater foul in different ways and dry at different speeds. A paint sold for one may behave badly in another, and some are labeled for one water type only.
Where the boat lives. A trailered or hoisted boat can skip antifouling entirely. A boat that sits on a mooring or at a dock all season cannot.
The finish you want. Gloss, satin, or a textured non-skid deck. This is mostly cosmetic, except that textured deck coatings need a compatible base and hide foot scuffs.
The manufacturer’s data sheet. Every legitimate marine coating has one, printed on the can or downloadable from the maker. It lists compatible substrates, coverage, temperature limits, drying versus curing times, and overcoating windows. The bulleted spec on the retailer’s shelf tag is a summary and sometimes gets it wrong; the data sheet is the document that governs.
For the work itself: a scraper, 80 to 120 grit and 180 to 220 grit sandpaper or a sanding pad, a stiff brush, masking tape, a dust mask and eye protection, a good brush or a small foam roller, a mixing stick, and rags. You also want the matching primer from the same manufacturer as the topcoat, plus whatever seam compound or caulk your hull’s construction calls for.
Step-by-Step: How to Choose Paint for a Small Boat
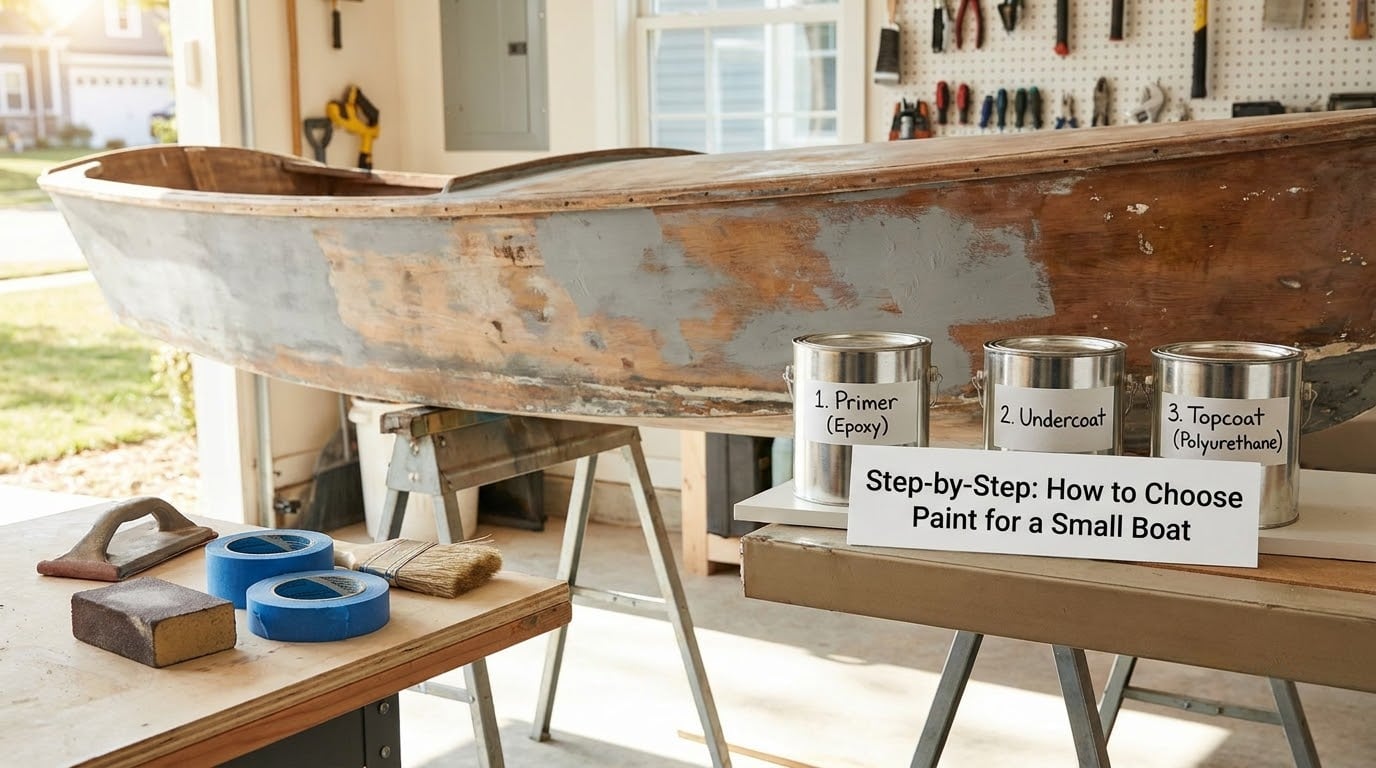
Six steps, in order. Most people who get it wrong skipped step two or three.
Step 1: Assess the hull and its surroundings
Look at the boat before you look at the paint catalog. Where does it spend its life, how much of the season is it in the water, how much sun does the topside take, and is there room to lay panels flat and let them dry between coats?
That last question matters more than people expect. A small boat rarely has a flat floor big enough for a hull side, so you will be working on curved surfaces propped up on sawhorses, with limited room for a second coat to cure before the weather turns. That is a real argument for a product with a forgiving overcoating window.
Step 2: Choose the coating system for each zone
A boat is not painted with one product. It is a system, and each zone has a job:
- Primer seals the substrate, blocks moisture, and gives the topcoat something to bond to. On metal it is also corrosion protection.
- Topside paint or enamel is the visible layer above the waterline. It carries UV resistance, gloss and color, and takes the abrasion of fenders, docks and boarding.
- Antifouling (bottom paint) goes below the waterline and exists to discourage or shed algae, slime and shell growth. It only works by immersion.
- Bilge paint is a light-duty finish for interior floors and sides that get damp but see no sun.
- Non-skid is a textured additive or coating for decks and sole, purely for grip and scuff resistance.
Decide which of these you actually need. A trailered boat needs primer and topside, full stop. Skip the rest and your job gets smaller by half.
How to Choose Paint for a Small Boat by Hull Material
Fiberglass and gelcoat. The default for small skiffs, dinghies and many center consoles, and the easiest substrate to work with. If the gelcoat is sound, scuffing and priming is enough; if it’s chalked, faded or locally thin, sand back to good gelcoat or fair the low spots. The real hazard is moisture already inside the laminate. Blisters and soft spots mean water got through the gelcoat, and painting over them just seals the problem in. Fix the cause, let the hull dry fully, then coat.
Aluminum. Used on jon boats, flat-bottom skiffs, pontoons and many small sailboats. Aluminum needs a corrosion-inhibiting primer, and it must be kept out of contact with anything copper — fasteners, anodes, wire, and especially copper-based antifouling paint. This is not a preference; it is a galvanic reaction that will eat the hull from the inside out at the paint line. Never put copper-based bottom paint on an aluminum hull. Keep fasteners isolated, keep anodes healthy, and use compatible non-copper coatings.
Wood and marine plywood. Planked and plywood hulls move with the water, and a rigid film will crack over a season. Flexible coatings are the requirement, and seams need to be well sealed before anything goes on. Brightwork — varnish or oil — is a legitimate choice for a wooden hull that will be maintained, but it is a commitment, not a one-weekend project.
Steel. Uncommon on small recreational boats but common on jon boats and utility hulls. Steel rusts from the inside out if water and oxygen get behind the coating, so the system is anticorrosion primer plus barrier plus topcoat, with every weld, seam and fastener treated.
Plastic and rotomolded hulls. Polyethylene and similar plastics need no primer but do need a coating that bonds to plastic, usually an adhesion-promoting product. Painting bare polyethylene with ordinary paint peels off in sheets within weeks.
Step 3: Check compatibility before you buy
Take the data sheet and confirm four things: which substrates it will bond to, whether it will go over the coating that’s on there now, what primer it requires, and what the coverage and temperature limits are.
Coverage is quoted in square feet per gallon, and it varies with how you apply. Rolling and tipping typically lands near the low end of the published range; a brush on a small hull gets closer to it than a spray gun does. Small boats are also fussy about how much you actually need — a 16 foot skiff uses a small fraction of what people buy by reflex. Measure the area, read the coverage rate, and add one extra coat’s worth rather than a spare gallon.
If the current coating is unknown, the data sheet will tell you whether a tie coat is needed — a barrier product formulated to adhere to unknown films. It’s a real technique, not folklore, but it only works if the old coating is sound and properly prepared.
Match the Finish to the Boat and Water Exposure
Fresh water only. A lake boat is the easiest case. Growth pressure is low, so a straightforward quality enamel or a hard antifouling is fine if the boat lives in the water. Many lake owners simply keep the boat on a trailer and skip bottom paint.
Brackish and tidal water. Water that alternates fresh and salt is the hardest on coatings, and some products are labeled for one or the other only. A boat that runs a river to the coast has to pick the more demanding label and accept that no paint is ideal for both.
Salt water. Salt acts as an electrolyte and accelerates every corrosion mechanism, which is why the primer step matters more on a coastal boat than anywhere else. Below the waterline, choices narrow to ablative or hard antifouling:
- Ablative antifouling wears away in layers, shedding growth as it goes. It lives in the water and dies on the trailer, so it has to be refreshed each season. It’s forgiving — no thick buildup to strip — and it keeps working in low-flow conditions better than most people expect, though moving water and regular cleaning still help.
- Hard antifouling holds a smooth film for years and is the choice when the bottom gets cleaned often and you want efficiency. The cost is that it builds up, and eventually it has to come off, which is the worst job in small-boat ownership.
- Copper-free and biocide-free formulas exist for aluminum hulls, for regions where copper is restricted, and for owners who would rather not handle a toxicant.
Above the waterline, gloss is easier to keep clean and reflects heat better; satin looks modern and hides wear; a textured non-skid deck coating is the practical choice on any sole people walk on barefoot. Dark colors run hotter in summer sun, which on a small hull with no cabin can matter.
Step 4: Prepare the surface
Cleaning, then sanding, then sealing, in that order. Wash off salt, dirt, oils and any wax or polish residue, and let the surface dry completely. Then scuff or sand: coarse enough to scuff a glossy surface and provide tooth, fine enough that you are not cutting through gelcoat or thinning the substrate.
Fill any fastener holes, dings, seams and nail heads with the marine filler the system calls for, and sand it flush. Mask before you prime, not after.
Step 5: Apply, then respect the cure time
Read the label for the temperature and humidity limits before you open the can. Most coatings want a dry surface, a surface temperature above the stated minimum, and no application within a few hours of the dew point — if the hull is cool enough for condensation, the film will not bond.
For most small-boat owners, rolling and tipping is the sweet spot: a short-nap foam roller lays the paint down and a stiff brush tips off the excess so the film is even. Brushing alone is fine for trim and tight corners. Spray gives the smoothest finish but needs a gun, a compressor or a rental, masking discipline, and a sheltered, dust-free place to work — rarely available to someone working in a driveway. For a single weekend owner, the honest answer is that a well-rolled finish is achievable and a well-sprayed one is not.
Give each coat its full stated drying time before recoating, stay inside the overcoating window, and cure before launch. “Dry to touch” and “ready to go in the water” are very different milestones, and the data sheet gives both.
Step 6: Inspect before you call it done
Walk the hull with a flashlight at an angle to the light. Look for runs, sags, missed patches, and thin spots at edges and around fasteners. Check that the coating is uniform, especially at the waterline and at any hardware. If a defect will not sand out cleanly, the answer is another coat, not launch day.
Common Mistakes During Application
- Sanding too fine, or not at all. A mirror-smooth surface with no tooth gives paint nothing to grip, and it peels later.
- Skipping the mask. One clean stripe of tape after the paint is on means feathering the edge by hand for an hour.
- Painting into damp or cool conditions. Dew, fog and temperatures below the label minimum are the most common causes of a failed job, and none of them look like mistakes while you are doing them.
- Applying one thick coat instead of two thinner ones. Thick films trap solvent, cure unevenly and peel in sheets.
- Launching on dry-to-touch time. Immersion before full cure is how a good-looking job ends up soft and pitted.
- Mixing products from different manufacturers. A primer from one maker and a topcoat from another is a compatibility gamble unless the data sheet says the pairing is approved.
Common Mistakes
These are the errors that cost people the most, and they mostly happen at the buying stage rather than the painting stage.
Using copper-based antifouling on an aluminum hull. The single most destructive beginner mistake on this list, and the one most repeated in owner forums. Copper and aluminum are far apart on the galvanic series, and the copper drives an electrical reaction that pits the aluminum. The fix is impossible retroactively — you are replacing damaged metal. Prevent it by choosing a copper-free coating approved for aluminum in the first place.
Using household exterior paint or automotive paint on the hull. Both are made for a dry surface in mild weather. Neither handles immersion, salt water, or the flexing of a hull, and car paint in particular will chalk and peel off a boat in a season. Marine paint exists because of that environment, not because of marketing.
Skipping the primer to save a step. On metal you lose corrosion protection. On fiberglass you lock moisture into the laminate. On unknown old paint you have nothing that guarantees adhesion. Primer is the cheapest part of the system.
Buying antifouling for a boat that never touches the water. It does nothing useful out of the water, and a hard film left on a trailered hull simply sits there taking abuse. Use a quality topside coating instead and save the money.
Painting in bad weather. Too cold, too humid, too much dew, or wind carrying dust into a wet film. No label exception covers this — the label already told you the limits.
Trusting a shelf tag over the data sheet. Retailer quick-reference panels get abbreviated, and the abbreviation drops conditions. Owners repeatedly report buying a product marked for all waters that the manufacturer lists as saltwater-only. Read the sheet.
Painting over osmotic blisters. On fiberglass, blisters mean water is already inside. Patching the surface traps it and the damage spreads under the new paint.
Two professional tips that save more time than anything else: buy the whole system from one manufacturer and follow its compatibility chart, and photograph every stage before you cover it — when a problem shows up eight months later, you’ll want to know what was under there.
Frequently Asked Questions
Can I use regular exterior paint on a small boat hull?
No. Exterior house paint is formulated for dry, sheltered surfaces and will blister, chalk and peel on a hull that flexes and gets wet. On a metal hull it will not stop corrosion, and below the waterline it does nothing at all. Use a marine system: a compatible primer, a topside enamel above the line, and antifouling below it if the boat lives in the water.
What type of paint is best for a fiberglass boat?
A high-quality marine topside enamel or polyurethane over a fiberglass-compatible primer, applied after the gelcoat has been assessed. If the gelcoat is sound, scuff and prime it. If it is chalked, sand back to sound gelcoat or fair the surface first. Any blisters mean water is already in the laminate and must be dealt with before painting.
Do I need primer before painting a boat?
Almost always. Primer seals the substrate, blocks moisture ingress, gives the topcoat something to bond to, and on metal it provides the corrosion protection that the topcoat alone cannot. The exceptions are bare plastic hulls, which need an adhesion promoter rather than a primer, and some self-priming enamels, which still follow their own data sheet for how many coats to apply.
What paint should I use below the waterline?
Antifouling, chosen by hull material and water type. On aluminum, never use copper-based antifouling — copper drives galvanic corrosion that pits the metal. Choose copper-free or biocide-free formulas approved for aluminum. On fiberglass and wood in salt water, compare ablative against hard based on how often the bottom gets cleaned and whether you mind stripping buildup later.
How long should boat paint dry before the boat is used?
Treat dry to touch and ready for immersion as two different milestones. The can’s drying time is usually measured in hours; full cure takes days, and the data sheet gives the figure. Launching early leaves a film that is soft, will scuff and pit, and may peel later. If the weather is not cooperating, it is better to wait for the next window than to launch into a partly cured coating.
Can I paint over an old boat coating?
Only if you know what the old coating is and it is sound. Where the previous paint is unknown, use a tie coat — a barrier product designed to adhere over existing films — after thorough preparation. Sand or blast back to bare substrate when the old coating is loose, blistered or peeling, because nothing applied on top of a failing film will last.
Start with two answers and everything else gets easier: what the hull is made of, and what water it lives in. Those two facts rule out most of the catalog, tell you whether you need antifouling at all, and set the primer that everything else goes over. Read the data sheet for the products that survive that filter, work inside the temperature and cure windows it lists, and a small-boat paint job is genuinely a weekend project.