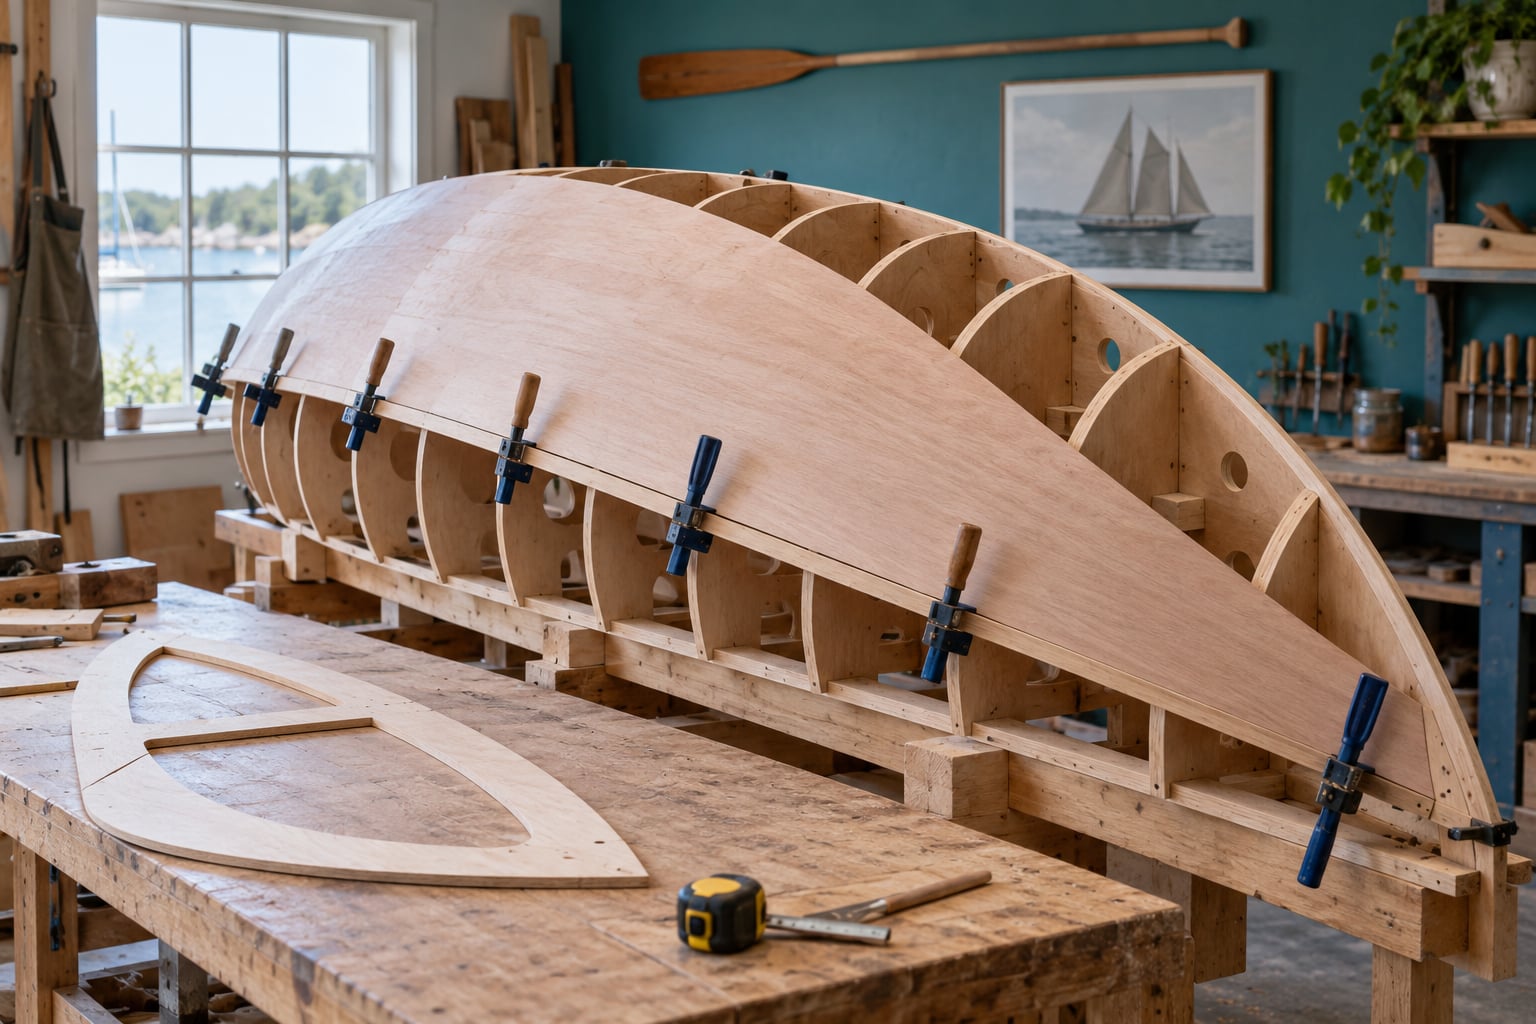
A curved flexible hull is a boat hull whose sections are bent rather than carved or chopped from a solid form, with a skin that flexes under load and returns to its shape. You make one by holding the curve on a straight, level strongback, building the curved ribs or planking against that reference, locking the shape with longitudinal stringers, then pulling a skin taut over the frame.
For a small experimental boat, a model hull, or a marine robot platform, that is the whole method. A beginner needs a weekend of shop time for the first mould and a few weeks for a complete hull, and the cheapest way to learn it is to build one small test section before committing to the full length.
The rest of this guide walks through the materials, the six build steps, and the failures that show up on the way through. I have kept the method material-neutral, because the right skin for a river kayak is wrong for an ocean-going drone hull, and the choice changes more than anything else in the build.
Table of Contents
- What You Need to Build a Curved Flexible Hull
- Step-by-Step: Forming a Curved Flexible Hull
- Common Mistakes
- Frequently Asked Questions
- How do I make a curved flexible hull without building a full mold?
- How do I bend plywood into a boat hull without cracking it?
- Should I lash, glue or screw the frame together?
- How do I stop a flexible hull from twisting?
- What material bends easiest for a boat hull?
- Can a flexible hull work for a small sailing robot or ocean drone?
- Conclusion
What You Need to Build a Curved Flexible Hull
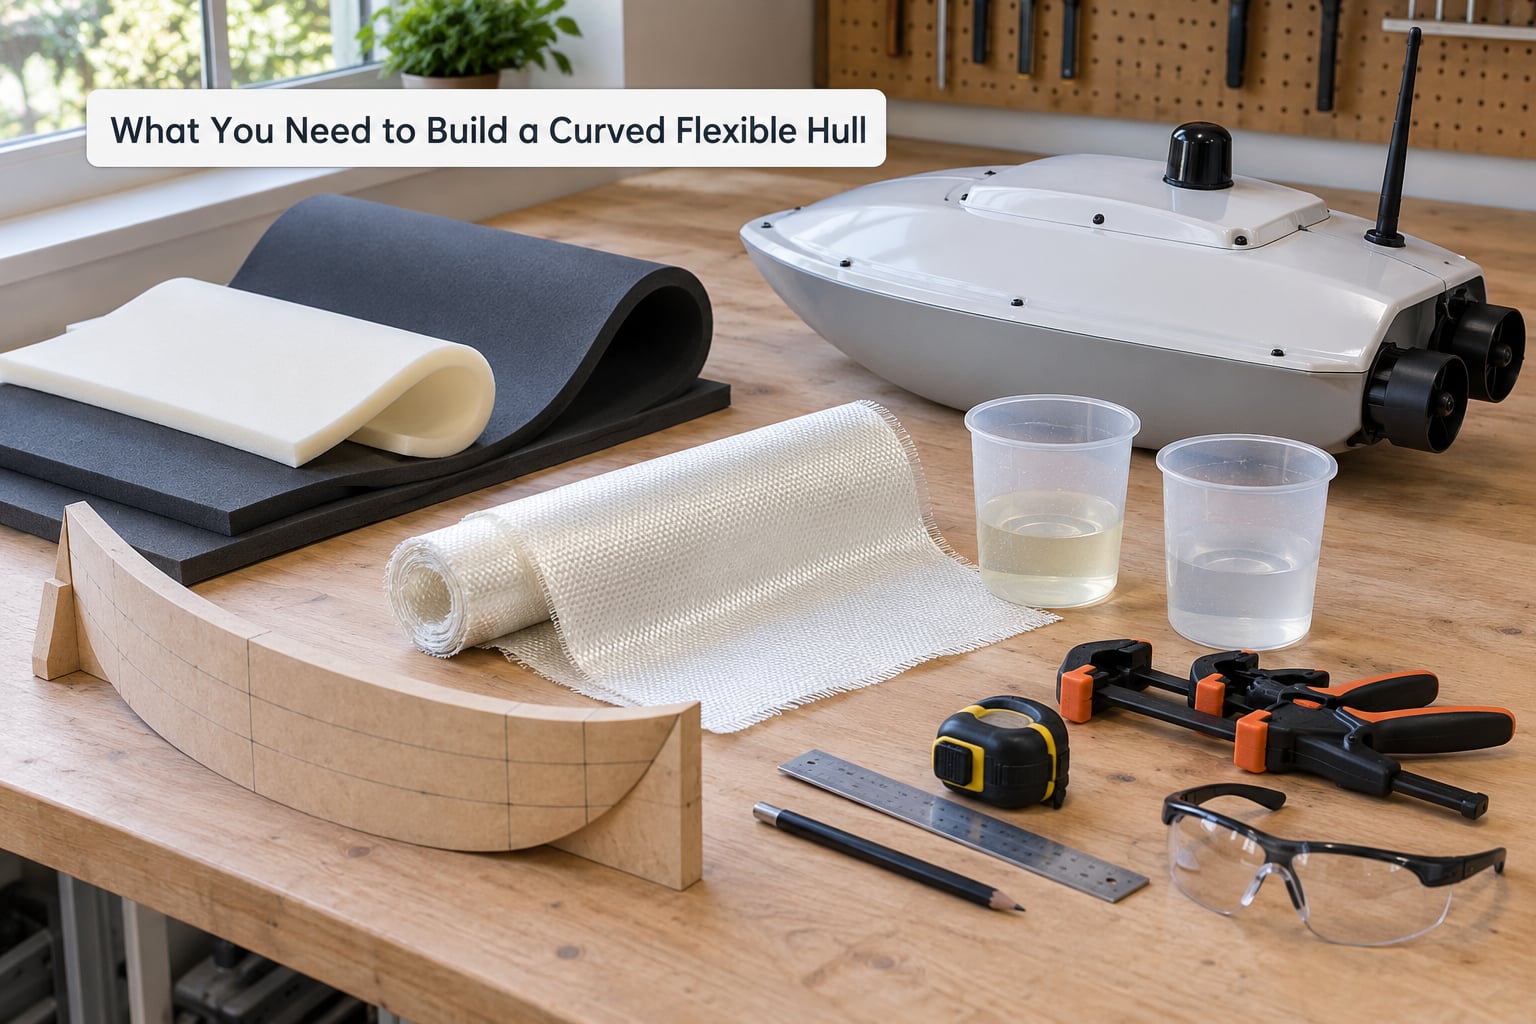
Start with the reference, because everything else is built against it. A strongback is a long, straight beam that runs the length of the boat and carries every frame in exactly the same plane; a mould is the curved cross-section template that fixes the shape at a given station. Kayarchy, the free skin-on-frame handbook most builders work from, treats mould construction as the foundation of the whole craft rather than a shortcut.
Reference and template materials
A box beam of 2 by 4 lumber, a straight laminated rail, or a length of scaffold tube works as a strongback for a hull under about 4 meters. Longer hulls need a deeper beam or a pair of beams to resist the twisting moment that a single straight member will happily accept.
For moulds, 15 to 20 mm plywood cut from a full-size drawing is the usual choice. Anything thinner distorts when wet; anything thicker is dead weight you carry through the whole build.
Curved frame material
- Marine plywood in 6 to 12 mm thickness for fuselage-frame construction, where the ribs themselves are cut to shape.
- Strip timber, usually 15 to 25 mm square or rectangular section, for steam-bent ribs.
- Thin solid timber, 6 to 10 mm, where lightness matters more than stiffness.
- Foam board or expanded polystyrene where the hull must float and carry almost no load.
Nomad Boatbuilding documents the traditional Arctic alternative: thin cedar ribs lashed to longitudinals with synthetic sinew, then covered with a ballistic nylon skin. That build is worth studying if you want to understand how a frame can flex and still survive repeated impacts.
Skin material
- Ballistic nylon or Dacron, which shrinks onto the frame as it dries.
- Polyester cloth with epoxy, for a rigid laminate with a little give in it.
- Hypalon or similar coated fabric, for abrasion resistance on a working hull.
- Glass fabric and epoxy, for the lightest option once you understand timing.
- ABS, HDPE or thin plywood sheet, for a semi-rigid hull that is still lighter than a moulded one.
Duckworks Magazine makes the material case better than anyone: a fuselage-frame skin boat works with quarter-inch (6 mm) ply because filleted epoxy joints replace the thick stock that mid-century builders needed, and the frame keeps a controlled flex that a bolted wooden frame does not.
Adhesives, fasteners and tools
You want epoxy, a filleting compound or thickened epoxy, and one of three fastening methods: adhesive only, synthetic sinew lashing, or mechanical fasteners. Clamps, a staple gun or upholstery tacks for temporary skinning, a rasp, a scraper, sanding blocks, a mixing scale accurate to a gram, and a vacuum cleaner for dust are all in scope.
Add a string line for the symmetry check, a tape measure, a bevel gauge or combination square, and a set of station templates cut from card or thin ply. Safety glasses, nitrile gloves, a respirator for resin work, and ear protection if you are shaping with a router. Nobody needs to power-tool a hull to build one, so ear protection is optional rather than standard.
Safety notes before you start
Handle epoxy and polyester outside or with forced ventilation, and read the resin’s own datasheet rather than assuming. Epoxy sensitisation is permanent once it happens. Wear a respirator when sanding cured laminate, keep dust out of the breathing zone, and treat any steam or hot water for bending as genuinely hot.
Step-by-Step: Forming a Curved Flexible Hull
The sequence below runs in build order, from the shape decision through to the water test. Each step includes the check that tells you it worked, because in this craft most mistakes are caught at exactly one point where you could still fix them cheaply.
1. Define the Hull Shape, Curvature and Load Requirements
Start from displacement and payload, not from a picture. Write down the mass of the hull, the motor or sail, the battery or ballast, and the crew or cargo, then add a safety factor. That total number determines everything downstream: beam, depth, skin thickness and how much curvature the structure can carry without distorting.
Choose the curvature deliberately. A cylindrical section is the simplest curve to build and the easiest to hold, which is why cylinder-mould multihull designs insist on simple curve sections. The same published guidance notes that flares, steps and hollows are not easily produced this way, and that these hulls need slenderness ratios of 10:1 or finer, meaning a hull length at least ten times the depth of its curve.
If you want a compound curve, meaning the section changes shape along the length, work out where the compound starts before you loft anything. Blending a hard chine into a round bilge is a different job from bending one smooth arc, and the difference shows up in the frame thickness you need.
Set the bending radius you intend before selecting material. A tight radius in the bow needs either a longer curve or a laminate that is thin enough to survive it. If you curve only the last 20 percent of a hull’s length, the bow reads blunt, which is the single most common complaint in open hull-design threads.
2. Build a Full-Size Mold or Forming Surface
A strongback must be straight, level and square before a single frame goes near it. Ashes Still Water Boats puts this more bluntly than anyone: a twist in your strongback becomes a twist in your boat, permanently, and no amount of fairing puts it back later. Check level with a long spirit level across the beam and square it with the 3-4-5 method before you do anything else.
Next, cut your moulds. A male mould is convex and sits inside the hull; a female mould is concave and sits outside it. Male moulds let you build the inside of the hull directly against the surface you designed, which is easier for thin, flexible construction where you want to see and fair the inner face. Female moulds suit a moulded composite layup, where the outer surface is the one that has to look right.
Either way, notch the mould so it can be removed after the stringers are in place. This is the step people forget, and a mould that will not come out means dismantling the boat to get it free.
Kayarchy’s rule of thumb on mould count is the useful part: two moulds often suffice, one is enough for a long thin hull, and a short fat hull with different end shapes needs four. The deciding factor is whether the cross-section changes along the length. If it does, you need a mould at each distinct station.
Finish by checking symmetry. Hang a plumb line from each station, mark the baseline on a floor plane, and measure from it rather than eyeballing. Any difference you find here shows up as a lopsided boat later.
3. Select a Flexible Hull Material
The material choice sets your bend radius, your fastening method and your finishing schedule, so it comes before any cutting. This table compares the options most builders actually consider.
| Material | How the curve is held | Flex behaviour | Bonding method | Marine exposure |
|---|---|---|---|---|
| Thin marine plywood, 6 mm | Mould and pedestal, cut to shape | Controlled flex; returns to shape | Epoxy with fillets | Good with a sealed surface |
| Steam-bent strip timber | Mould, held while cooling | Sprung, durable, absorbs impacts | Lashing, epoxy or bolts | Excellent |
| Foam board | Cut and bonded to ribs | Very flexible, low strength | Contact adhesive or epoxy | Fine for models and floats |
| ABS or HDPE sheet | Heated and pressed over a mould | Semi-rigid; resists impact | Adhesive, heat welding or rivets | Very good |
| Glass fabric and epoxy | Laid up in a female mould | Stiff unless laminate schedule is tuned | Epoxy cure | Excellent with a good topcoat |
| Ballistic nylon or Dacron | Tensioned over the frame | Flexible; shape held by tension | Lashing or stitching, then resin | Needs a coating in full salt |
| Hypalon or coated fabric | Tensioned over the frame | Flexible and abrasion resistant | Bonded seams and hardware | Excellent |
Bend radius rules of thumb apply across all of them. Solid timber bends further than cross-banded plywood. Cross-banded marine ply roughly twice its thickness in radius is safe; 1/4 inch (6 mm) ply has been bent successfully at around 12 inches (300 mm) with heat and pressure. Anything tighter wants a laminate of thin plies bonded first, because a single thick sheet splits on the outside of the bend.
Grain direction is the other half of the rule. A panel bent with the grain running across the curve will crack; with the grain running along the curve length, it will take the radius. Draw your bend lines on the sheet before cutting, and lay the parts out so they nest.
For marine robots and ocean platforms, choose for impact tolerance and repairability over minimum weight. A hull that flexes on purpose and can be patched in the field is worth more than a lighter one that cracks.
4. Shape the Hull and Add Temporary Supports That Hold the Curve
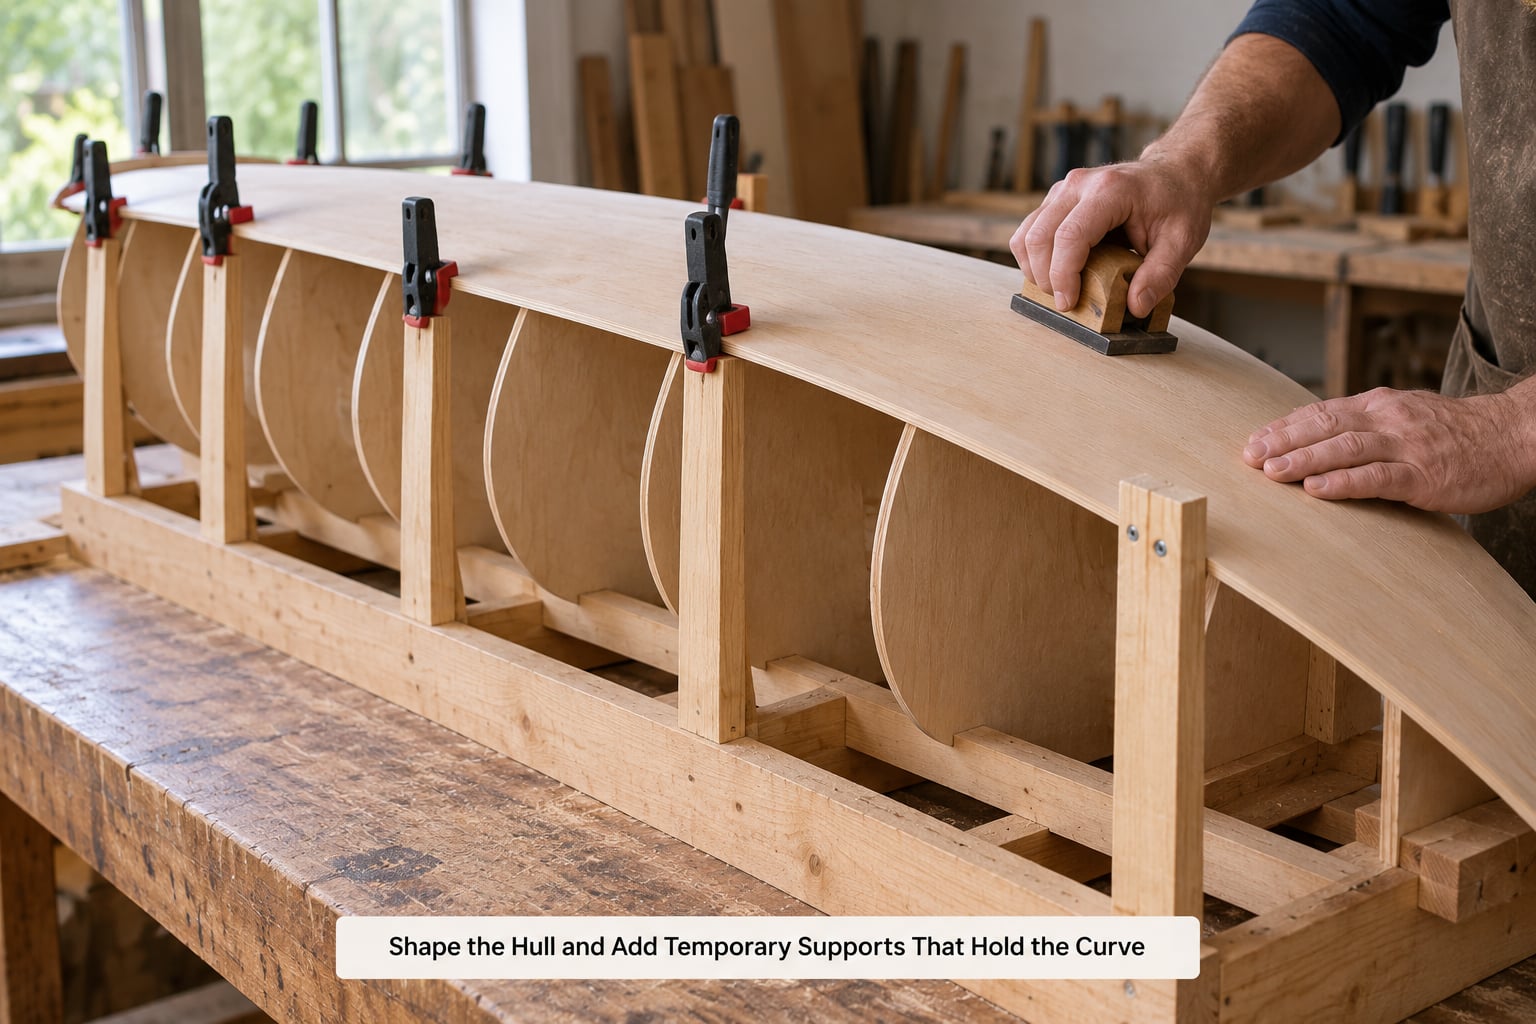
Transfer your station drawing to the strongback and cut the frame material. Sawn plywood frames follow the section outline; steam-bent strip timber follows a mould and is held there while it cools. For steam bending, a steam box is traditional, but wrapping timber in towels saturated with boiling water is reported as sufficient for gentle bends on small work.
Fit frames at each mould station and check them against the mould before fixing anything. Builders using plank-and-contour methods dry-fit a whole group of planks first specifically to confirm the frames are holding fair curves before any glue goes down. It takes an hour and saves a rebuild.
Add internal frames or temporary braces as soon as you have enough structure to hold a shape. Cross braces and diagonals keep the section from racking; longitudinals hold the curve along the length. Leave stringer stock long by an inch or so at the ends so lashings can be tightened after assembly, rather than cutting to length and locking in a slight misalignment.
Now fix the longitudinals. The sheer stringer carries the top edge, the chine stringer carries the hard corner, and the keel and kingplanks carry the bottom and the cockpit edge. Notch them to the frames and lash or glue them in place. This is the step that converts a wobbly frame into a hull that holds its own shape.
Apply the skin last. For a heat-shrink fabric, tension it as you tack and let the drying fabric do the pulling. Chesapeake Light Craft documents the classic technique: stitch or wire the panels together, tighten from the stern forward with a mallet, and work the seam alignment against the transom so the panels meet corner to corner. Where a seam refuses to line up, that is a frame out of position, not a fabric problem.
Do not expect the bare frame to feel solid. Skin-on-frame builders routinely describe the frame as alarmingly wobbly on sawhorses until the skin shrinks taut and balances the whole structure. Judge the hull after skinning, not before.
5. Reinforce High-Stress Areas Without Killing the Flex
Reinforce the keel, stem, transom, motor mount and any point that takes an impact, because that is where loads concentrate. Add an extra laminate, a backing plate or a doubled rib in those areas and nowhere else. Over-reinforcing is a real failure mode: a hull that is rigid everywhere has no reason to flex anywhere, which defeats the point and adds weight.
Watch for stress risers. Hard interior fittings such as shelving, bulkheads and battery boxes are the classic source, because the hull flexes around a fitting that does not. Flexible hulls on production GRP boats have failed exactly at those interfaces, and the fix is a bonded, compliant joint rather than a rigid block screwed to the shell.
Filleted epoxy joints do a lot of heavy lifting here. A fillet runs the full length of every frame and stringer intersection, spreading load and removing the sharp inside corner where cracks start. It also lets you use thinner material than traditional practice, which is where the weight saving comes from.
Keep a plan for where the flex is meant to occur. On a wave-following hull or a robot platform, the intended flex line is usually fore-and-aft along the keel region. Reinforce across it and you get a hull that is stiff where it needed to move and weak where you made it thick.
6. Seal, Finish and Test the Hull
Fair the surface first, because a finish will only amplify what is underneath. Fill low spots with epoxy thickened with wood flour or a filled fairing compound, sand back with a block, and repeat. Chesapeake Light Craft uses the same material as a tack weld: epoxy and wood flour brushed on at ketchup consistency to hold pieces in place while they set.
Expect fairing to be the slowest part of the build. Excess epoxy over a compound surface runs and pools, and scraping it back costs hours. Work in thin coats, keep the surface cool, and resist the urge to fill a dip that the skin will pull out on its own.
Seal and coat next. Balsa, ply end grain and any exposed core need a barrier coat before epoxy so the resin cannot wick into the cells and print through later. Fill the seams, sand between coats, and finish with a coating appropriate to the water you will be in. A nylon skin intended for salt water needs a real coating, not a sealer.
Then test, in this order:
- String-line symmetry check. Before skinning, hang a string from the bow and stern stations and check that every cross-section sits square to it. Fix any twist now.
- Leak test. Float the hull and leave it, or fill it and watch for a drop in level. A flexible hull that leaks is usually leaking at a seam or a fitting, not through the skin.
- Load and flex test. Add weight in increments to your design payload and watch where the flex appears. Flex should be spread and should return; a crease or a permanent set is a failure.
- Righting and capsize test. Inverted, a flexible hull has real reserve, which is a genuine safety margin worth knowing about before you rely on it.
Signs of trouble are specific: a seam that opens under flex cracking means an unfilleted joint, a sharp crease that does not spring back means the skin was stretched past its limit, and a soft patch that dents under a boot means the laminate schedule stopped too soon in that area.
Common Mistakes
A twisted strongback produces a twisted hull. This is the one to check twice, because it cannot be fixed later. Level the beam, square it with the 3-4-5 method, and confirm before installing a single frame.
Plywood cracks on the outside of the bend. Model boat and boatbuilding builders hit this constantly. Bend to a larger radius than you think you need, use thinner material, laminate before bending rather than after, over-bend progressively across several attempts rather than forcing it once, and keep the grain running along the curve.
Reinforcement everywhere. Adding weight to fix a soft feeling is a natural instinct and the wrong one. If you are not sure where the weakness is, add a test load and find the actual soft spot before reinforcing anything.
Skin that will not pull taut. Slack and wrinkles mean the frame is not yet the right shape, or the skin was stretched past its working strain before it dried. Build the frame to its final curve, tension progressively, and let drying fabric do most of the work.
Seams that will not meet corner to corner. Panels usually fight each other because a frame is out of position. Go back and align the frame rather than pulling harder on the fabric.
Trapped moisture inside the laminate. A sealed cell that fills with water adds weight it never carried and can freeze and split the skin. Seal end grain and core edges properly and let the hull dry fully before launching.
Testing too late. The first float is not a test. Check symmetry dry, test for leaks in a bathtub or pool, and add load in steps before you take a new hull anywhere it cannot be recovered from.
Frequently Asked Questions
How do I make a curved flexible hull without building a full mold?
Use a straight, level strongback as your reference and cut a small number of station templates instead of a full mold set. Two moulds usually suffice for a long thin hull; a short fat hull with different end shapes needs closer to four. Build the frame to that reference, then tension a fabric skin over it so the shrink pulls the shape fair.
How do I bend plywood into a boat hull without cracking it?
Bend a larger radius than you think you need, and go thinner rather than thicker. Laminate thin plies before bending, keep the grain running along the length of the curve, and over-bend progressively over several attempts so the material yields gradually. Wood does not like being forced to a radius once. Heat, a form and patient pressure do most of the work.
Should I lash, glue or screw the frame together?
Adhesive with fillets gives the cleanest result and spreads load at every joint, which is why most modern builds use it. Lashing with synthetic sinew is traditional Arctic practice and allows a frame to flex while staying strong. Mechanical fasteners are fast and adjustable, and are the right choice for hardware and panels you may need to remove.
How do I stop a flexible hull from twisting?
Tackle it at the source, because twist cannot be faired out later. Level and square the strongback, mark every frame against the same plumb line, and check section alignment at each mould before fixing it. Leave stringer stock over-length so lashings can be tightened during assembly, and run a string line from bow to stern to confirm symmetry before skinning.
What material bends easiest for a boat hull?
Solid timber and strip wood bend most easily, and traditional Arctic frames use thin cedar precisely for this reason. Foam bends freely but carries almost nothing, so it suits models and floats rather than a working hull. Cross-banded marine plywood bends further than plain ply, and ABS or HDPE sheet takes a curve with heat but holds it far more rigidly than fabric.
Can a flexible hull work for a small sailing robot or ocean drone?
Yes, and it suits that job well. A compliant hull absorbs wave energy instead of transmitting it into sensors and electronics, survives an impact that would crack a rigid shell, and can be patched at sea. Keep fittings bonded rather than rigidly bolted, reinforce the keel, motor mount and bow, and design the flex line to run fore and aft where you want compliance.
Conclusion
Start by drawing the cross-section and building one station mould on a dead-straight strongback. Check it for level and symmetry before anything else, because that is the one error you cannot correct later.
Then cut a single test frame from the material you plan to use, bend it to the radius you need, and find out whether it takes that curve before you commit to a full hull. Most builders who rush past that step end up rebuilding a frame or a bow, and the prototype section takes an afternoon.
Once you know how to make a curved flexible hull that holds its shape, flexes where you want it to and stays sealed, refine the curve against your actual payload and water. That last loop, curve then test then adjust, is where a decent hull becomes a good one.