To clean an outboard carburetor, take it off the engine, pull the float bowl and brass jets apart, and blow every passage out with carburetor cleaner and low-pressure air. Rebuild it with new gaskets, set the float height to spec, then leak test before the first start. On a small single-carb motor the whole job is a couple of hours on a bench. On a V6 with four carburetors, plan for a weekend.
The reason this part fails so often is simple. A carburetor is vented to atmosphere, so the light fractions of your fuel evaporate away inside it and leave behind a hard resinous varnish. After one winter sitting in a garage, that varnish is often enough to choke an idle port and turn a motor that would start in two pulls into one that needs eight.
What follows is the full procedure, in order, with the safety steps first and the mistakes that cost people the most at the end. Model layouts vary more than manufacturers like to admit, so treat your own service manual as the authority on anything specific to your motor.
Table of Contents
- What You Need
- Step-by-Step: How to Clean an Outboard Carburetor
- 1. Identify the Motor and Carburetor
- 2. Work Safely and Drain the Fuel
- 3. Remove the Carburetor or Access Its Parts
- 4. Photograph and Mark Every Component
- 5. Clean the Exterior Before Disassembly
- 6. Disassemble and Inspect the Carburetor
- 7. Clean Jets, Passages, and the Float System
- 8. Reassemble Without Overtightening
- 9. Prime, Leak-Test, and Run the Engine
- Common Mistakes and How to Avoid Them
- Frequently Asked Questions
- Conclusion
What You Need
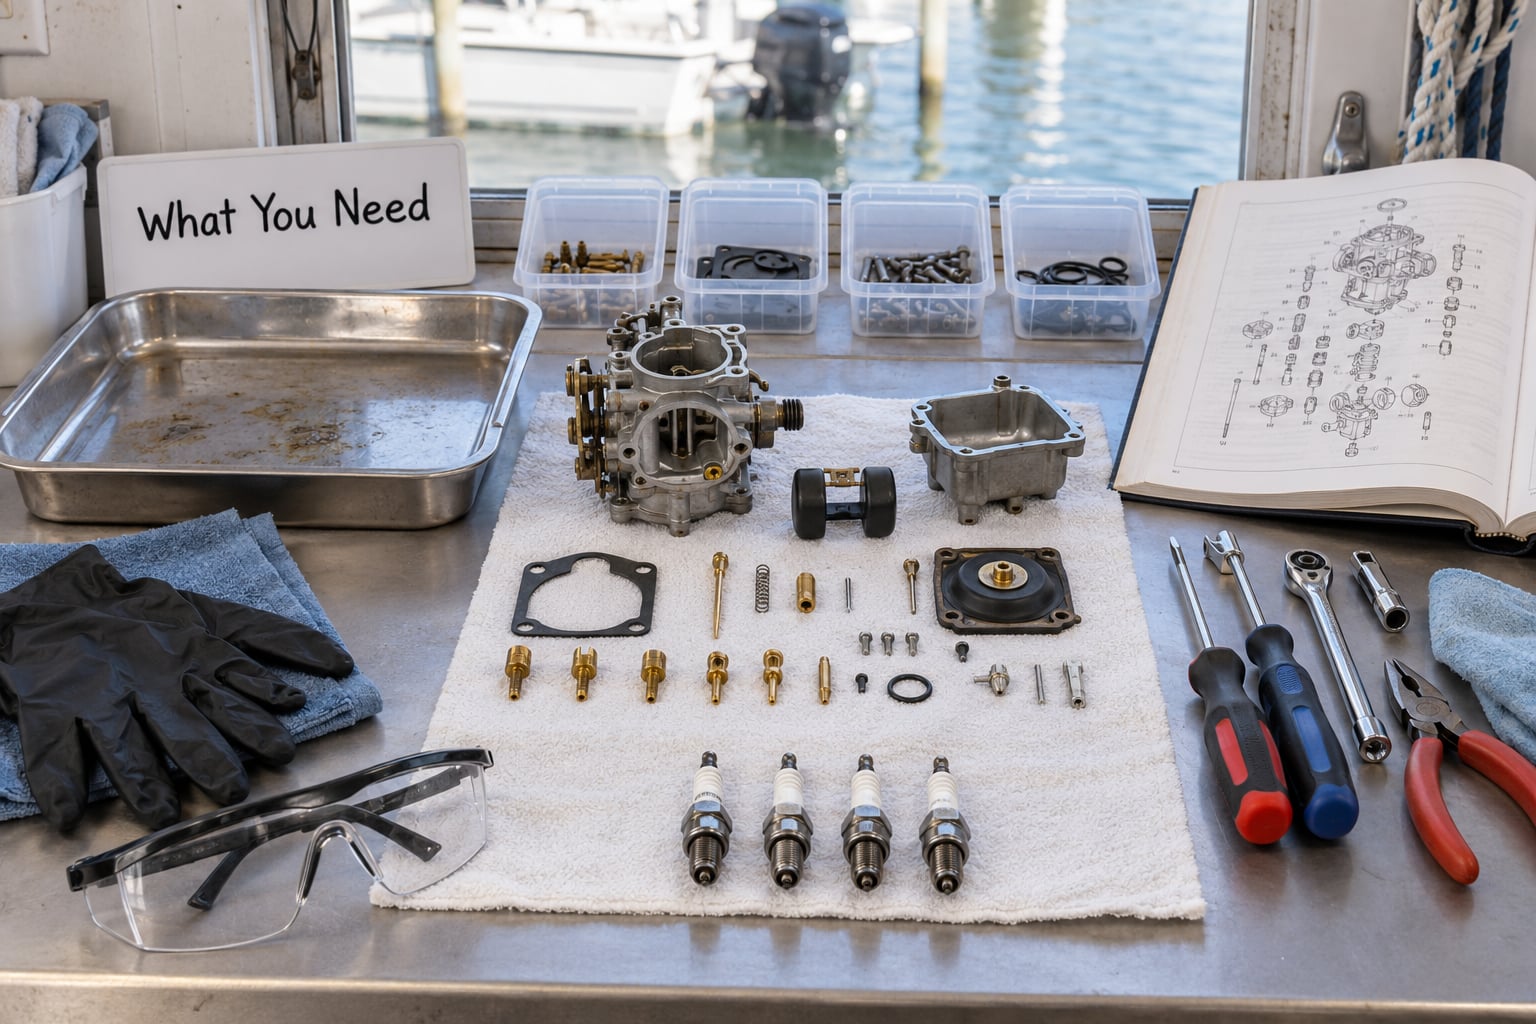
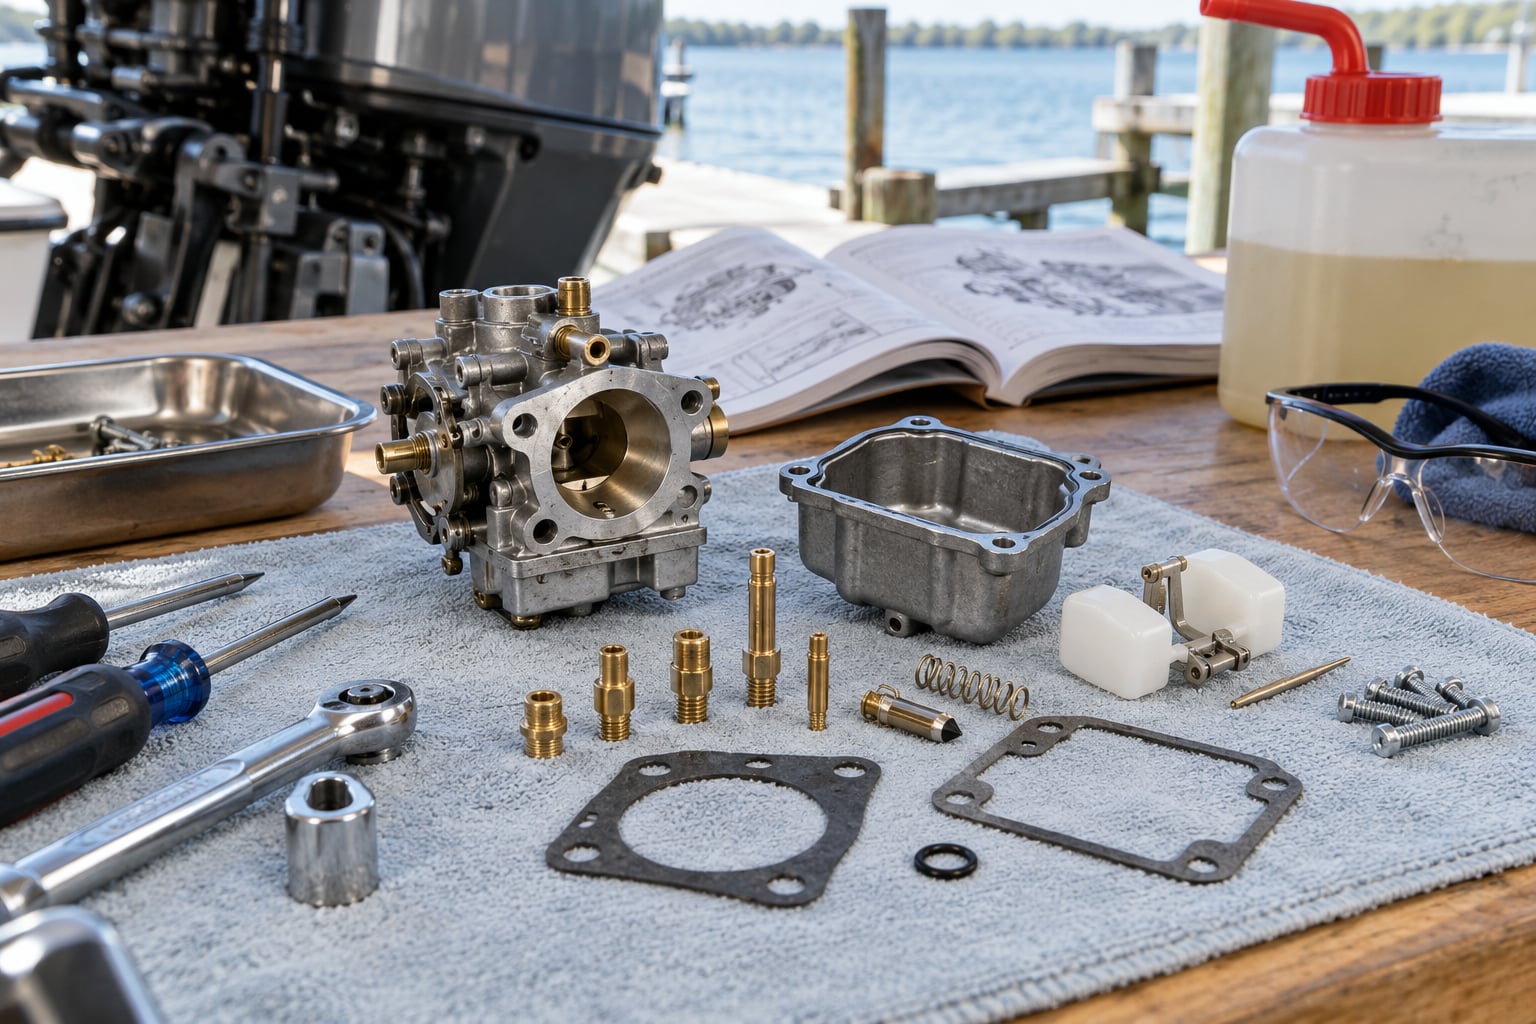
Most of what you need is already in a household tool drawer. The items that trip people up are the carburetor cleaner with a straw extension, a genuine source of low-pressure air, and a rebuild kit for the seals.
- Owner’s manual and model-specific service information, including float height spec and jet sizes
- Flathead and Phillips screwdrivers, plus a 10mm socket and a short extension for bowl and nut access
- Pliers, and an impact driver with a snug-fitting bit for stubborn bowl screws
- Carburetor cleaner spray with an extension tube, or a quality parts cleaner such as Sta-Bil Carburetor, Choke & Parts Cleaner
- Compressed air or canned air with a regulator so you stay under pressure
- Nylon-bristle brush, brass wire brush, and a jet cleaning tool or soft brass rod
- Carburetor rebuild kit with gaskets, or the specific gaskets, diaphragms and needle and seat your model needs
- Fresh plugs or thread sealant for any disturbed port or stud
- Labelled containers or small bags so each part has a home
- Shop towels, a drip tray, a funnel and a fuel-safe container for draining
- Safety glasses, fuel-resistant gloves, and a ventilated workspace away from any flame or spark source
- Optional: an ultrasonic cleaner with a heated tank, and a graduated cylinder or small jug for measuring float level
Before you buy anything else, establish what kind of motor you have. Two-stroke and four-stroke carburetors differ in what fouls them and in how the fuel reaches them, and fuel-injected engines have no conventional carburetor to clean at all. Owners on marine forum threads repeatedly get better results when advice names their exact model, so find the year, horsepower and stroke count before you start.
Step-by-Step: How to Clean an Outboard Carburetor
1. Identify the Motor and Carburetor
Read the engine’s serial or model number and pull up the service information for that specific motor. The service manual wins every time a generic guide disagrees with it, particularly for float height, jet sizing and torque figures.
On most outboards the carburetors sit on the intake side of the engine block behind the cowling, one or more per bank, held down by studs and nuts with fuel lines and throttle or spark-advance links running to each one. Some designs reach the jets through a side access plug on the float bowl well, which is worth knowing before you start. If the motor is fuel-injected, stop here and follow the manufacturer’s fuel system service procedure instead.
2. Work Safely and Drain the Fuel
Let the engine cool completely. Work outdoors or in a well-ventilated space, with no smoking, no running engine and no spark-producing tools nearby. Gasoline vapour is heavier than air and can ignite from a static spark well away from the tank.
Put on safety glasses and fuel-resistant gloves, then close the fuel supply valve or shut the fuel selector if the motor has one. Disconnect the battery negative terminal so nothing can fire while the fuel system is open. Relieve any pressure by opening the vent screw on the separator or fuel rail, then disconnect the fuel line at the engine and catch the flow in an approved container.
For a two-stroke, drain the tank and remember that what you drain is premixed fuel with oil in it. Dispose of it properly and never pour it onto the ground or into the water, and keep oily rags away from anything hot. For a four-stroke, the tank and lines are usually drained separately.
3. Remove the Carburetor or Access Its Parts
Take the cowling off according to the manual, then disconnect the spark plug leads so nothing can start by accident. Remove the air box parts, the intake gaskets or reed block, and the throttle link or spark advance rod from the carburetor arm.
Mark which fuel line goes to which carburetor before you pull anything, especially on a V6 where the lines run in a bank along the block. Then undo the carburetor mounting studs or bolts, supporting the carb body as the nuts come free so you do not twist the fuel boss. Pull it off gently. Never yank a fuel line or a throttle cable to move the carburetor; the fittings are brass and the cables bend.
4. Photograph and Mark Every Component
Before anything comes apart, take close-up photos from two angles: the carburetor as mounted, and each connection. Then label parts as you remove them, either with a marker on a clean area of the casting or with small bags and tags.
Record the position of the main jet, high speed jet, idle or pilot jet, low speed needle, needle and seat, springs and any adjustment screw. Also note the position of the throttle advance spool and any linkage washers. Reassembly should match the manufacturer’s configuration, not what looks symmetrical to you.
5. Clean the Exterior Before Disassembly
Dust and salt off the outside first, so nothing gets carried into the passages when you split the body. Brush the exterior with a stiff nylon bristle brush and wipe it with cleaner and a shop towel.
Keep abrasive blasting, wire wheels and scraping off aluminium castings, and never use a solvent on diaphragms, plastic float bodies or any part the manufacturer lists as not serviceable. Salt deposits in particular need a gentle soak and a rinse, not a grinder.
6. Disassemble and Inspect the Carburetor
Work methodically through the carburetor in the order the manual gives. On a typical vacuum-operated marine carb that means the top cover or diaphragm cap, the fuel pump diaphragm and its gasket, then the float bowl with its gasket and drain screw.
Inside the bowl, take out the float, the float pin, the needle, and the needle and seat. Then come out the main jet, high speed jet, pilot or starter jet, and any low speed needle with its clip, plus the passage screws where the model uses them. Keep the jets in order, and lay each one out so you can put it back where it came from.
Now inspect everything under good light. You are looking for hardened fuel or varnish, white or green corrosion, swollen or brittle gaskets, a scored needle and seat, a bent float pin, damaged jet threads, blocked passages, and any plastic part that has gone brittle or crazed. A float that is full of fuel, or one that rocks freely with no resistance, is a replacement, not a cleaning job. If the needle and seat are pitted or leaking, cleaning will not fix it.
7. Clean Jets, Passages, and the Float System
Soak the brass jets, bowl and body in carburetor cleaner for 15 to 30 minutes so the varnish loosens. Then clear each jet from both directions with carb cleaner sprayed through the passage and a burst of low-pressure air, finishing with air until nothing comes out of the far side. A brass jet cleaning tool or soft brass rod works for a stubborn orifice; a steel probe is a permanent wound to a calibrated hole.
Work the same way through the body: main passage, idle port, high speed circuit, bowl drain. Some people run a soft rubber bulb on the main jet hole and squeeze to draw cleaner through from inside the bowl, which helps where spray alone will not reach. Keep the air pressure low. Blowing hard enough to lift or seat a brass jet or a needle damages the very surfaces that meter fuel.
Do not clean a diaphragm, a needle and seat, or a nylon needle. Wipe the float with cleaner and a towel, check it for leaks by gently squeezing it, and confirm the float pin moves freely in the float. If your model uses a plastic float that floats fuel rather than air, do not try to drain or test it. For heavy varnish, an ultrasonic cleaner works well: heated solution, 20 minutes, brass parts only. Leave out the diaphragms, seals, needle and seat, plastics that can float, and anything with a bonded rubber pad.
8. Reassemble Without Overtightening
Install the needle and seat, then the jets, each in the correct port and facing the right way. Fit new gaskets rather than reusing old ones, and note the position of any shims, washers or jets you moved. On a multi-carb motor, transfer the same jet size to every carburetor unless the manual says otherwise.
Lightly tighten the jets only. Brass jets and the cast aluminium housing strip or crack if you crank them down hard, and the same goes for the plastic bowl. Set the float to the height the manual specifies, usually with the carburetor inverted and the float measured from the casting face to the highest point of the float, without pinching the needle. Seat the float pin on its tab before the cover goes down.
Reconnect the throttle or spark advance link, the fuel line and the intake gasket, and torque the mounting hardware to the manual figure. Double check the fuel line routing matches your photographs from step four.
9. Prime, Leak-Test, and Run the Engine
Reconnect the battery, turn the fuel supply back on, and open the vent screw. Prime the engine only as specified, then let it sit a few minutes and look for fuel at the bowl drain screw, at the vent, and anywhere a connection was made. Wipe the area dry, wait, and check again. Any sign of a growing bead of fuel means you have a leak and the engine does not start yet.
When it is dry, start it. Check that it starts promptly, holds a steady idle for a full minute without the primer, and accelerates cleanly up through the range rather than hesitating. On a V6, rev it up and hold a piece of cardboard in front of each intake in turn, a quick way to spot the one carb that is not pulling its share. If fuel appears, the engine floods, or it still will not start, stop and work the post-clean list rather than pulling the spark plug again.
Common Mistakes and How to Avoid Them
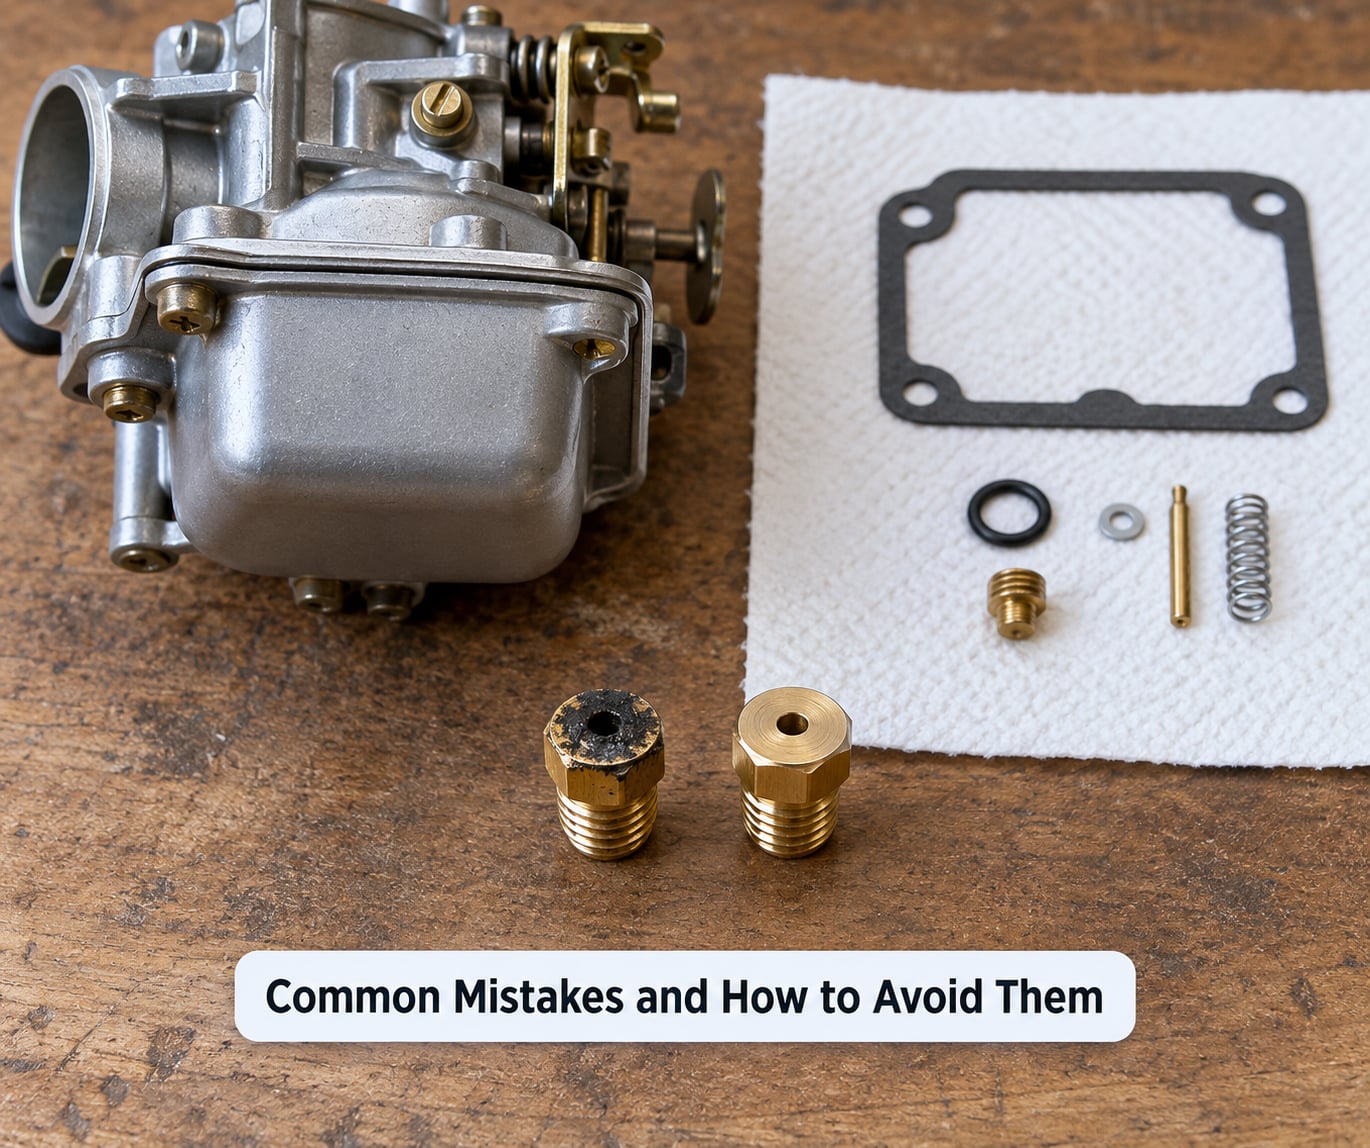
Almost every ruined carb rebuild comes down to one of a handful of avoidable moves. These are the ones that show up over and over.
- Drilling or scraping jets. A jet is a calibrated hole. A wire, a pick or a drill changes its size permanently, and the motor will run rich or lean with no way to put it back.
- Spraying carb cleaner over everything. It is fine on brass and castings, and wrong on diaphragms, needle and seat assemblies and some plastics. A can that claims to be universal is not.
- Forcing stuck screws. Float bowl screws and drain screws seize and strip easily. Break them free with a well-fitting driver while they are still free, and if they are already tight, use an impact driver or grips before any force that rounds the head.
- Losing the adjustment settings. Photograph and label first. Idle mixture screws, throttle advance position and jet combinations are easy to lose and hard to guess back.
- Overtightening. Brass jets, plastic bowls, needles and aluminium housings all crack or strip under a ratchet. Snug is the goal, and the manual’s torque figure is not a starting point.
- Wrong gasket placement. A gasket fitted upside down or in the wrong groove leaks fuel into the intake. Fit them dry, check the shape lines up, then oil the threads only.
- Skipping the float height. Too high and the bowl floods until the engine will not start. Too low and the engine runs lean, starves at high RPM, and hesitates. It is the most common reason a clean motor runs worse than a dirty one.
- Swapping fuel lines on a V6. Multi-carb motors can starve unevenly at high RPM, and the last carb to run dry is the one that hurts. Follow your photos.
- Starting before checking for fuel. A weeping bowl gasket can flood an engine in minutes and put solvent into the oil on a four-stroke.
For a motor that spent time in salt water, a carb soak is not enough. Salt creeps into the diaphragm, the needle and seat, and every passage, and the whole unit needs a strip and an inspect rather than a clean. Handling the rest of a saltwater-soaked motor is a separate job, and it is worth reading how to clean salt water off electronics safely before you pull anything apart.
Two habits do most of the preventing. The first is to stop leaving fuel sitting in the system: either run the motor down until it quits and then drain the carbs, or fill the tank with fresh fuel and a stabilizer and leave it there. Long-time owners go dry; experienced contributors argue the last carb to run dry while the engine is still screaming is the one that causes trouble, which is why they favour stabilise and drain. Pick the approach you can actually carry out, and be consistent.
The second is storage practice rather than chemistry. Packing the leftover premixed fuel out of a two-stroke tank and into a vehicle tank, so the next trip starts on fresh fuel, is a cheap habit that works. Neither ethanol nor stabiliser is the villain the internet suggests: varnish comes from gasoline residue as the fuel evaporates in a vented body, and ethanol contains virtually no solids. Time, heat and moisture do the damage.
Frequently Asked Questions
What do I clean an outboard carburetor with?
Use a dedicated carburetor cleaner or parts solvent, an extension straw, and low-pressure compressed air. Soak the brass jets and bowl in cleaner for 15 to 30 minutes, then flush each passage and jet from both directions with spray followed by a short burst of air. Finish with a nylon brush for the exterior. Keep steel probes, wire wheels and high air pressure away from the calibrated holes, and never soak diaphragms, needle and seat parts, or plastics.
Does Sea Foam actually clean an outboard carburetor?
A fuel additive loosens light varnish and can be enough on a motor that has only sat a few months. On a carb that has been open to the air for a year, owners report it clearing fouling without fully freeing a misfiring multi-cylinder two-stroke, and a full teardown fixed the motor when additives did not. Additive is also not a substitute for two-stroke oil, so keep the normal premix ratio. It buys time, not a guaranteed result.
Can you clean an outboard carburetor without removing it?
Partly. Clearing varnish out of the float bowl drain and spraying the pilot and main passages through accessible openings will often restore an idle, and it needs far less time. The jets, the needle and seat, and the passages behind them are still unreachable, so anything with a damaged seal or a scored seat needs the carburetor on the bench. Cleaning in place also makes it easy to miss a leak on reassembly.
What are the signs of a dirty outboard carburetor?
A rough or uneven idle that clears only when you pull the primer, stalling every thirty to forty-five seconds, is the classic one. Other signs include hard starting or no starting at all after storage, hesitation or misfiring on acceleration, needing choke to get up on plane, and fuel that has darkened or separated. If the motor runs clean and the symptom follows it to the dock, the cause is probably not the carburetor.
Why won’t my outboard start after I cleaned the carburetor?
Work down the list in likelihood order: float height set too high, a needle or jet left out or installed backwards, a fuel line reconnected to the wrong carburetor, a float pin not seated so the valve stays open, or a leaking bowl gasket flooding the intake. Check for fuel at the drain screw before you pull the plug. If it starts and then dies as soon as the primer is released, the bowl is flooding, which points almost straight at float level or the needle and seat.
Conclusion
Start by identifying the motor, then work from the manufacturer’s service information rather than a generic guide. Cool the engine, kill the fuel supply, disconnect the battery, drain into an approved container and work outdoors. Photograph and label everything before the first screw comes out, clean only the parts and passages the manufacturer permits, and treat the jets with nothing harder than cleaner, low-pressure air and a brass tool.
Rebuild with fresh gaskets, set the float height to the specified measurement, and inspect for leaks before the engine turns over. That inspection is the step people skip and the one that turns a clean carburetor into an engine that floods or won’t prime. Clean carburetors start first time, hold a steady idle without the primer, and get up on plane without choking.