There is no single interval that covers every instrument on a boat. A practical answer for how often to calibrate marine sensors is a three-tier rhythm: a visual and log check monthly, a functional verification against a reference each quarter, and a full calibration on the manufacturer’s schedule, usually every 6 to 12 months. Electrochemical probes need checking far more often than a GPS receiver, and any impact or relocation overrides the calendar entirely.
That last part is the one most owners miss. A transducer that gets knocked off its bracket during a hard tide or a compass that was fine until someone mounted a new computer under the wheelhouse has already changed its calibration whether the calendar says so or not.
Below is the schedule we work to, sensor by sensor, plus the workflow for running one. It suits anyone maintaining a cruising boat, a working vessel’s electronics or an ocean robot’s sensor stack.
Table of Contents
What You Need
A calibration pass is mostly paperwork and preparation. The adjustment itself often takes a couple of minutes, but deciding whether the adjustment is correct needs the right reference.
A reference you can trust
The rule of thumb in marine calibration practice is that your reference standard should be about ten times more accurate than the instrument under test. Some work will accept three times. If your handheld meter is only as accurate as the sensor on the rail, you are not calibrating anything, you are just comparing two unknowns and averaging the error.
Traceability matters too. A certificate showing the reference was calibrated against national standards, by an accredited lab and within its own interval, is what makes the result defensible on a surveyed vessel.
Whatever the manufacturer supplies
Every sensor ships with a calibration procedure and an interval in its manual. Pull that first and write the interval down before you touch anything. Most documentation also lists the acceptable tolerance, which is the number you will judge the pass or fail against.
Tools that actually get used
- A calibrated hand-held reference meter for pressure, temperature, conductivity, pH and dissolved oxygen, depending on what you run
- Certified reference solutions or traceable buffers for wet calibration of probes
- Fresh distilled or deionised water for rinsing electrodes and cells
- Soft brushes, lint-free swabs and dilute mild detergent for housings and optical windows
- A small wrench set and thread seal for transducer and sender work
- A multimeter for checking NMEA 2000 supply voltage and continuity before you blame the sensor
- An ice-bath vessel if you verify temperature sensors on the bench
Records and safety
Bring the existing calibration log, the previous certificate for any send-out reference instrument, and the vessel’s survey schedule. Gloves matter more than people expect here: bare hands carry salt and oil onto optical windows and connector pins, and you end up cleaning the sensor twice.
Step-by-Step: How Often to Calibrate Marine Sensors
Six steps, in the same order every time. Doing them out of sequence is how a dirty sensor gets adjusted to compensate for fouling instead of getting cleaned.
Set a calibration schedule by sensor type
Start from the table below, then adjust for your waters and how you use the boat. The intervals assume a salt-water environment with normal fouling and some vibration. Fouling-prone or warm water shortens them; a lift-kept boat on a hard stand lengthens them.
| Sensor type | Routine check | Verification | Full calibration | What drifts first |
|---|---|---|---|---|
| GPS/GNSS receiver and AIS | Monthly | 6 months | Annually or on installation | Antenna cable attenuation, position error after a move |
| Magnetic compass or fluxgate heading sensor | Before departure, visually | Every hardware change | After any equipment moved, annually | Hard and soft iron from nearby gear |
| Gyrocompass / MEMS IMU | Monthly zero-rate check | 6 months | Annually | Bias drift with temperature |
| Echo sounder / depth transducer | Monthly against a known mark | 6 months | Annually, or after replacement | Offset setting and fouling on the face |
| Speed log through water | Monthly pitot check | Annually | Annually | Impeller wear and fouling |
| Wind sensor (apparent and true) | Monthly visual | 6 months | Annually | Bearing friction in the anemometer |
| Barometric pressure transducer | Monthly | 6 months | Annually | Zero point and diaphragm seal |
| Engine gauges: oil pressure, coolant temp, fuel level, RPM | Monthly comparison | Quarterly | Every 6 months | Sender drift and gauge hysteresis |
| NMEA 2000 tank and trim level sensors | Monthly against a dipstick | 6 months | Annually | Float sticking and calibration table mismatch |
| Water temperature sensor | Monthly | 6 months | Annually | Slow response from fouling, not sensor error |
| Conductivity / salinity cell | Weekly in fouling-prone water | Monthly against a standard | Monthly to 6 months | Biofouling on the cell plates |
| Dissolved oxygen optode | Weekly | Monthly | Monthly to 6 months | Membrane fouling and photobleaching |
| pH electrode | Weekly rinse | Monthly | Monthly | Electrode coating and reference junction |
| Turbidity / chlorophyll optode | Weekly wipe | Monthly | Monthly | Optical window fouling |
On the conflicting advice you find across vendors: panel-gauge suppliers commonly quote six months for engine-room gauges and tie that to vibration, which matches the table above. Oceanographic instrument makers run continuous in-situ auto-calibration because they deploy for weeks at a stretch. Recreational electronics sit at the far end of the scale, where annual is usually the honest answer.
Recalibrate immediately when something happens, not when the calendar says
Five events cancel your schedule and demand an immediate pass. Grounding or collision, especially if the transducer or a probe took a hit. A lightning strike or any electrical surge on the NMEA 2000 backbone. Replacing a sensor, which always starts life with factory defaults and needs commissioning. Moving anything within a few feet of a compass or IMU, or rewiring a run that now sits beside a compass. And coming out of extended lay-up after winter storage or a season on the hard, when condensation sits inside every enclosure.
A sudden change in behaviour counts too. A depth sounder that suddenly reads a fixed offset, a fuel sender that drifts a quarter of a tank, a compass that points somewhere new after a crossing. That pattern is a fixed offset, and fixed offsets are correctable.
Inspect and clean each sensor
Start at the cable and work outward. Look for chafing where the cable passes through a bulkhead, corrosion at the connector, and strain relief that has started to give. On transducers, wipe the face and look for a film, weed or shell growth. On optical sensors, check the window under a strong light; a thin film is enough to flatten a chlorophyll trace.
Soak optical windows and conductivity cells in mild detergent, rinse with fresh water and dry gently. Do not use anything abrasive on a membrane or an electrode. Wipe a pH electrode bulb with a soft tissue rather than scrubbing it. Anti-fouling coatings on exposed sensors need reapplying on the same schedule as the sensor itself.
Verify readings against a trusted reference
Let the sensor stabilise first. Ten to twenty minutes in the same water mass is usually enough, and comparing a freshly dunked probe with a calm reference is not a comparison at all.
Take both readings and work out the error as the sensor reading minus the reference reading. If your depth sounder reads 4.2 m against a reference 3.9 m, the error is 0.3 m and the correction is minus 0.3 m. Do the same in the opposite direction to reveal hysteresis, which is a different problem: the sensor reads differently going down than coming up, and adjusting it to fix one direction leaves the other wrong.
Calibrate the sensor
For a temperature sensor, an ice bath of crushed ice and water gives you a known zero-ish reference, and a second known point gives you span. For pressure and depth, apply a known pressure from your reference and compare; transducers commonly take a one-point offset plus a scale factor. For conductivity and pH, wet calibration against traceable standards brackets the work with a low and a high point.
Know which correction your sensor supports before you start. One-point adjusts zero only. Two-point adjusts zero and span, which is what electrochemical probes need because their output moves with temperature as well as with the measured value. Compasses have their own procedure entirely: rotate the boat or the sensor through full turns in several orientations and let the software fit the hard and soft iron correction.
Watch for a sensor that cannot hold a stable reading. If it wanders while sitting in a stable reference, or will not accept a correction at one end of its range, you are looking at a failing sensor rather than a miscalibrated one, and no amount of adjustment fixes it.
Repeat the measurement and confirm stability
Accept only readings that stay inside the manufacturer’s stated tolerance. Recheck at least three times after the adjustment, and at two points for anything with span, because an offset fixed at zero can hide a span error at full scale.
Then let it run. A sensor that passes cold can still drift inside an hour as it warms or as the fouling film reasserts itself. A quick repeat a few hours later or the next morning catches the lazy failures.
Record the result and schedule the next check
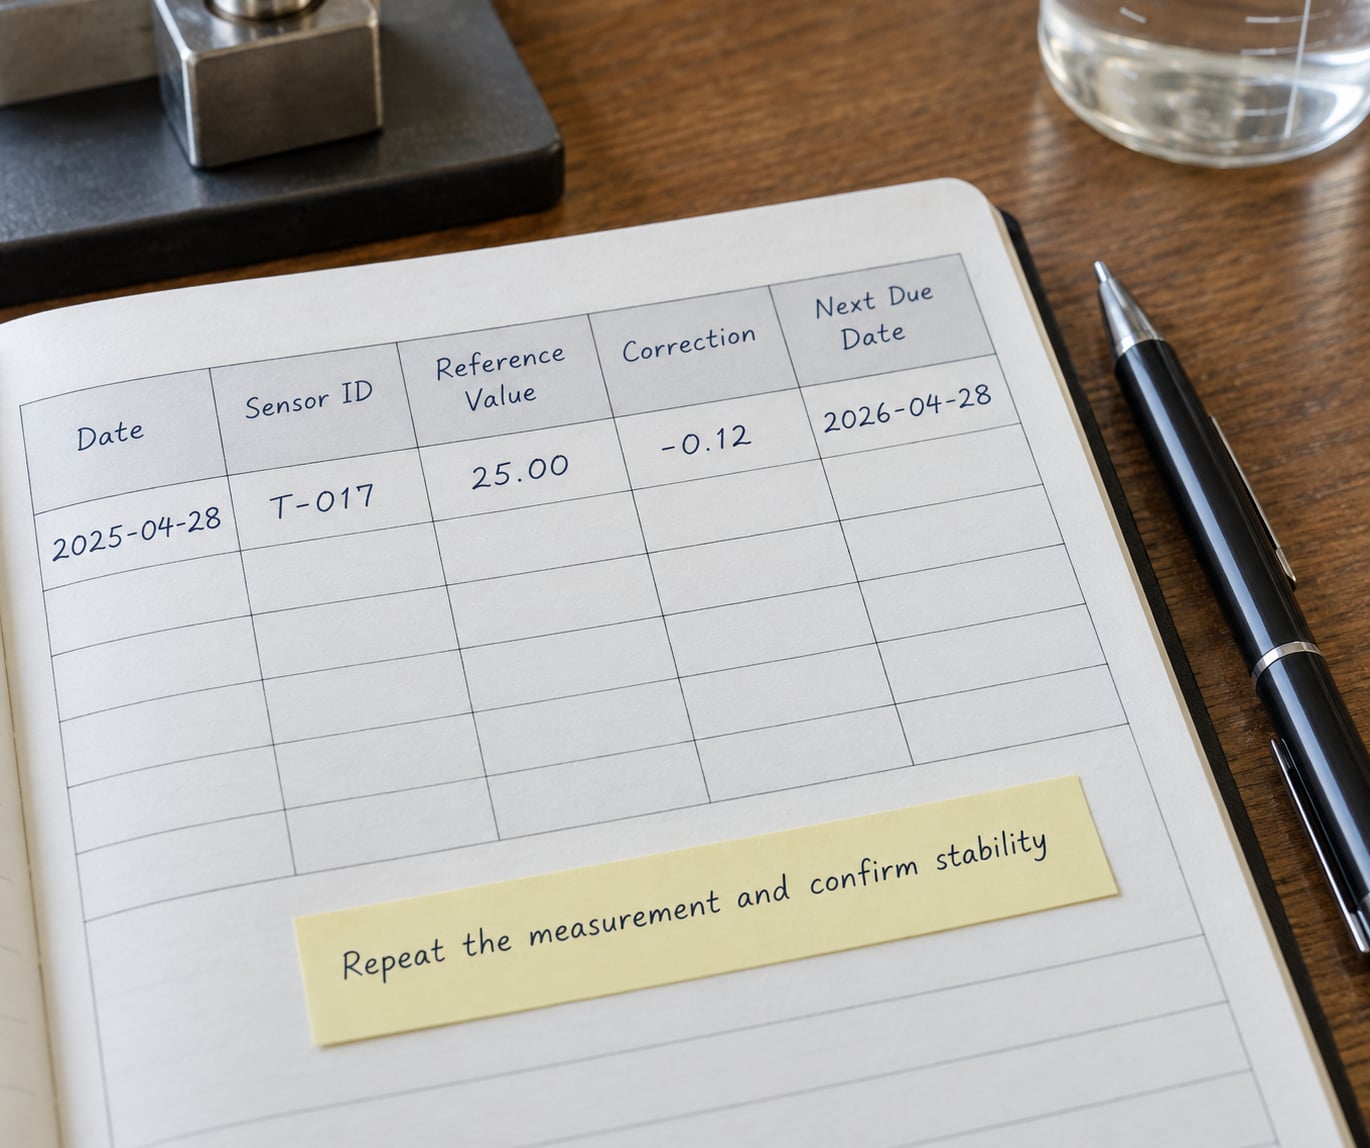
Write down the date, position, water conditions, temperature, the reference value, the reference instrument’s own certificate number, the as-found reading, the correction applied and the pass or fail result. Add the next date due before you close the lid.
This is what turns a habit into a record book a surveyor will accept. Class and IOPP inspections ask for evidence that an instrument was within tolerance at a known point in time, not an opinion that it probably was. The same log is what tells you whether a recurring drift pattern is the sensor or the environment.
Common Mistakes
Calibrating against an unverified reference. The single most damaging error, because it looks like success. If your handheld meter has no current certificate, or you are comparing a sensor against a value you are fairly sure about, the correction you apply may be worse than the drift you were trying to remove. Log the reference’s certificate number every time.
Calibrating in unstable conditions. Doing it in a seaport, in the rain or while the boat is moving gives you a comparison between a moving sensor and a stationary reference. Wait for a calm moment, or accept that you are recording a sea trial comparison rather than a calibration.
Adjusting instead of cleaning. A conductivity cell a few weeks into a growing season reads low, and a two-point calibration will happily absorb that error into the cell’s coefficients. Now the instrument is wrong in clean water too. Clean first, compare second, adjust third.
Using the wrong solution. Fresh water is not a conductivity standard and tap water is not a pH buffer. Unopened, in-date, traceable standards only. Open a fresh ampoule for each calibration rather than decanting into a bottle that sits in a warm sunlit cockpit all week.
Changing several things at once. Cleaning, adjusting span and swapping cables in a single session means that when the next reading looks wrong you have no idea which change caused it. One variable per pass.
Skipping the repeat. One reading immediately after an adjustment proves nothing. Three readings, two range points, and a recheck once the sensor has warmed.
Calibrating a compass indoors. Reeling on hard, surrounded by power cables and steel, tells you about your house. In the OpenMarine forum a user traced a stubborn bad-fit compass calibration to a Raspberry Pi mounted on the case a few inches from the IMU; moving the board about six inches away fixed it, and one builder found calibrating outdoors gave far better results than at a desk. Calibrate a magnetic heading sensor on the boat, in its real magnetic environment, and recalibrate whenever hardware moves.
Never logging it. A calibration nobody recorded did not happen, as far as a survey or a future argument with a manufacturer is concerned.
Frequently Asked Questions
How often should calibration be done?
Most marine instruments do well with a three-tier rhythm: a visual and log check every month, a functional check against a reference every three to six months, and a full calibration every 6 to 12 months or on the manufacturer’s stated interval. Electrochemical probes such as pH, conductivity and dissolved oxygen need monthly attention. Engine gauges on a hard-running vessel often need six-monthly calibration because vibration moves the senders. Any impact, strike, relocation or sensor replacement overrides the schedule entirely.
How often should probes be calibrated?
Probes drift much faster than solid-state sensors because fouling sits right on the sensing surface. pH, conductivity and dissolved oxygen probes in a CTD package should be checked against a traceable standard monthly, and calibrated before and after any deployment longer than a few weeks. Optical turbidity and chlorophyll probes need the window wiped weekly in productive water. Rinse between deployments, never store a membrane dry, and expect the membrane and reference junction to be the first things replaced.
How often should a meter be calibrated?
Treat any meter you own the same way as the instruments it measures: annual calibration from an accredited lab if it is your primary reference, or at minimum an annual verification check against a second, higher-grade instrument. Hand-held pressure, temperature and pH meters used for field work are commonly sent out yearly, and more often in warm or fouling-prone conditions. Keep the certificate, and if the meter has drifted out of tolerance, work out which past calibrations it invalidates before you trust any of them again.
How often should a Megger be calibrated?
An insulation resistance tester is adjacent to, rather than part of, marine sensor calibration, but the same logic applies. Verify it annually against a known resistance, and after any drop or repair, with a reference resistor of around 500 megohms for cable work. Its own drift matters because an insulation reading of 100 megohms on a faulty tester looks identical to a healthy one on a good tester. Record the test voltage and ambient humidity, since humidity changes the expected reading.
Do I need to calibrate a new sensor after installing it?
Yes. A new sensor arrives with factory defaults that know nothing about your boat, your mounting angle, your cable run or your local magnetic environment. Commissioning calibration is part of installation, not an optional extra. Set the depth transducer offset against a known bottom, fit the compass correction on board with all normal equipment running, and bracket any electrochemical probe against standards in the water it will work in. Log the commissioning results as your baseline.
How do I know if my marine sensor has drifted?
The giveaway is a consistent offset rather than random noise. A depth sounder that is always 0.3 m deep, a fuel sender that reads a quarter of a tank low, or a compass that points a few degrees off after every crossing all show the same bias. Check it against a trusted reference before adjusting, and run the comparison in both directions, because hysteresis makes a sensor read differently rising and falling. If it will not hold a stable reading or will not accept a correction, replace it rather than calibrating a failing sensor again.
Conclusion
Write down every sensor on the vessel, look up its manufacturer’s interval, and replace vague entries with a monthly check, a quarterly verification and a dated full calibration. Then find the sensor most likely to be out of tolerance right now, usually a fouled conductivity probe or a compass that has seen new hardware, and verify it against a reference you can trace.
That first pass takes an afternoon and gives you the baseline every later check gets compared against. Book the next date before you close the log.