To paint an aluminum boat, you strip the old coating, remove the chalky white oxidation, scuff the metal to a dull gray tooth, then hit bare metal with a self-etching primer before rolling or spraying two or three thin coats of aluminum-rated marine paint. That etch is the step that decides whether the finish lasts one season or ten years.
Aluminum is harder to paint than fiberglass, but the whole job is really just four stages repeated patiently: clean, abrade, etch, coat. Get the first three right and the paint almost always sticks.
A realistic job runs three to five days for a 14-foot jon boat, because each coat needs its own drying window. The order of work matters too: interior first, then topsides, then the hull bottom last, so you are not scuffing fresh paint while you work under the boat.
- Clean: wash off salt, oil and bird droppings, and get the hull completely dry.
- Abrade: 80 to 120 grit to knock down old coating, 180 to 220 grit for a uniform matte surface.
- Etch: self-etching wash or a self-etching primer, so the coating bonds chemically instead of sitting on top.
- Coat: primer if the system needs one, then two or three thin topcoats, each inside its recoat window.
- Cure: surface-dry is not the same as cured, and the boat does not go back in the water until the label says the film is cured.
Table of Contents
- What You Need
- Step-by-Step
- Frequently Asked Questions
- Do I need to prime aluminum before painting?
- Can I paint my aluminum boat while it is in the water?
- How long does paint take to cure on an aluminum boat?
- Do I have to sand between coats of paint?
- What should I do about old paint or corrosion before I repaint?
- Can I use copper antifouling bottom paint on an aluminum boat?
What You Need
Most of the pain in this project comes from starting without the right product for one of the three zones of the hull. Gather everything first, while the boat is still in the water, because replacing a specific primer halfway through means stripping a wet coat off.
- Access and workspace: boat stands, blocks, or a lift and a shop; drop cloths, plastic sheeting, masking tape and masking paper, trash bags, a tack cloth, and a fan or blower for drying.
- Cleaning: mild boat soap, a soft brush and sponge, a marine-safe degreaser, mineral spirits for oily areas, and plenty of fresh water for rinsing.
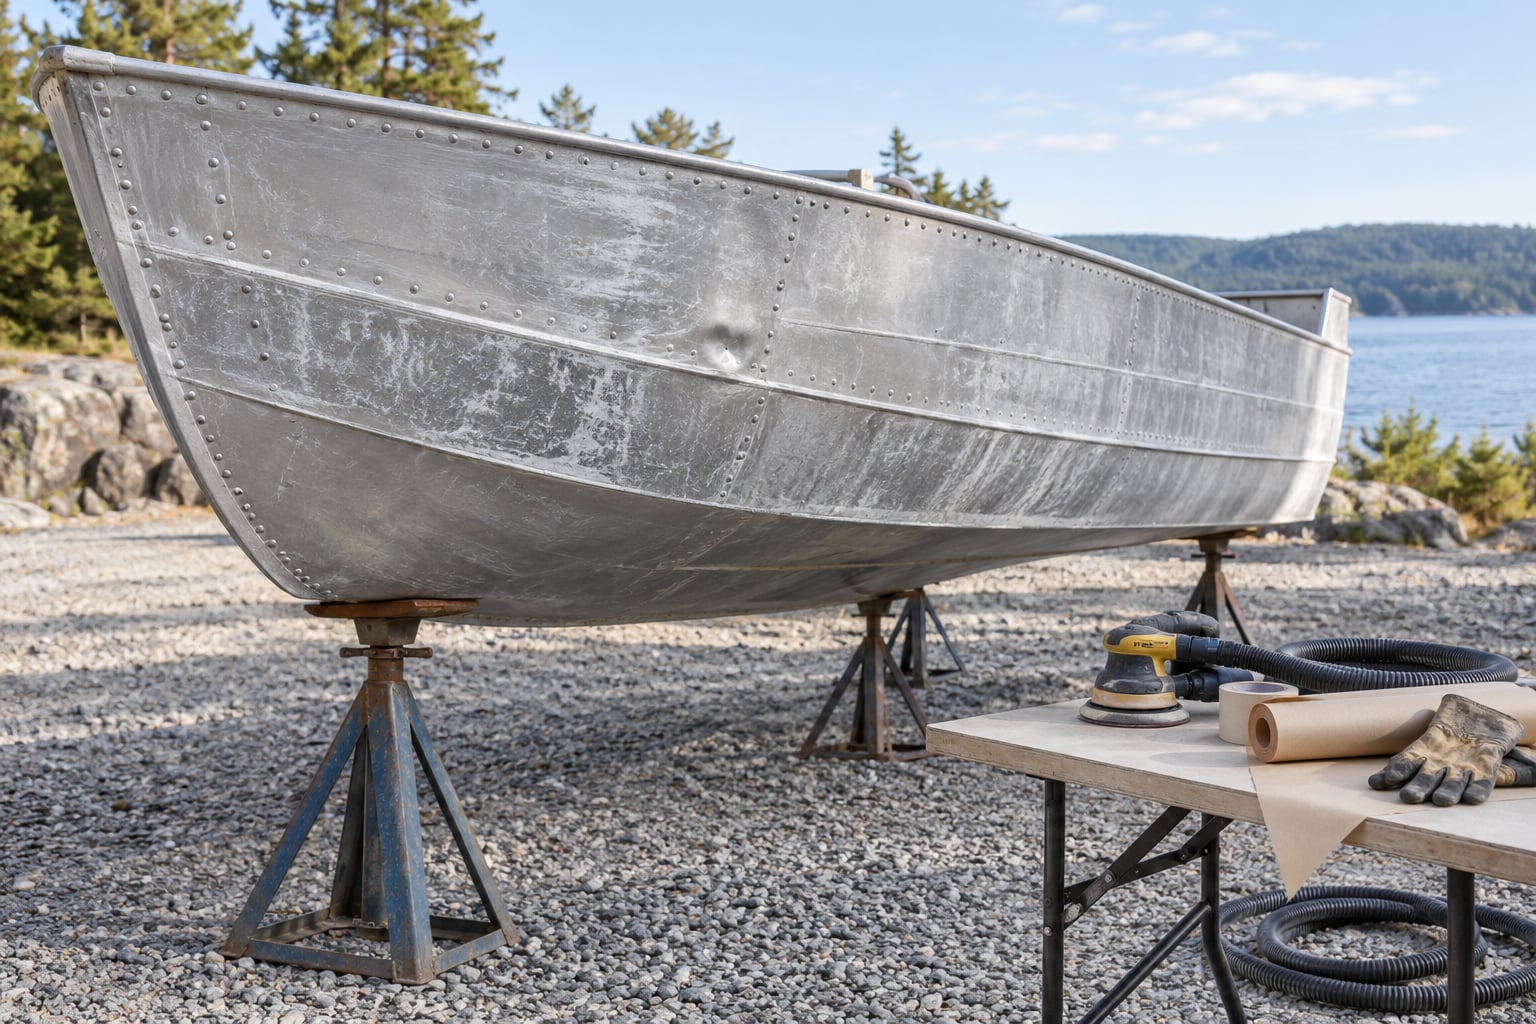
- Abrasives: 80, 120, 180 and 220 grit paper, a sanding block, a random orbital sander, and a plastic scraper. Add 60 grit only for heavy, thick, sound old paint.
- Blasting gear (optional): soda blasting media or glass bead, a wet-vacuum blast cabinet or a dust-extraction hood, and eye and respiratory protection. Plenty of DIYers skip this and hand-sand, which is fine on a small hull.
- Etching product: a self-etching wash for bare aluminum, or skip the wash and go straight to a self-etching primer.
- Primer: an epoxy polyamine primer or a self-etching primer labeled for aluminum, plus a two-part epoxy filler for gouges, dings and deep scratches.
- Paint: marine topside enamel or polyurethane for the sides, a copper-free antifouling or epoxy-and-paint system for the bottom, and for the interior either a non-skid epoxy or a truck bed liner.
- Application gear: a 3/8 or 1/2 inch nap solvent-resistant roller, a good marine brush, masking for hardware, and the VOC reducer or thinner the label specifies. An HVLP spray gun is optional, not essential.
- Safety: a respirator with organic vapor cartridges, nitrile gloves, and eye protection. If you are spraying a two-component isocyanate topcoat, the cartridge or the supplied air supply named on the label is the minimum, and plenty of painters skip spraying those at home for exactly that reason.
Two decisions drive everything else: whether the hull is bare metal or still wearing sound paint, and whether the boat lives in a trailer or in the water. Settle those, then read the technical data sheet on the can before you buy. Compatibility, overcoating windows and thinning ratios vary a lot between product lines, and mixing a self-etching primer from one line with a topcoat from another is a common way to end up with peeling paint.
Step-by-Step
1. Inspect the Aluminum and Decide on a Coating System
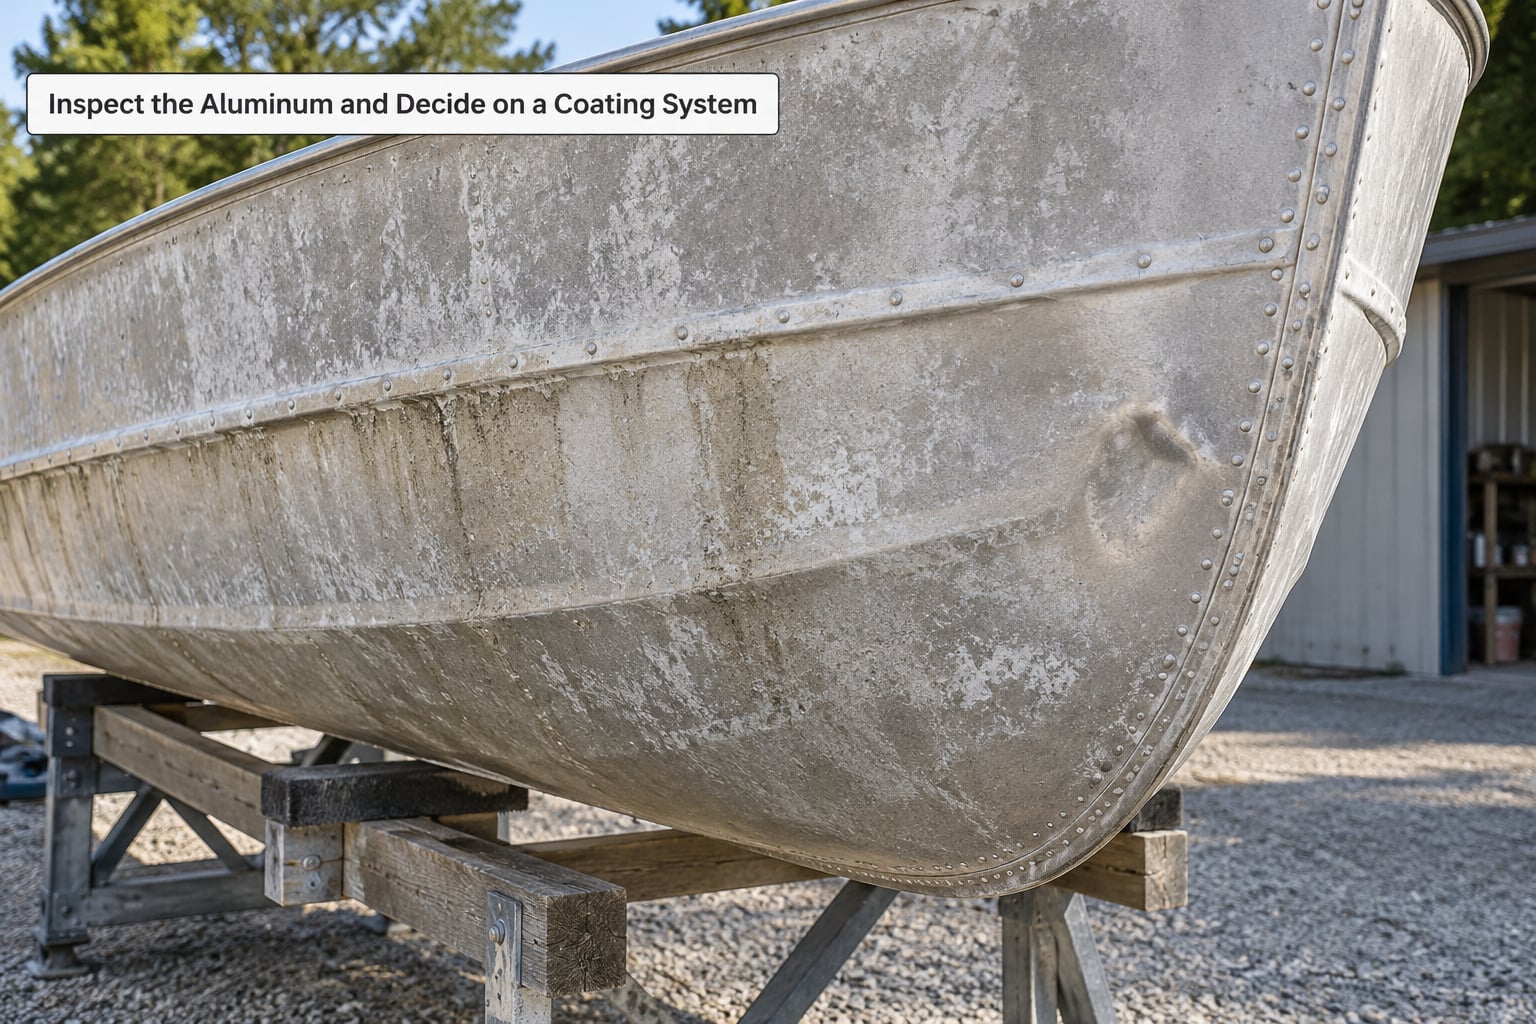
Start by reading the hull honestly. Bare mill aluminum looks silver and smooth, and may still carry a factory protective film or a skin of oil. Oxidized aluminum has a chalky white or gray cast that wipes off on your hand. Sound old paint stays bonded in sheets; failing paint lifts at the edges, bubbles under the film, or comes off in flakes when you scrape it.
Look at the hardware too. Rust-colored staining around a rivet or screw usually means steel fasteners, not aluminum, and that steel will keep bleeding rust out through any coating you put over it unless it is sealed or replaced with aluminum or isolated with washers. White powdery deposits under the paint are aluminum oxide, not rust, and they mean the metal is corroding.
Here is the decision. Sound, well-adhered paint over clean metal means you can scuff and recoat. Flaking, blistering or alligator-cracked paint has to come off. Bare chalky metal means strip or blast, then etch. Deep corrosion pits, cracked stringers or soft rotting panels are a repair job, not a paint job, and no coating fixes them.
Follow the compatibility requirements of the system you picked. A one-coat self-etching topcoat is a complete system on bare metal by itself, while a two-coat epoxy system has its own required primer and its own window between coats.
2. Clean and Degrease the Entire Hull
Salt is the quietest killer in this job. Salt left under a coating pulls moisture through the film and keeps the metal wet, so the paint lets go and then corrodes underneath. Wash the hull down with mild boat soap and a soft brush, rinse with fresh water, and repeat the rinse until the water runs without a slick or a film.
Degrease after washing, not instead of it. Mineral spirits or a marine-safe degreaser on a clean rag handles oil, wax, fuel residue and handprints around the transom and cleats. Change out the rag often, and keep solvents away from any plastic or vinyl trim until you have tested a small area, because solvents attack plastics and printed graphics in ways that are not reversible.
Now get it dry. Water trapped in a seam, behind a rivet head or inside a transom drain will still be there three days later, and coating over it guarantees a blister. Plug drain holes with a rag, run a fan if the boat is in an enclosed space, and press the back of your hand against the hull for a full minute before you call it dry.
3. Remove Old Paint and Treat Corrosion Safely
There are four ways to strip a hull, and which one you pick depends on how much paint is there and how thick the aluminum is. Scraping and sanding works for peeling paint and small areas. A scuff-sand across sound paint works for a simple color change. Abrasive blasting handles a hull that has been repainted several times. Chemical stripping works well for intricate hulls full of seams and rivets, but it brings its own cleanup.
Whatever you use, protect the structure. Aluminum skin on a riveted hull is often thinner than a kitchen can lid, and an angle grinder held against a rivet line will round the rivet heads and open slots you cannot close. Sand across the rivets, not into them, and use a lighter touch on the last coat than the first. When blasting, soda media is what aluminum owners reach for on the iBoats forums, and the same threads warn hard about sand, which can gouge soft skin or embed abrasive you will never get out.
Corrosion gets treated before any coating goes on. Aluminum oxide is a powder and it comes off with a nylon brush and water, followed by a rinse. Rust staining means steel, so seal or isolate that steel. Some systems want a conversion treatment or a neutralizing rinse; the technical data sheet on your primer tells you which, and skipping the neutralize step is how you get corrosion blooms under a finish that looked perfect on day one.
Wear the gear. Gloves, eye protection and a respirator with organic vapor cartridges are not optional around strippers and marine solvents. If the boat is old enough that the previous coating might contain lead, do not sand it dry indoors without a rated respirator and containment, and check your local rules for disposal of the spent media and slurry.
4. Abrade and Etch the Surface
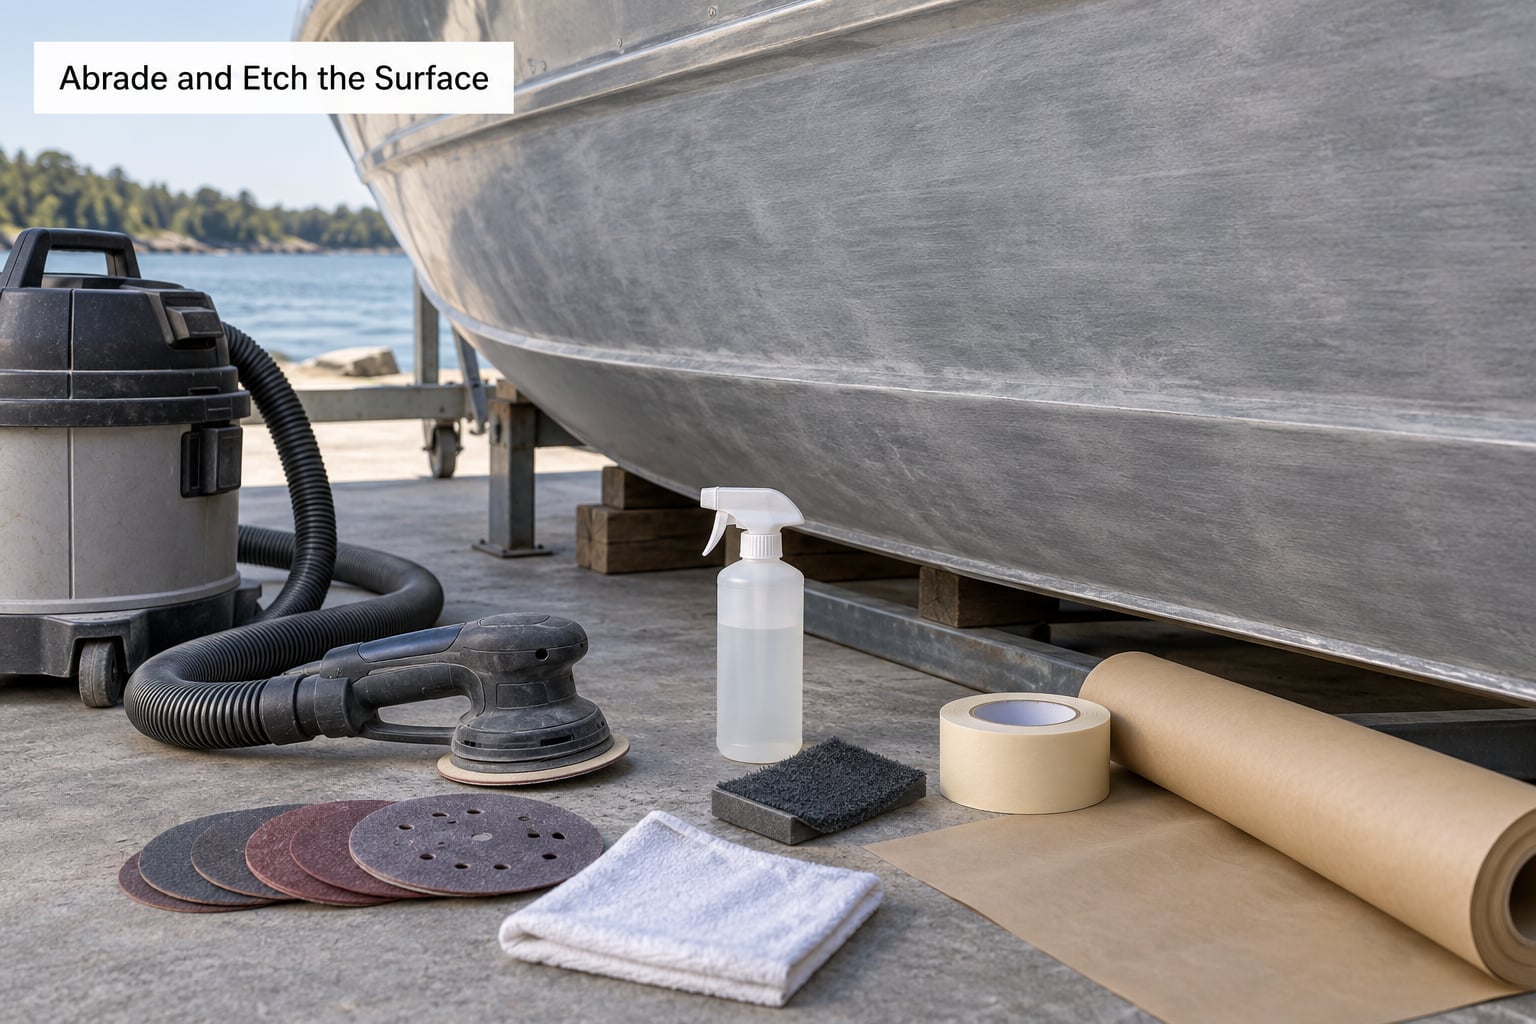
Abrade to a uniform matte gray, then stop. Start at 80 or 120 grit where there is old paint and heavy oxidation, and work up to 180 or 220 grit for the final pass so the whole hull has the same tooth. The goal is consistent scratch depth everywhere, not a smooth surface. Polishing aluminum to a mirror finish before painting is a well-known mistake, because a slick surface gives the coating almost nothing to hold onto.
If you blast instead, soda media leaves a slightly etched, matte surface that primers and topcoats love, and glass bead gives a finer, more uniform profile if you are set up for dust extraction. Whatever the method, wipe the dust off and inspect the hull under a work light before you move on. Shiny patches you missed will show up later as isolated peeling.
Etching comes next. A self-etching wash or conversion coating chemically prepares the bare oxide, and it must be rinsed and neutralized exactly as the label directs, then dried. The alternative, and often the easier one, is to skip the wash and let a self-etching primer do the etching and the priming in the same coat. Either way, finish with a tack cloth on a clean glove, gloves on, and get into primer before fingerprints and overspray find the metal.
5. Apply Primer in Thin, Even Coats
Mask first. Pull or tape off hardware, cover drain openings, protect any plastic, decals and brightwork, and drop cloths under the hull so you do not find your own drips later. Mix the primer thoroughly and thin it only as the label allows, usually a small dose of VOC reducer, because primer that is too thick bridges the microscopic scratches instead of flowing into them.
Apply thin. Brush or roll it out until it stops looking wet and even, because primer is meant to fill micro-scratches, not sit on the hull as a shell. Runs and sags come from too much material in one pass, and trapped solvent under a thick film can stay there for weeks. Work top-down so you roll through anything that drips, and keep a wet edge without re-walking a coat that has started to skin.
Honor the flash time and the overcoating window. Flash time is how long the solvent needs to evaporate; the overcoating window is how long you can wait before the next coat stops biting into the first. Outside that window, scuff lightly and move on per the label, or you will be back here next season with sheets of paint coming off. When the manufacturer requires a full cure before topcoating, respect that timing rather than your own schedule.
6. Apply the Marine Topcoat
Pick the chemistry to match the zone. Above the waterline, a marine topside enamel or polyurethane gives you gloss, color and UV resistance. Below it, use a copper-free antifouling or an epoxy primer-and-paint system. On the interior, a non-skid epoxy or a bed liner coating takes foot traffic and hooks better than a glossy topside. Gloss shows every scuff; flat camouflage colors hide them but need more care and often more coats.
Two or three thin coats beat one thick one every time, and your dry film thickness depends entirely on coat count. Give the seams, rivet lines and the chine an extra pass, since that is where film thickness starves and where failure usually starts. Roll in horizontal strokes, and if you are brushing, follow the same direction so lap marks blend instead of crossing.
Watch the weather the whole time. Most labels call for a surface temperature between about 50 and 85 degrees, the surface above the dew point, low humidity, and no direct sun on the panel you are painting. Wind is the other enemy: it pushes overspray into the boat you just finished, and it skins the panel too fast for the coating to level. If the label prohibits a condition, stop and wait, even if the paint feels like it would go on fine.
7. Cure, Reinstall Hardware, and Inspect the Finish
There are three different words people mix up here. Surface-dry means solvent has flashed off. Recoatable means the next coat can bite into it. Fully cured means the film has crosslinked and reached something close to its final hardness, and only that state handles immersion, hot trailers and physical abuse.
Reinstall hardware gently, over a drop cloth, and snug fittings without leaning on fresh paint. Spot every chip, holiday and thin edge under a bright light before the boat goes back in the water, because a small hole is a five-minute fix on a stand and a nightmare in a slip. If your system specifies a film thickness, check it where the maker says to check it, usually the seams and the transom.
Then put a maintenance inspection on the calendar, twice a year for a trailered boat and every time it comes out of the water for a moored one. Chips, blisters and rust stains are all easier to fix while they are the size of a fingernail.
Common Mistakes
Almost every failed aluminum paint job comes from one of these. The first three are responsible for most of the peeling I have seen.
- Painting over salt. Wash and rinse until the runoff is clear. Salt under a film keeps the metal wet forever.
- Painting over oil, wax or silicone. Degrease with a solvent on a clean rag after washing, and change rags often.
- Leaving loose oxide or chalky oxidation in place. Strip or blast it back to bright metal and etch it. Paint over chalk and it lifts in sheets.
- Using paint that was not formulated for aluminum. Fiberglass and general-purpose enamel will not hold on bare aluminum. People on boating forums trace most adhesion failures to exactly this substitution.
- Using copper-based antifouling on an aluminum hull. Long-standing advice on the Tin Boats forum is blunt: cuprous oxide paint on aluminum sets up a reaction that destroys the hull rather than protecting it. Use a copper-free system.
- Skipping primer in a two-coat system. If the paint on the can says it goes over a specific primer, it means it. One-coat self-etching topcoats are the exception, and only when used exactly as labeled.
- Over-abrading into a mirror. A polished hull has no tooth. Aim for a uniform matte gray, then etch.
- Building too much film in one coat. Runs, sags and trapped solvent all come from heavy coats, and thick films crack on an expanding and contracting hull.
- Neglecting seams and rivet lines. Give them an extra pass. Failure starts where film thickness is thinnest.
- Blasting too aggressively. Sand or a heavy blast can gouge thin skin and open rivet slots. Control pressure and media, and start on a hidden corner.
- Launching before the coating has cured. Immersion before full cure is how a good-looking job becomes a peeling one in a month. Follow the label.
For maintenance, wash with mild soap and fresh water, skip abrasive cleaners and wire brushes, and touch a chip immediately with primer and a topcoat matched to the original system. Trailered boats only need a light scuff and a fresh coat every year or two. Boats that live in the water need a closer look at the waterline every season, and some owners use a yearly non-stick hull spray as a cheap stopgap instead of a full paint job while they save up for the real one.
Frequently Asked Questions
Do I need to prime aluminum before painting?
Usually yes, and the exception is specific. A two-coat system such as epoxy primer with topside enamel or polyurethane requires its primer. A one-coat self-etching topcoat is a complete system on bare, properly prepared aluminum by itself. The part you never skip is the etch: whether it comes as a wash or inside the primer, bare aluminum has to be chemically prepared or the coating will peel. Check the technical data sheet for the system you bought, and use that system throughout.
Can I paint my aluminum boat while it is in the water?
No. The hull has to come out of the water, both for access to the underside and because you cannot clean, dry, abrade and coat a surface that is wet. Salt water wicking under a coating will lift it, and trapped moisture in seams and rivet heads will blister. On stands you can rotate the boat, light both sides with a work lamp, and get at the bottom with a roller on an extension. If you cannot get the boat out of the water, wait for a haul-out rather than painting around the problem.
How long does paint take to cure on an aluminum boat?
Read the label, because the numbers vary by product, but expect three different milestones. Surface-dry, where the panel stops feeling tacky, is not the same as recoatable, which is your window for the next coat. Full cure is a separate, longer clock, often several days to a couple of weeks depending on temperature, humidity and film thickness. Do not launch until the coating is cured, not just dry. Immersing a film that is still soft is the fastest route to a peeling finish in a month.
Do I have to sand between coats of paint?
Scuff, but it does not have to be aggressive. Between coats of topcoat, a light pass with fine abrasive or a tack cloth is usually enough to give the next coat something to grip, and plenty of self-etching topcoats do not want sanding at all inside the recoat window. Do not sand aggressively on a self-etching primer, and do not sand through a coat that is meant to be the chemical bond. The label is the deciding factor, and it is worth reading it before you start.
What should I do about old paint or corrosion before I repaint?
Remove everything that is loose, flaking or blistering, and go back to sound material: bare bright metal, or paint that is still firmly bonded. Sand or blast the perimeter of the good paint so the new coating has something to feather onto. For corrosion, remove the oxide with a nylon brush and water, deal with any rust staining from steel fasteners by sealing or isolating that steel, and follow the technical data sheet for neutralizing or conversion treatment. Coating over loose paint simply moves the failure date.
Can I use copper antifouling bottom paint on an aluminum boat?
No. Copper-based antifouling does not belong on an aluminum hull. The long-standing warning repeated across Tin Boats forum threads is that cuprous oxide on aluminum sets up a reaction which attacks the hull rather than protecting it, and the damage shows up as eaten and pitted metal after the paint comes off. Use a copper-free antifouling or an epoxy primer-and-paint system below the waterline. On a trailered boat that is never immersed, a well-prepped epoxy and topcoat system is usually the simpler choice.
If you only remember one thing from this guide, remember the etch. Everything else in the process is ordinary preparation, and you can redo ordinary preparation fairly easily.
Before the boat goes back in the water, it is worth knowing how she handles a rough wake. Our piece on what makes a boat self-righting covers the geometry behind that, and the same trim and load questions come up in our guide to doing a stability test on a model boat if you want to work through the numbers at small scale first.
So start there: put the boat on stands this weekend, wash it down, and rub a scuffed spot on the transom with a clean finger. If the metal underneath is bright and matte rather than chalky white, you know how much of the hull still needs work, and that tells you whether this is a weekend scuff-and-recoat or a full strip and blast. Everything after that is just following the label on the can.