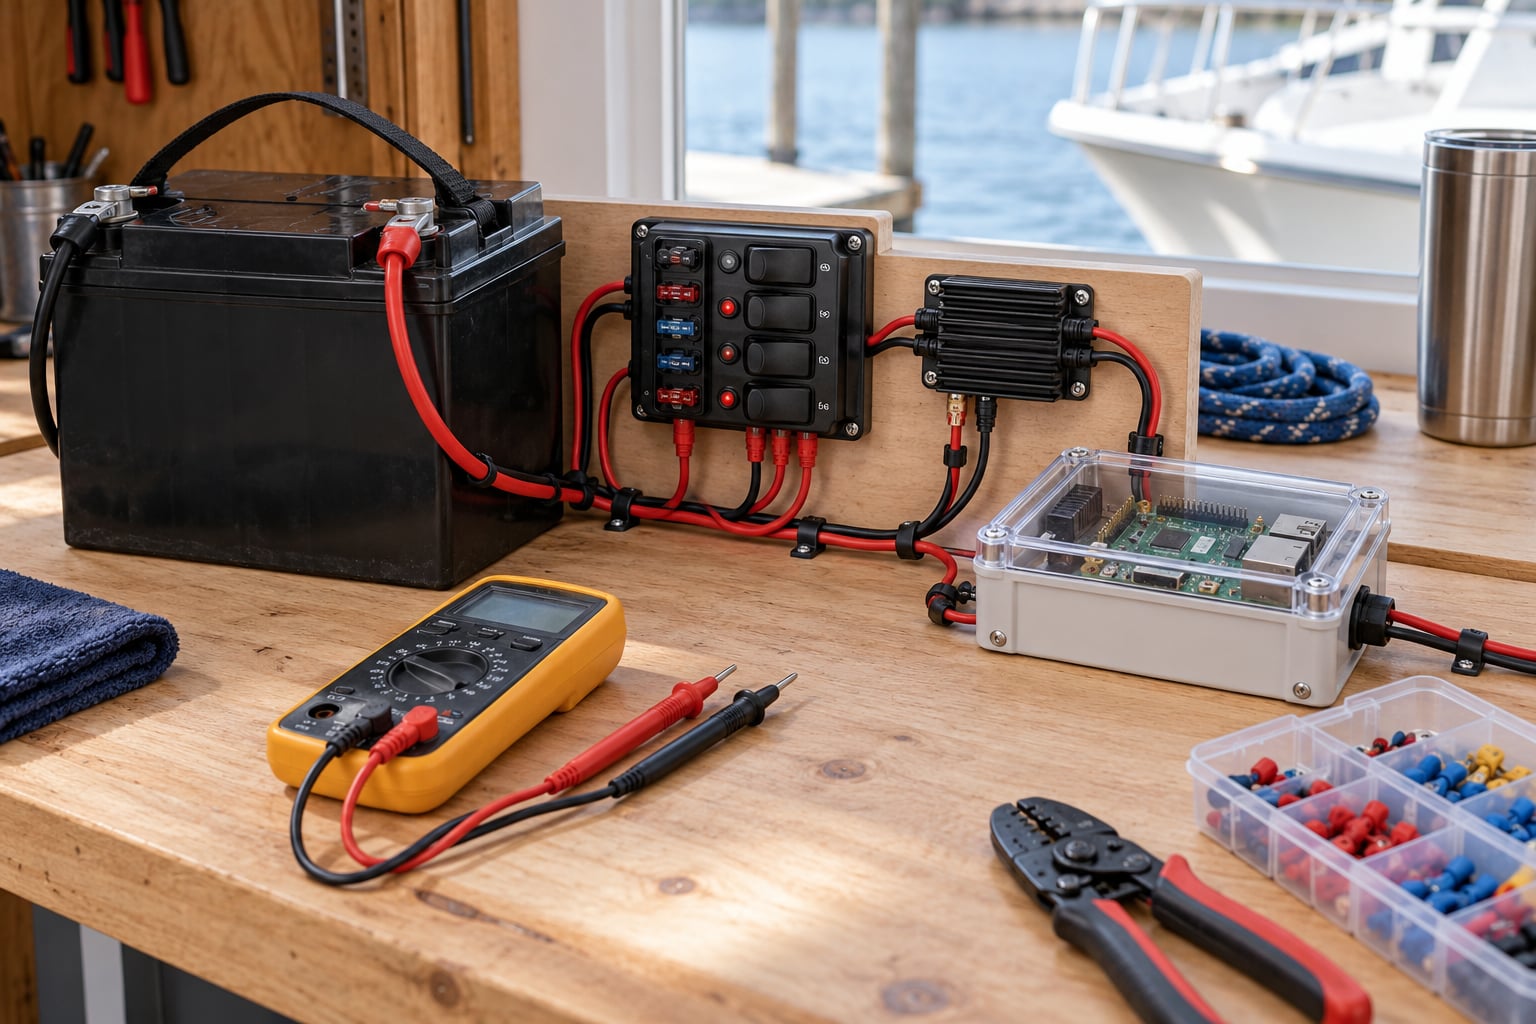
Yes, you can power a Raspberry Pi from a marine battery, but not by wiring the battery straight to the board. The safe chain runs from a 12V deep-cycle battery through a fuse, reverse-polarity protection, and a DC-DC buck converter that steps the voltage down to a steady 5V before it reaches the Pi’s USB-C power input. Never connect 12V directly to the Pi.
That direct answer matters because the failure is quiet and repeatable. On marine forums, one of the more common posts is a Pi Zero that ran happily on four AA cells and died the moment a 12V marine battery was attached. The board does not smoke or beep. It simply stops, and the damage is done.
The rest of this guide walks through the parts list, the voltage math, the protection hardware, the wiring sequence, and how to test the finished installation before it ever sees salt water.
Table of Contents
- What You Need to Power a Raspberry Pi from a Marine Battery
- How to Power a Raspberry Pi from a Marine Battery: Choose the Correct Voltage
- How to Power a Raspberry Pi from a Marine Battery: Install Protection and Controls
- How to Power a Raspberry Pi from a Marine Battery: Wire the System
- How to Power a Raspberry Pi from a Marine Battery: Test and Protect the Installation
- Common Mistakes
- Frequently Asked Questions
- Can I power a Raspberry Pi directly from a 12V marine battery?
- Is a 12-volt cigarette-lighter adapter safe for a Raspberry Pi on a boat?
- How much power does a Raspberry Pi need from a marine power system?
- Can I use a USB power bank to power a Raspberry Pi from a boat battery?
- How do I prevent low battery voltage from causing a Raspberry Pi to shut down?
- Do I need a UPS or supercapacitor for a Raspberry Pi on an ocean drone?
- Conclusion
What You Need to Power a Raspberry Pi from a Marine Battery
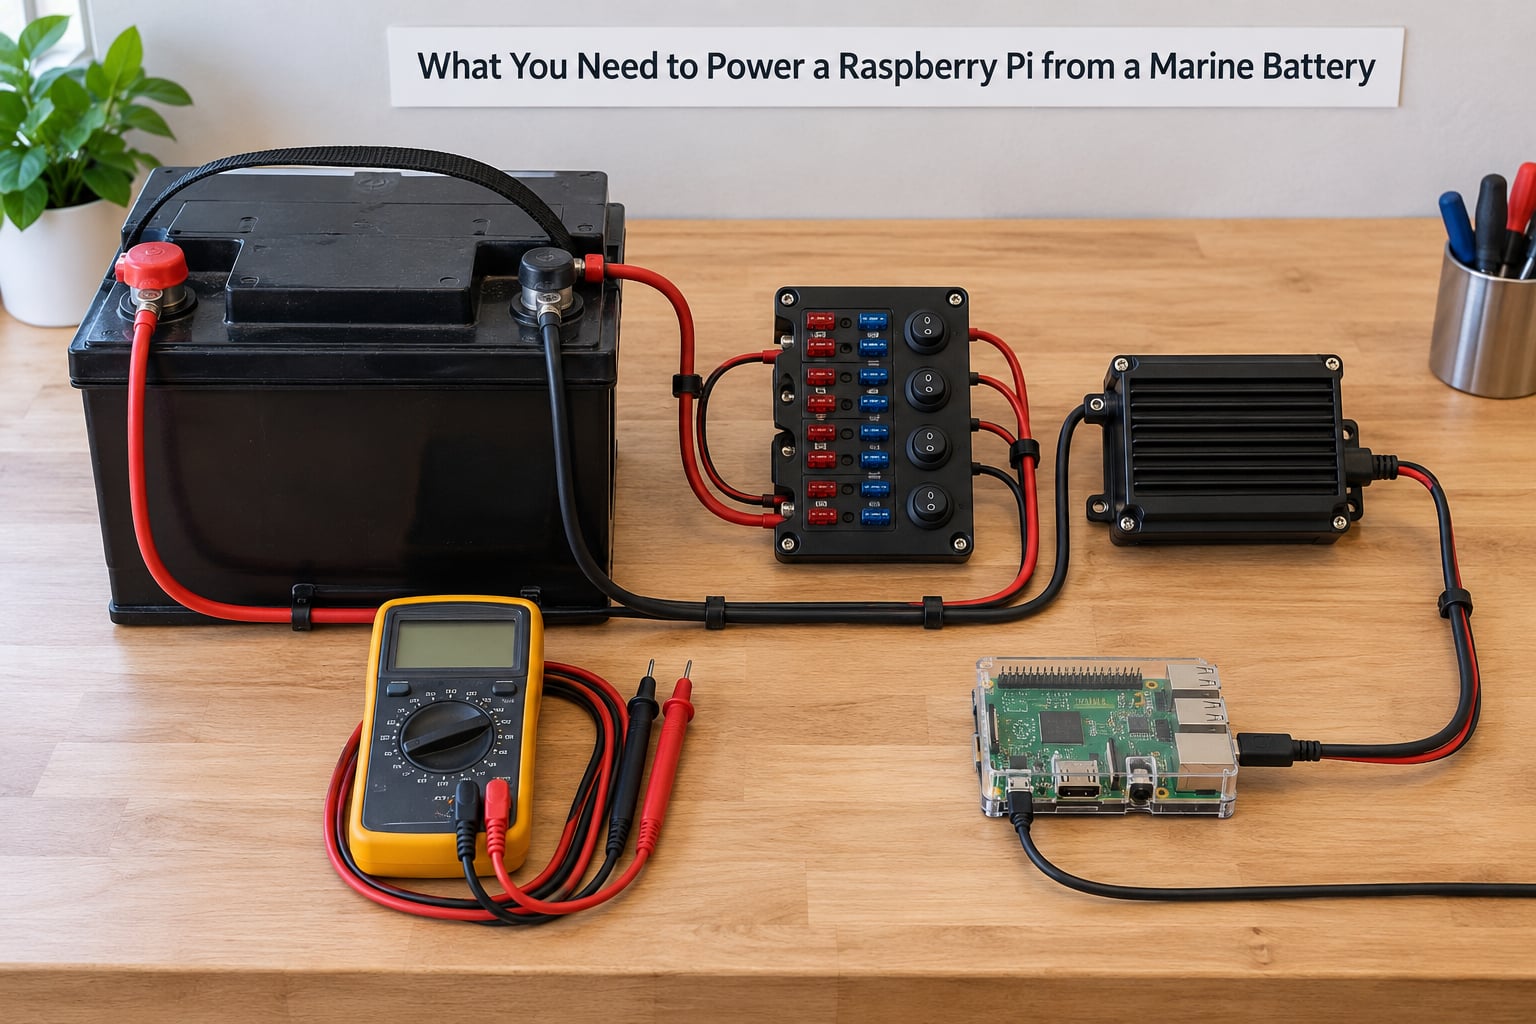
You need six things, and only one of them is complicated. A beginner can complete this build in an afternoon on a workbench.
- A 12V deep-cycle marine battery. Flooded lead-acid, gel, AGM, or LiFePO4 all work, but they behave differently under load and they size differently. If the boat runs a 24V system, your converter input range has to cover it.
- A DC-DC buck converter rated for continuous current well above what the Pi draws. For a Pi 4 or Pi 5, that means a converter rated 5V 5A or better, not the cheapest one you can find.
- An inline fuse holder and a fuse sized to the conductor, mounted within a few inches of the battery positive terminal.
- A main disconnect switch rated for DC voltage at the current you are pulling. An AC-rated light switch is not a substitute.
- An IP-rated enclosure with cable glands, plus marine-grade wire in a gauge matched to your run length.
- A multimeter, and a load test you can run before the boat goes in the water.
On the converter itself, check four numbers before you buy anything. Input range must cover your battery’s highest voltage, which can reach 14.7V for a 12V lead-acid system under charging and 15V or more on some boats with smart chargers. Output must be a regulated 5V. Continuous current rating should be at least double your expected peak draw, so a Pi 5 with USB peripherals attached gets a 10A-rated unit. Efficiency above 85% matters more than you would think on a finite amp-hour budget.
| Converter type | Typical efficiency | Heat at 5V 3A from 12V | Input range | Best for |
|---|---|---|---|---|
| Buck (step-down) | 85-92% | 1.5-2 W | 8-32V common | 12V and 24V boat systems |
| Linear regulator | 55-70% | 20 W or more | Fixed dropout | Bench use, not a sealed marine enclosure |
| Boost-buck | 85-90% | 2-3 W | 4-30V | Batteries that can fall below 10V or rise above 16V |
A linear regulator is the advice you will see most often in beginner answers, and it is the worst of the three here. Dropping 12.6V to 5V linearly throws away more than half your energy as heat, which in a sealed enclosure on a sunny cockpit means thermal shutdown.
How to Power a Raspberry Pi from a Marine Battery: Choose the Correct Voltage
A Raspberry Pi needs a regulated 5.1V at the USB-C power input. A 12V marine battery sits somewhere between 10.5V fully discharged and 14.7V fully charged, and that number swings while you are drawing current. Nothing about that range is acceptable at the Pi’s input.
Connecting 12V to the 5V rail destroys the board almost instantly. On a Pi 4 or Pi 5, 12V goes into the USB-C input and the on-board protocol chip and regulator cannot survive it. On a Pi Zero, people often bridge the 5V pin on the GPIO header, which does the same thing with less ceremony. A buck converter is not an optional accessory here. It is the part of the system that makes any of it work.
Match the current to the model. A Pi Zero 2 W is a 5V 1.5A part with a far lower average draw, and a Pi 4 wants 5V 3A. The Pi 5 ships with a 5V 5A supply and will pull close to that with USB devices attached, and undersizing the converter is how you get random reboots and throttled clocks that look like software faults.
One detail that catches people: the Pi 5 negotiates its input current over USB-PD. Feed it a dumb 5V supply and it still works, but it assumes a lower current budget, so budget the converter for the full 5A regardless.
How to Power a Raspberry Pi from a Marine Battery: Install Protection and Controls
Protection is what turns a working circuit into one that survives a season on the water. There are four items and an order matters.
The fuse goes first, within a few inches of the battery positive post. Everything downstream of that point is protected by it, and a shorted wire anywhere else becomes a hull fire. A Pi 4 or Pi 5 installation on 16 AWG wire typically lands around a 5A fuse; a Pi Zero 2 W on smaller wire can use 3A. Never oversize a fuse to survive a surge. It is sized to protect the wire, not the device.
The main disconnect comes next, mounted where you can reach it before you touch anything else. This is the switch that makes a wet-weather service call safe.
Reverse-polarity protection sits between the fuse and the converter input. A series Schottky diode is the cheap version and costs about 0.5V of drop; a P-channel MOSFET ideal-diode module is the better one because the drop stays low even at higher current. Battery terminals get reversed more often than anyone expects, especially in the dark.
Transient suppression handles the alternator. When a charging system is switched off while the engine runs, the result is a load dump that can spike well past normal charging voltage. A TVS diode rated above your maximum charging voltage and clamped below the converter’s absolute maximum gives that spike somewhere harmless to go. For a 12V system, a part around 24V clamping is a reasonable starting point; check the numbers against your converter’s datasheet before you fit it.
Finally, bond the converter negative to the boat’s ground system at a single point, and take the Pi’s ground from the converter, not from a separate chassis connection. Two paths back to the source create a ground loop, and a ground loop on a boat carrying a VHF radio is a noise problem you will hear before you see it.
How to Power a Raspberry Pi from a Marine Battery: Wire the System
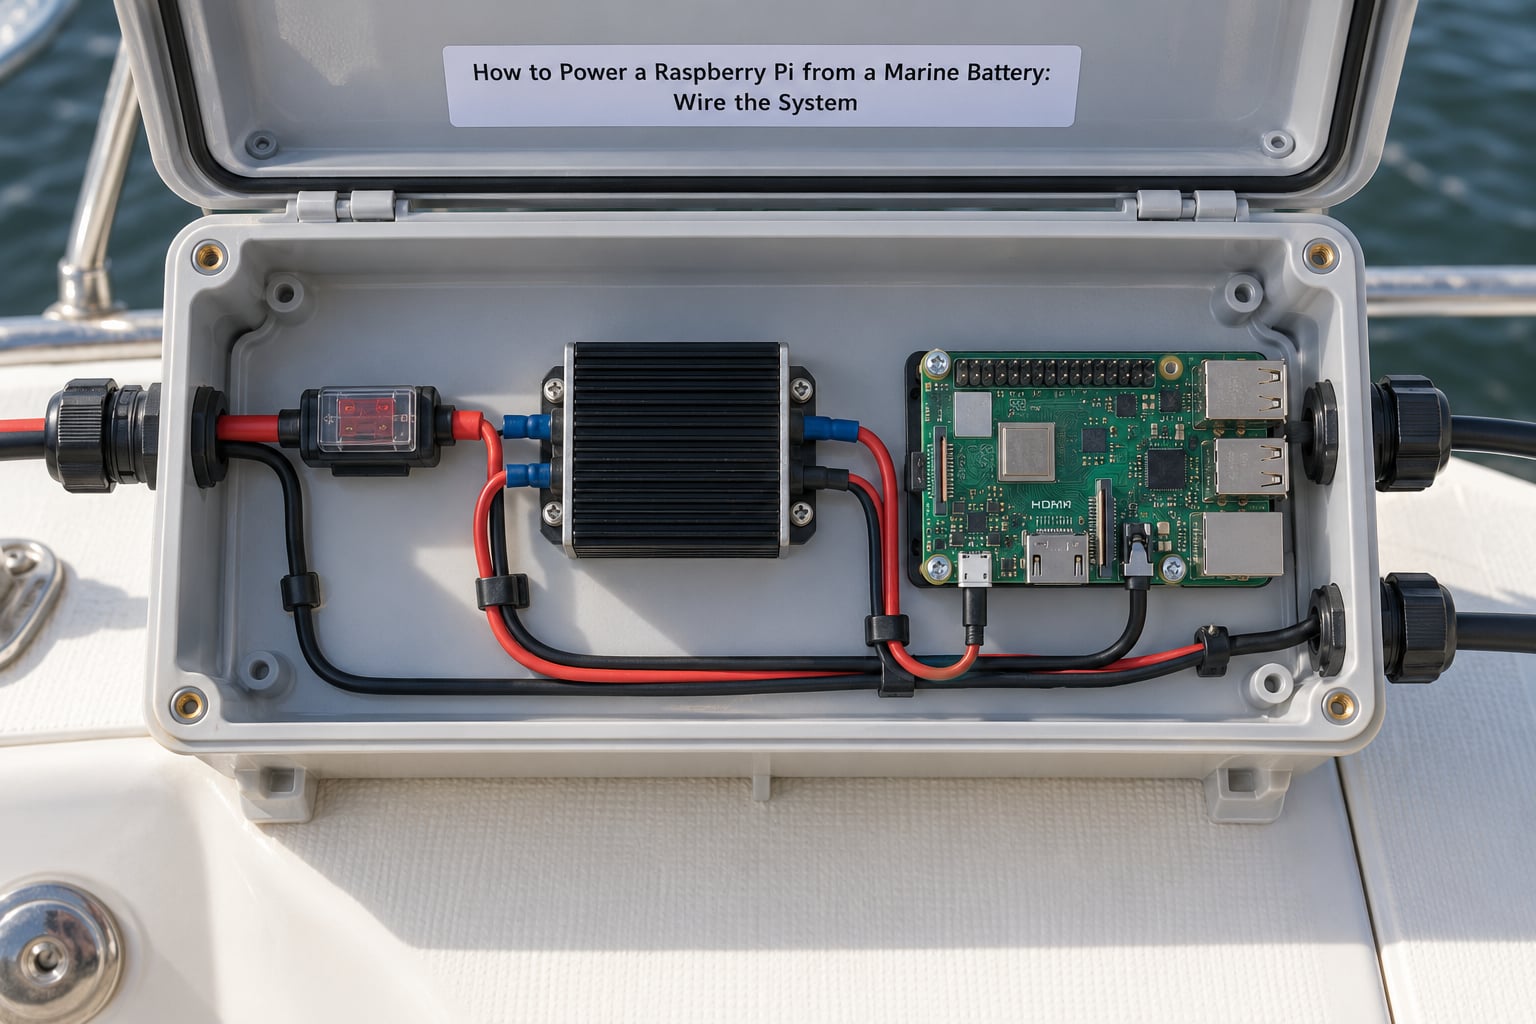
Build it on a bench first, then install it. The order below is the one that keeps a mistake from becoming a dead board.
- Identify your battery. Measure open-circuit voltage with a multimeter and confirm the chemistry and nominal voltage. A 12V bank reads 12.4-12.8V at rest.
- Fit the fuse holder at the battery positive terminal, crimped, heat-shrinked, and mechanically secured so the wire cannot tug on the terminal.
- Run the fused feed to the disconnect and onward to the reverse-polarity module, using a continuous run of one gauge. You can splice to step down in size only after the last high-current branch, never before it.
- Connect the converter input to the protected positive and to the battery negative. At this point the converter is powered but its 5V output is not yet connected to anything.
- Set the converter output to 5V with no load attached, and measure it with a multimeter before going any further. A cheap converter shipping from 4.6V is a real and common problem.
- Add the TVS diode across the converter input, oriented for clamping, with a short, heavy lead.
- Run the 5V output to the Pi’s USB-C power input using a short, reasonably heavy cable. Keep this run physically separate from any motor, thruster, or solenoid wiring, and cross it at right angles if paths must cross.
- Optionally add monitoring. An ADS1115 ADC on the I2C bus reading a resistor divider across the battery gives you live state-of-charge data, which is what a low-voltage shutdown depends on. The divider must be scaled so battery voltage stays under the ADC reference.
Use crimped, tinned terminals rather than twist-and-tape. Salt air attacks bare copper fast, and a crimp that has been properly made and strain-relieved survives spray that eats a loose connection in a season. Cable glands, not drilled holes, keep water out of the enclosure.
How to Power a Raspberry Pi from a Marine Battery: Test and Protect the Installation
Testing is where you catch the problems that would otherwise show up as a corrupted SD card on a three-day passage.
First, measure voltage at the Pi’s USB-C input with nothing running. It should read 5.0-5.2V. Then measure again with a deliberate load on the Pi: boot it, start the storage, and read voltage while it is busy. A healthy buck converter holds within a few hundred millivolts of 5V under load; a sagging reading means the converter is undersized or the battery is too far discharged.
Next, find your brownout threshold deliberately. Run the battery down with the Pi attached and note the exact voltage at which the board resets. That number, plus a margin, is the cutoff you program into your monitor. Typical lead-acid systems want to be cut off around 11.8-12.0V under load rather than at the 10.5V open-circuit figure, because lead-acid voltage sags hard under current.
Ripple is worth checking with a scope if you have one, and worth assuming to be acceptable if you do not. A converter with an output LC filter keeps switching ripple in the tens of millivolts, which every Pi tolerates comfortably.
For the filesystem, treat every power loss as a potential corruption event. Mount the root filesystem read-only, log to USB storage or an SSD rather than the SD card, and use a high-endurance card if an SD card is unavoidable. On the software side, a systemd service watching a GPIO or the ADC can issue a clean shutdown well before the hardware brownout.
Commission wet-weather operation in stages. Run it dry for a day, then add a deliberate salt-spray rinse, then check the terminals and the enclosure gasket again after a week in the cockpit. Photograph the finished installation and record every fuse rating, wire gauge, and set voltage. When something fails at 2am on a passage, that sheet is worth more than memory.
Common Mistakes
These are the errors that show up repeatedly, and most of them are cheap to prevent.
- Wiring 12V straight to the Pi or to a 5V GPIO pin. Fix: a rated DC-DC buck converter between the battery and the board, always.
- Using an AC-rated switch or an unfused lead. Fix: a DC-rated disconnect and a fuse sized to the wire within inches of the battery post.
- Omitting a main disconnect. Fix: install one where it is reachable before anything else, and label it.
- Skipping reverse-polarity protection. Fix: a series diode or an ideal-diode MOSFET module on the converter input.
- Choosing a linear regulator for a 12V to 5V drop. Fix: a switching buck converter rated at roughly twice your peak current.
- Undersizing the converter for a Pi 5. Fix: 5V 5A or higher, and re-test under load after adding every USB device.
- Leaving ripple and transients unhandled. Fix: filter the converter output and fit a TVS diode sized above your maximum charging voltage.
- Reversed battery cables. Fix: reverse-polarity protection plus a deliberate polarity check with a multimeter before the first power-up.
- Treating signal ground and chassis ground as the same wire. Fix: single-point bonding, with the converter negative as the Pi’s ground reference.
- Using twist-and-tape joints and non-rated enclosure holes. Fix: crimped and strain-relieved terminals, cable glands, and an enclosure rated for the location.
Two more worth naming. Skip a fuse because “the Pi draws so little” and you have removed the only thing standing between a short and a lithium thermal event. And do not confuse an amp-hour rating with available energy: a 100Ah lead-acid bank realistically delivers around half its rated capacity under a continuous moderate draw, and less as the current climbs, which is the Peukert effect.
Frequently Asked Questions
Can I power a Raspberry Pi directly from a 12V marine battery?
No. A 12V marine battery varies from about 10.5V to 14.7V depending on charge, and the Pi’s USB-C input expects a regulated 5.1V. Connecting 12V directly destroys the board, usually within seconds, and on a Pi Zero people sometimes bridge the 5V GPIO pin and get the same result. Always put a DC-DC buck converter between the battery and the Pi, and verify the converter output reads 5.0-5.2V on a multimeter before connecting the computer.
Is a 12-volt cigarette-lighter adapter safe for a Raspberry Pi on a boat?
It will often work and it is not a good idea as a permanent install. A cigarette-lighter adapter is a car accessory, not marine-rated, and cheap units often drop voltage as the engine charges, add noise, and offer no reverse-polarity or surge protection. A boat also sees alternator load dumps that a consumer adapter was never tested for. For a fixed navigation server, use a marine-rated DC-DC buck converter with proper fusing and transient protection.
How much power does a Raspberry Pi need from a marine power system?
Budget 5V 1.5A for a Pi Zero 2 W, 5V 3A for a Pi 4, and 5V 5A for a Pi 5 with USB peripherals attached. Size the converter to roughly double your expected peak draw so it stays cool and does not throttle the board. From a 12V source, a Pi 5 at full load pulls around 12W, which is about 1A at the battery before converter losses.
Can I use a USB power bank to power a Raspberry Pi from a boat battery?
Technically yes, and most builders regret it. The power bank has to be charged from the boat first, which wastes energy and adds another conversion stage, and the internal battery is often a poor choice for a vibration-heavy, warm environment. It also removes your ability to monitor battery state of charge directly. A marine-rated DC-DC converter with an ADS1115 on the battery line gives you both clean 5V and real battery data.
How do I prevent low battery voltage from causing a Raspberry Pi to shut down?
Find the real brownout threshold by running the battery down under load and noting the voltage where the board resets, then set your cutoff above that with a margin, typically 11.8-12.0V under load for lead-acid. Add a supercapacitor or a large output capacitor for hold-up, use a hardware watchdog, and have a service read battery voltage through an ADS1115 and trigger a clean shutdown. A read-only root filesystem and logging to USB storage prevent corruption when a cutoff is missed.
Do I need a UPS or supercapacitor for a Raspberry Pi on an ocean drone?
For a buoy or an unattended ocean platform, yes, hold-up is worth building in. Sudden voltage sags and brief dropouts are normal at sea, and every abrupt removal risks a corrupted SD card. A supercapacitor module sized to hold the rail up for 30-60 seconds gives the Pi time to shut down cleanly. Pair it with a hardware watchdog, a read-only root filesystem, and a startup service that launches your logging without a keyboard attached.
Conclusion
Start by measuring, not guessing. Identify your battery’s nominal voltage and its resting and charging range, confirm the current your Pi model needs, and select a DC-DC buck converter whose input range covers that battery and whose output is a clean 5.1V.
Then protect the chain: a fuse at the battery, a main disconnect, reverse-polarity protection, a TVS diode for alternator spikes, and single-point grounding. Load-test the finished installation on the bench, document every value, and only then expose it to salt air.
Follow the instructions that came with your Raspberry Pi, your battery, your converter, and your boat. This guide covers the power chain; your boat’s own wiring standards cover the rest.