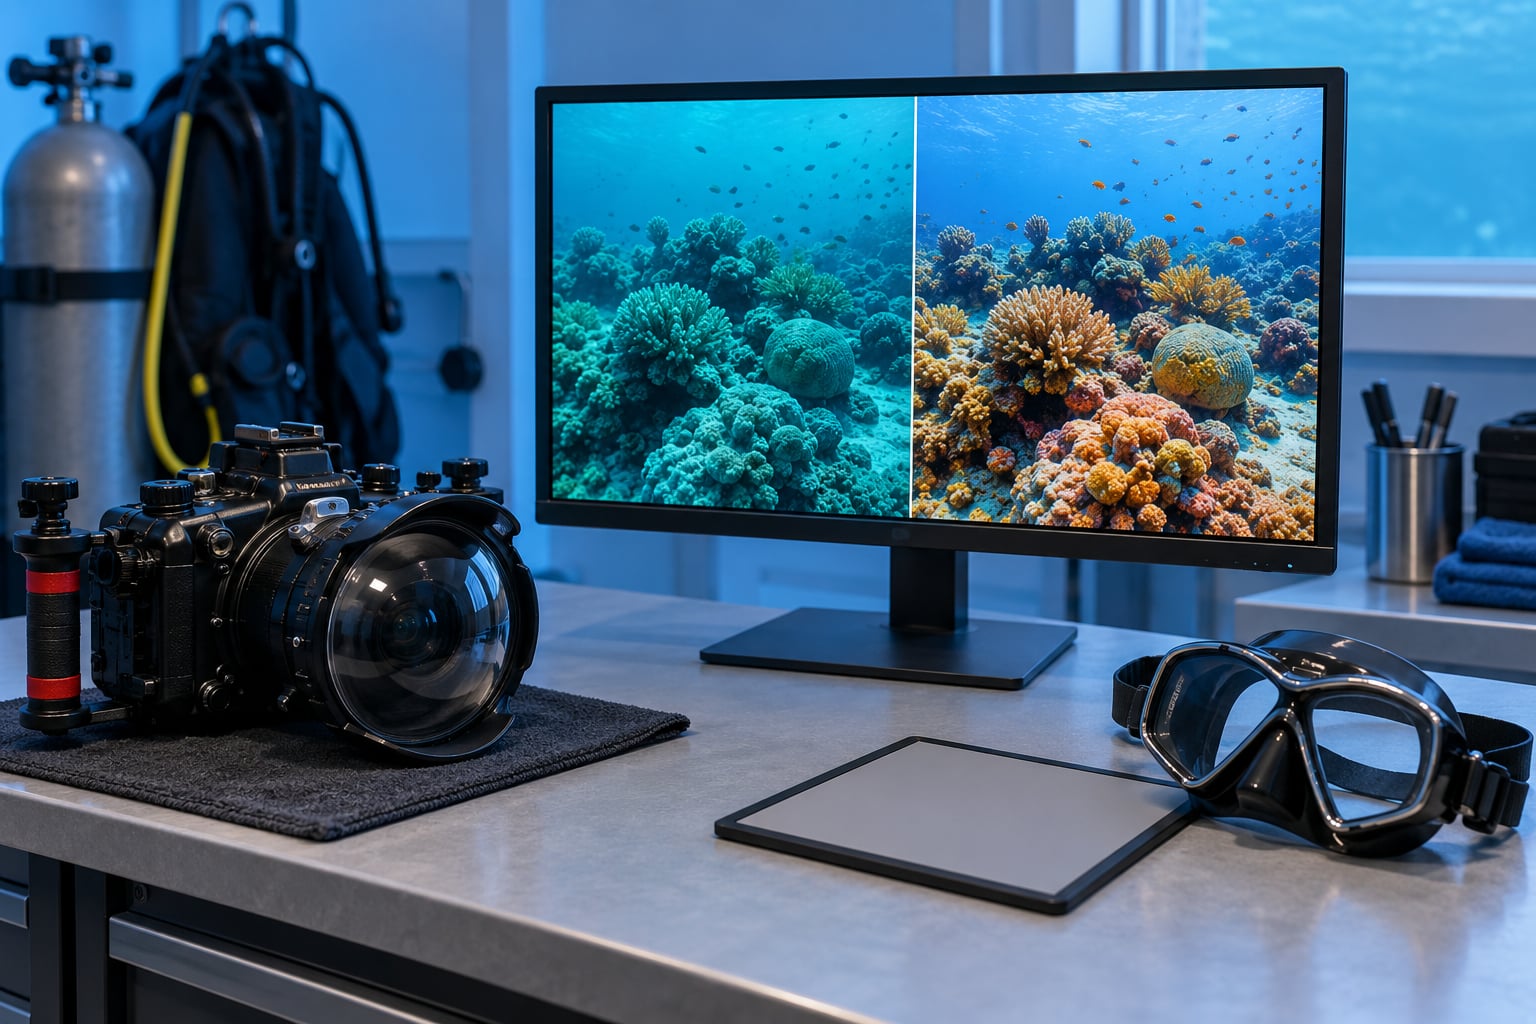
Water absorbs red, orange and yellow wavelengths long before blue, so every underwater frame comes out of the camera with its warm colours already stripped away. To color correct underwater photos you rebuild that warmth in post: raise colour temperature until the image looks too warm, push tint toward magenta, then use curves or levels on the individual channels to pull out whatever cast remains. It works in Lightroom, Photoshop, GIMP, Snapsea, Dive+ or the free Photos app on your phone.
The order matters more than the tools. Correct the white balance before you touch contrast, because every later adjustment reads against the colour underneath it. Most of the process is fifteen minutes of slider work once you know which way to push.
Table of Contents
- What You Need
- How to Color Correct Underwater Photos Step by Step
- Common Mistakes
- Frequently Asked Questions
- Can I color correct underwater photos taken as JPEGs?
- Should I use Lightroom or Photoshop for underwater color correction?
- Why do my underwater photos still look blue after editing?
- How do I correct color in underwater video instead of photos?
- What is the best way to recover detail in a dark underwater image?
- Do underwater photos need a custom camera or monitor color profile?
- Conclusion
What You Need
Four things genuinely change the outcome: a RAW file if your camera shoots one, a decent display, software with temperature, tint and curves controls, and a reference for what the colour should look like.
Shoot RAW whenever the camera allows it
A JPEG is a finished decision your camera already made. RAW keeps the actual data from each channel, which is the only reason a red wetsuit can be warm again at 20 metres. If you are stuck with phone JPEGs, you can still rescue a green or blue frame, but you will be working with much less headroom and the reds will never come back fully.
Work on a calibrated display in a neutral room
Judging a colour cast on a dim screen in a bright room is the most common reason people over-correct. Turn the brightness down so the display matches the room, and if you have a second screen, check the image on both. Cheap laptop panels lie to you about blues.
Any editor with temperature, tint and curves
You do not need the expensive one. Here is what each tier actually gives you for this job.
| Tool | Cost | Best for |
|---|---|---|
| Adobe Lightroom | Paid subscription, free mobile app | The full workflow: white balance, curves, masks, batch editing a whole dive trip |
| Adobe Photoshop | Paid subscription | Spot healing for backscatter and diver, precise channel mixer work |
| GIMP | Free, open source | Levels and channel mixer corrections on a desktop, no licence needed |
| Snapsea and Dive+ | Free tier, paid upgrades | One-tap colour recovery on a phone, useful as a starting point you then refine |
| AquaColorFix | Paid app | Phone correction for both photos and video clips |
| DaVinci Resolve and Shotcut | DaVinci free, Shotcut free | Underwater video from a GoPro or similar camera |
| iPhone and Android Photos apps | Free | Quick corrections on a single shot with no watermark |
Keep a reference for the colour you want
Pick two or three shots from the same dive that you know should be neutral, and compare against them at the end. Better still, put a grey card or a white diver tank in one frame at the start of the dive so you have a true neutral to sample with the eyedropper.
How to Color Correct Underwater Photos Step by Step
Six steps, in this order. Exposure first, then colour, then structure, then the details that need local work, then a final look, then export.
Correcting the Underwater Color Cast
Start by identifying the cast. In warm tropical salt water the frame goes cyan or deep blue. In temperate or fresh water, especially around algae or in low visibility, it swings green. A shot taken with a strobe at three metres may barely need anything at all, while the same camera on natural light at the same depth needs a heavy push.
Open the white balance panel and work in this order:
- Drag the temperature slider toward the warm end. It will look wrong, almost sepia, before it starts looking right. Keep going until the blue cast is clearly gone, then pull back a little.
- Push tint toward magenta. Green-cast frames need more of this than blue ones. Watch skin and any neutral surface, because overdoing it is what makes wetsuits and faces look pink and artificial.
- Drop vibrance slightly if saturated reds and yellows start clipping into flat orange patches.
- Sample a true neutral with the white balance eyedropper when you have a grey card or a white tank in frame.
The last 10 percent of the cast lives in the curves. U-shape the blue and green curves slightly to reclaim the cool tones, lift the red curve just enough to warm the midtones, and put a gentle S-curve on the master RGB channel. Levels does the same job more gently: pull the blue and green channel black points up a touch, then use the red channel sliders to bring warmth back.
How do you know it worked? Turn the saturation down to near zero for a second. Anything that should be neutral should sit close to grey.
Restoring Contrast, Detail, and Visibility
Water scattering flattens everything. Backscatter veils the frame with a milky haze, and the apparent contrast falls with it. Deal with the black and white points first, because a veiled image is mostly a tonal range problem before it is a colour problem.
In the levels panel, raise the black point until shadows sit just off pure black, and lower the white point until highlights nearly touch pure white but do not clip. Then add a mild S-curve to the master channel. If the frame still looks dull, a small amount of dehaze in the clarity or texture panel pulls the haze out; go slowly, because dehaze exaggerates every speck of backscatter as soon as it touches a noisy area.
Sharpening comes last, after noise reduction, and only at 100 percent magnification. Do it in small passes and watch the edges of fins, hands and reef texture for halos. Reduce noise before you add clarity or dehaze, or you will amplify the grain that high ISO always brings at depth.
The test is simple. Zoom to 100 percent, check a shadow area for mush, check a bright area for blown detail, and look at the histogram. A healthy corrected frame uses the width of the histogram without spiking hard against either end.
Balancing Color for People, Reefs, and Equipment
The white balance fix is global, so it can flatten the parts of the scene that were already close to correct. That is where local adjustments earn their keep.
For divers in a wetsuit, mask a face or a hand and lower temperature slightly, because the global push usually overshoots on skin. Soften any magenta overshoot on bare skin with a small saturation reduction in the same mask. Where a strobe has already put light back into a fish or a reef wall, drop the local temperature instead of re-warming it.
For marine life, check that species colours are separated rather than just stronger. Coral that has gone flat grey after dehaze needs vibrance, not saturation. Wide-angle reef scenes usually need less warmth than close macro work, because the wide lens is shooting through more water to reach the subject.
For wrecks, boat hulls and any painted equipment surface, the danger is oversaturation turning a faded hull into a cartoon orange. Work with vibrance and add saturation only in small amounts to specific masked areas.
Fixing Common White Balance Problems
Some frames refuse a simple global correction. Here are the four that come up constantly.
Mixed lighting. A strobe lighting the subject against blue ambient water leaves you with two different white balances in one frame. The fix is a selective white balance: sample the strobe-lit subject for one correction, then mask the background and apply a stronger correction there.
Strobe shots that look flat. When the strobe already returned the colour, the background is doing most of the work. Apply the strong correction to the background only and leave the subject close to neutral.
No neutral reference at all. Use the clearest white in the frame, such as a bubble stream or a dive light housing, as an eyedropper sample. If there is nothing neutral, take the average of a skin area and pull back from it; that keeps you conservative.
Which filter to use. The in-water filter question has a straightforward answer. A red filter suits warm tropical salt water, where the loss is mostly red. In cold or green water a magenta filter gives a more even balance across the channels and keeps reds from being over-corrected. The same logic applies in post: salt water calls for a heavier red push, green water calls for more magenta tint and less overall warmth. Fixing a green frame by only pushing temperature is the mistake that turns it orange.
Making a Final Natural-Looking Check
Toggle the before and after at 100 percent. Not side by side, which flatters both; toggle, then look. The corrected version should look natural, not dramatic. Underwater photographs are allowed to be blue, and a frame with a genuinely blue background and a warm subject is correct, not wrong.
Check for the failure signs: halos around high-contrast edges, shadows dragged to solid black, highlights clipped to pure white, skin that has gone orange or magenta, and greens pushed to a lurid yellow. Any of those means back off one slider rather than fixing it with another adjustment. If a colour has clipped to a single flat value, only the red channel curve or a saturation drop will bring the variation back.
Look at the frame on a second screen if you have one, and check the histogram for spikes. Then walk away for ten minutes and come back to it with fresh eyes. Diver and reef tones usually survive that test; a posterised edit never does.
Exporting the Corrected Underwater Photo
Export for where the file is going, not for the software you happen to use.
- Web and social: sRGB, JPEG, full size or a long edge around 2048 pixels. Colour management handles the rest.
- Print: embed the sRGB profile for most lab prints, or convert to a wide gamut profile such as Adobe RGB if your lab asks for one. Greens and blues in a print shop’s workflow can shift noticeably otherwise.
- Archive: keep one layered working file with your RAW next to it, so the whole correction is reversible.
- Video: export the same way, and grade at the shallowest part of the clip first. A grade tuned at depth will look wildly oversaturated as the diver ascends, because you are correcting colour that the camera recovered by different amounts at different depths.
Do the final sharpen on export rather than earlier in the workflow, and keep the sharpening radius modest so fine reef texture does not turn crunchy.
Common Mistakes
These eight come up in almost every dive photography forum thread, and each has a simple fix.
- Correcting colour before exposure. Fix the black and white points first, because you cannot judge a cast in an image with no tonal range.
- Stopping temperature too early. It has to look too warm before it looks right. Push past the comfortable point, then pull back a little.
- Going magenta on skin. Cool the local temperature and drop saturation slightly in the face mask instead of backing off the global correction.
- Fixing a green frame with warmth only. Green needs tint toward magenta. Warming it further produces an orange image, not a neutral one.
- Over-dehazing. Every speck of backscatter becomes an obvious bright dot. Reduce the amount and use a masked correction on the water behind the subject instead.
- Sharpening before noise reduction. The order is noise reduction, then clarity and dehaze, then sharpening, all at 100 percent.
- Trusting automated underwater apps. They are a useful first pass, but divers on r/scuba complain constantly about watermarks and forced paid exports, and the one-tap result still needs a manual pass on skin and reds. Check the export terms before you process a whole dive trip in an app.
- Applying one preset to the whole trip. A preset built at 25 metres with clear water will be wrong at 8 metres in green water. Presets are starting points, not answers, and users running whole trips in batches usually end up splitting them by depth and visibility.
One tip that settles most arguments: aim for neutral rather than vivid. A frame that looks slightly too plain on screen usually prints or displays well. A frame that looked great at full brightness is usually the one you will regret.
Frequently Asked Questions
Can I color correct underwater photos taken as JPEGs?
Yes, but you have less room to work. A JPEG has already been rendered with a white balance decision baked in, and channels are compressed, so heavy warming and dehaze will bring out blotchy noise and clipped reds. Work gently: small temperature and tint moves, curves before sliders, and noise reduction before sharpening. Shoot RAW whenever the camera allows it.
Should I use Lightroom or Photoshop for underwater color correction?
Lightroom for most underwater frames. Its temperature, tint, curves, masking and batch editing cover the whole correction in one place, and sync settings between the desktop and phone versions. Photoshop earns its place when the frame has heavy backscatter that needs spot healing, or when you are rebuilding colour with the channel mixer. Most people finish in Lightroom and only move to Photoshop for cleanup.
Why do my underwater photos still look blue after editing?
Usually one of four reasons. The temperature was not pushed far enough, the tint is still leaning green, the cast was only half removed and needs a curve adjustment on the blue and green channels, or you corrected the frame after adding contrast and dehaze, which pushed the blue back in. Also check you are looking at the updated version rather than a stale export.
How do I correct color in underwater video instead of photos?
The logic is the same but the toolset differs. Use DaVinci Resolve or Shotcut for desktop footage, and the mobile equivalents for clips shot on a GoPro. Correct the flat portion first, then grade at the shallowest depth in the clip, because a correction strong enough for the deepest frames will look oversaturated once the diver ascends. Sharpening and noise reduction still come last.
What is the best way to recover detail in a dark underwater image?
Work on the tonal range before the colour. Raise the black point in levels until shadows have depth, add a gentle S-curve to the master channel, and use a small amount of dehaze or texture to counter the haze. Reduce noise before sharpening, and check the result at 100 percent rather than fit to screen. Shadow detail lost at high ISO cannot be recovered, only smoothed over.
Do underwater photos need a custom camera or monitor color profile?
No. Underwater light has a different spectrum, but every serious editor treats the file as a standard sRGB or Adobe RGB image and corrects the colour from there. A monitor calibrator still matters, because a warm cast on an uncalibrated screen makes you under-correct, which is why so many frames come out magenta. Custom in-water profiles exist but are rare and rarely change the final result.
Conclusion
Start here: open the RAW file, set the black and white points, then drag temperature well past comfortable until the cast lifts and pull tint toward magenta. That single correction step solves most of what makes underwater frames look wrong. After that, add a gentle S-curve, bring back warmth and cool tones with the channel curves, and use local adjustments on skin and reef. End with the noise reduction, sharpening and export order, and check the result against a frame you know is neutral.
The one thing worth accepting early is that some reds are simply gone at depth. Correct the frame as far as it honestly goes and stop there, because a natural-looking underwater photograph beats a garish one every time.